
This is by far the most time-consuming project I’ve ever undertaken but definitely the most exciting and rewarding!
I’ve never made a wedding dress before. I’ve altered many over the years for clients but I’ve never taken on the making of one. I knew this would take some careful planning and preparation to make sure I had the right style of dress, the right pattern and the right fabric. I must admit, I did spend rather a long time thinking about making it, rather than actually getting on with it but in the end I made a plan:
- Research styles of dresses
- Go to a bridal shop and try on a few dresses
- Choose a style
- Research fabrics
- Purchase dress fabrics
- Choose / draft a pattern
- Make a toile
- Create the dress
My fiancé proposed on Christmas Eve 2015 and we decided to get married in October 2016. This would give me around 9 months to make my dress. I also decided I wanted to make the bridesmaid dresses, 3 of them and I had ideas for a second wedding dress which I’d like for the evening. So five dresses to make in 9 months, alongside working my full time job. Oh, and I forgot to mention I was planning on knitting and crocheting all the flowers. This was going to be a challenge!
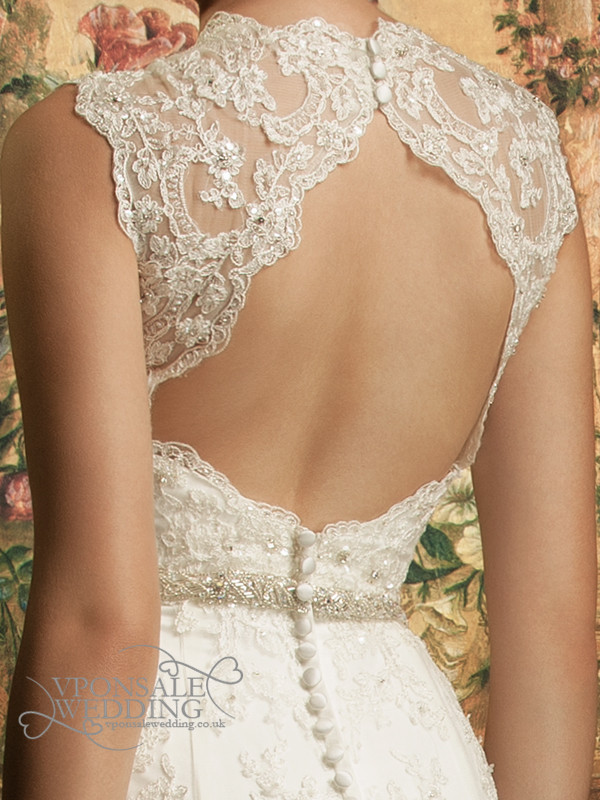
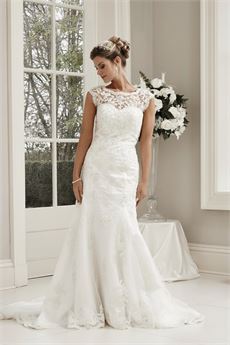
Step 1 – I began with the research – I looked online and visited a few wedding fairs. I thought I wanted a lace overlay and liked lace detail around the shoulders and back of a number of dresses. I loved dresses with open backs and lace detail and thought I’d like something like this:
Step 2 – I made an appointment with a local wedding shop and went to try on a few dresses. I took a good friend with me for a second opinion and pre-selected the dresses from their website that I wanted to try on. I’m so glad I went to try on a few dresses because the style I thought I wanted for my wedding dress really didn’t suit me. The lace around my shoulders and neck was really fussy and frumpy and looked terrible – it just wasn’t me.
The experience of trying on ‘sample sized’ dresses was also a bit embarrassing. They seemed to come in sizes from 8 to 12, sizes which, unfortunately, I am not. Some of the dresses were a ‘trumpet’ or ‘mermaid’ shape which were so figure hugging I couldn’t get them over my hips. I tried to step into them which didn’t work and putting them over my head was no better. They wouldn’t pull up and they wouldn’t pull down! The shop assistant tried her best to squeeze me into them but it wasn’t much fun. They’d looked beautiful on the website but in real life it just wasn’t the same and clearly I don’t have the figure of a model. The shop assistant picked out a strapless dress for me to try on instead, with a corset style lace up back. The style of the opening meant that it was easier to get into and it actually fitted, and even better than that – I loved it!
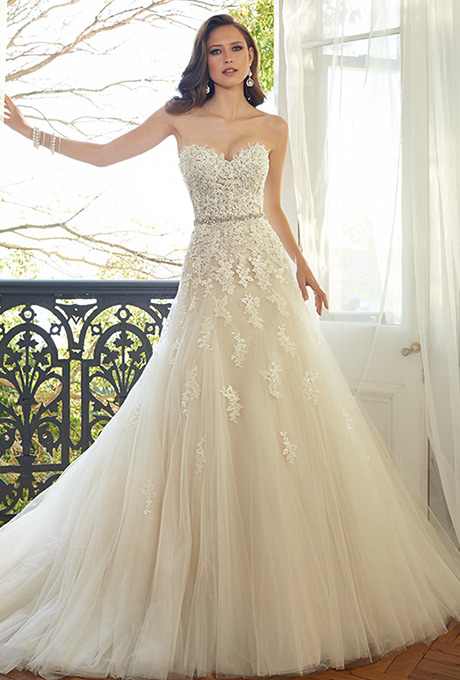
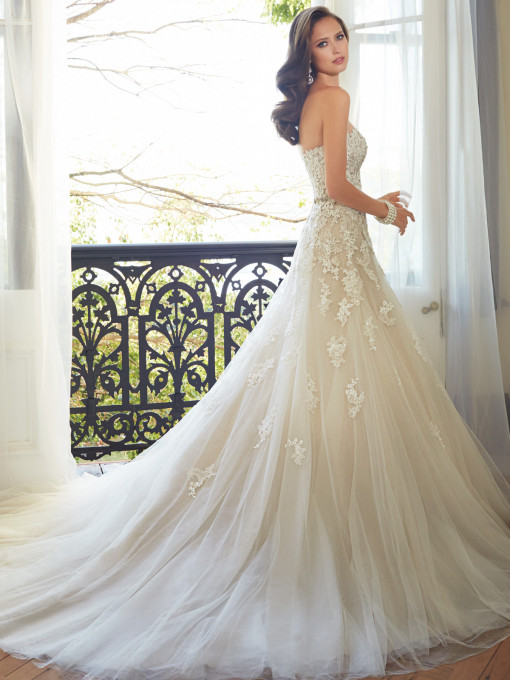
The dress was made up of around 8 layers comprising of net, tulle and lace. I loved the fitted part around the bust and waist and as the dress was fuller from the waistband down, the layers of net made this really flattering around my lower waist and hips. There was a bit too much fullness in this dress though.
Step 3 – Choosing the style – I didn’t want a dress where I’d need assistance to go to the toilet or something which was likely to get stuck in a door, I wanted something a bit more practical, so I decided to steal the bits I did like from the strapless dress and then make the skirt section with less layers, no train and a length so it just touched the floor.
I printed out the pictures of the dress from the internet as we weren’t allowed to take photos in the shop. I made a few notes from what I’d remembered about the construction of the sample dress and then started on the next stage of the plan.
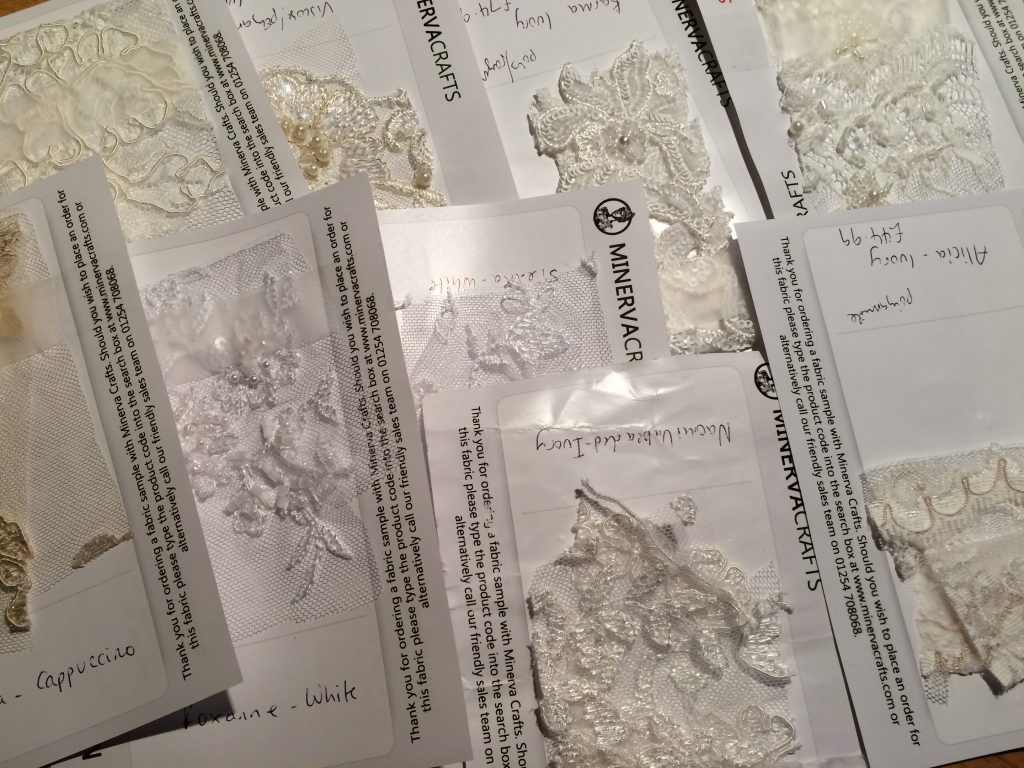
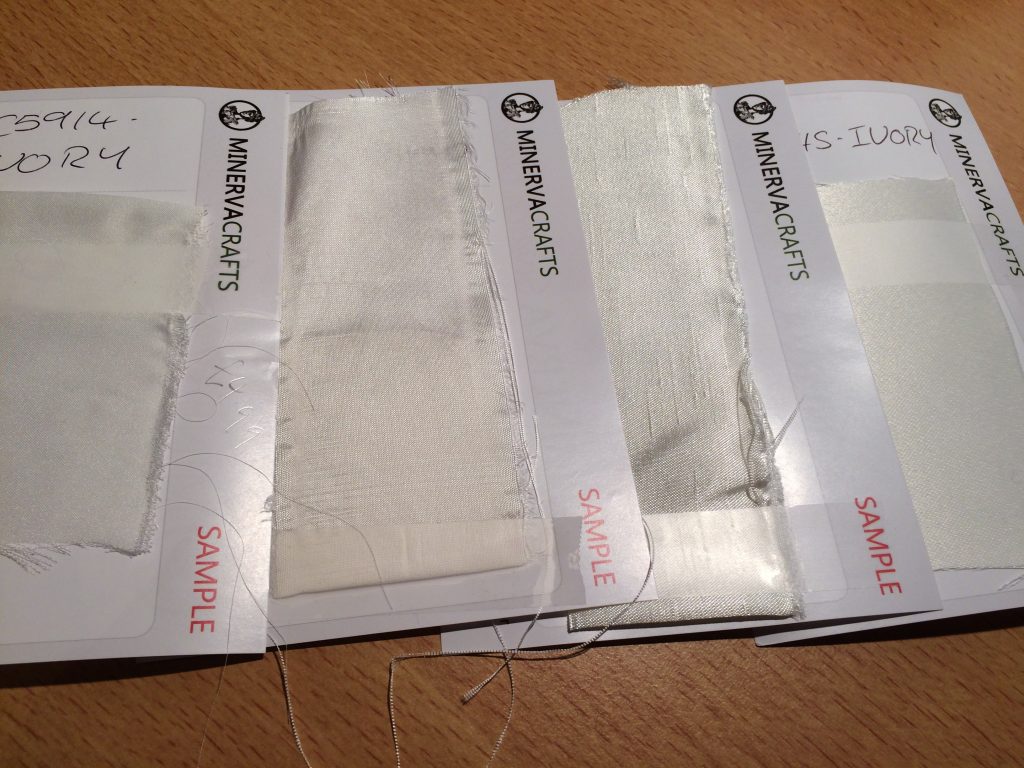
Step 4 – Researching fabrics. Where do I begin with this?? I’ve previously ordered lots of fabrics from Minerva Crafts and knew that their website had a huge selection of bridal and lace fabrics. I also trawled the shops of Brighton and Worthing to see what types of fabrics were available. While on holiday in America I looked in Mood Fabrics but that shop is just too overwhelming and I was really unprepared! I needed beaded lace, lining fabric, net and tulle. I didn’t want to spend a fortune on fabric but it had to look good and be the right thing. I ordered a ridiculous number of samples from Minerva crafts – pretty much every style of ivory lace that they had, along with some samples of satin, taffeta and tulle.
Step 5 – After much deliberation, I bought some silky satin dress fabric for the inner most skirt lining and beaded lace from Minerva Crafts. For the main shell of the dress I bought ivory duchess satin and some tulle for the skirt layers, both from Fabric Land in Brighton. If I had been more organised I would have kept a record of how much fabric I’d bought and what I’d spent but as it is, I’m now really not sure. I know I bought 1.8m of lace and 5m of silky lining but no idea how many metres of satin and tulle.
At this stage it was already May and I hadn’t started the construction process yet. Oh dear!!
Now all I had to do was put it all together!
Other reads:
The Making of my Wedding Dress – Part 2 – Creating the Pattern & Toile
The Making of my Wedding Dress – Part 3 – Constructing the Dress


