I’m very excited about this! – I’ve wanted to try out bra making for some time.
There’s always loads of workshops I read about online taking place in the US and in London but I’m not one to travel too far for a course and clearly undertaking a course hundreds of miles away isn’t something I can easily afford or even get to…. so I had a genius idea… I found a bra making teacher to work at Friends Centre Adult Education in Brighton!
The tutor and I spent some time considering which pattern to use for beginners, what was the best fabric and where we were going to buy everything from… it’s not that easy to source a wide range of bra making supplies in the UK and I didn’t want to wait forever to receive my parcels from overseas.
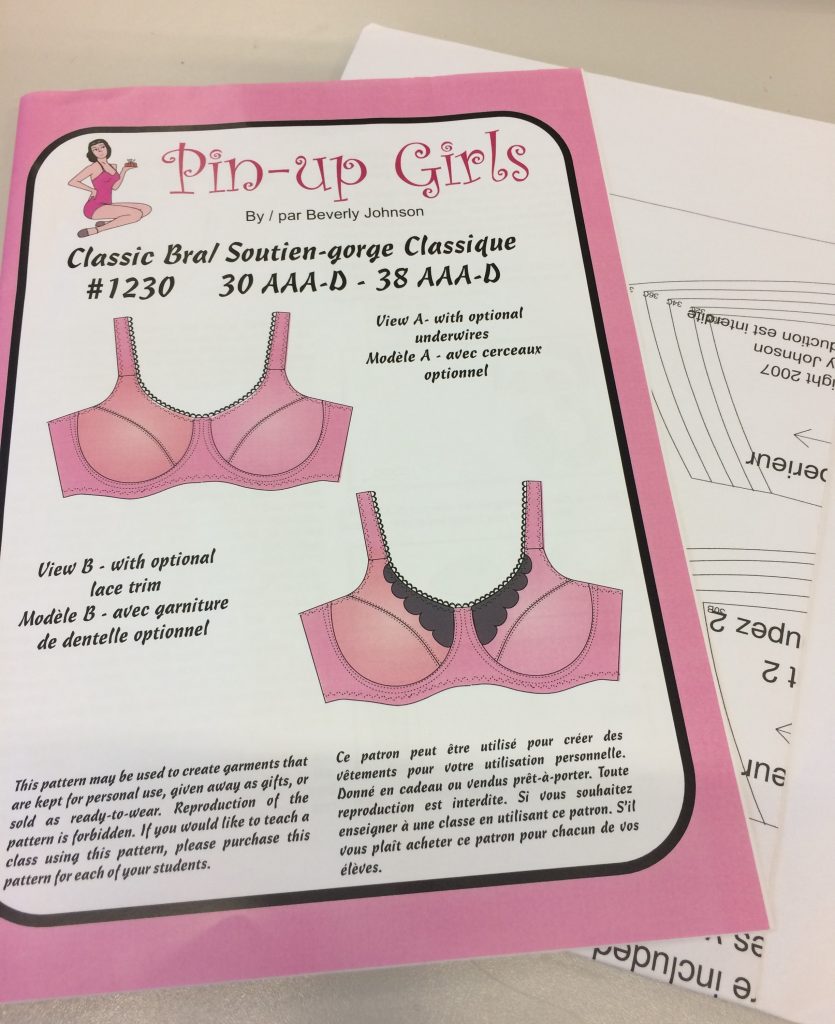
We opted for the Pin-Up Girls’ Classic Bra by Beverly Johnson since this came in such a huge range of sizes, it seemed ideal for beginners (as all the info online told us) and the pattern instructions were relatively easy to follow.
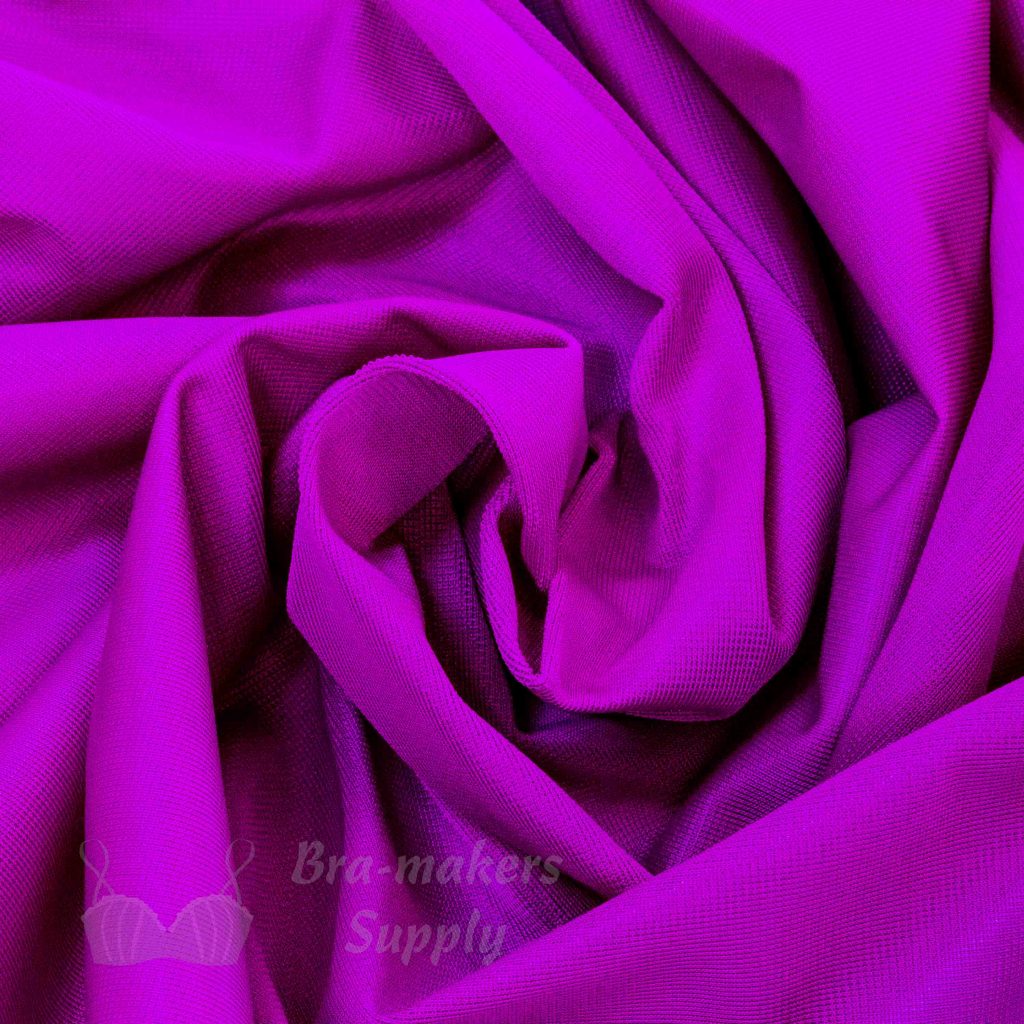
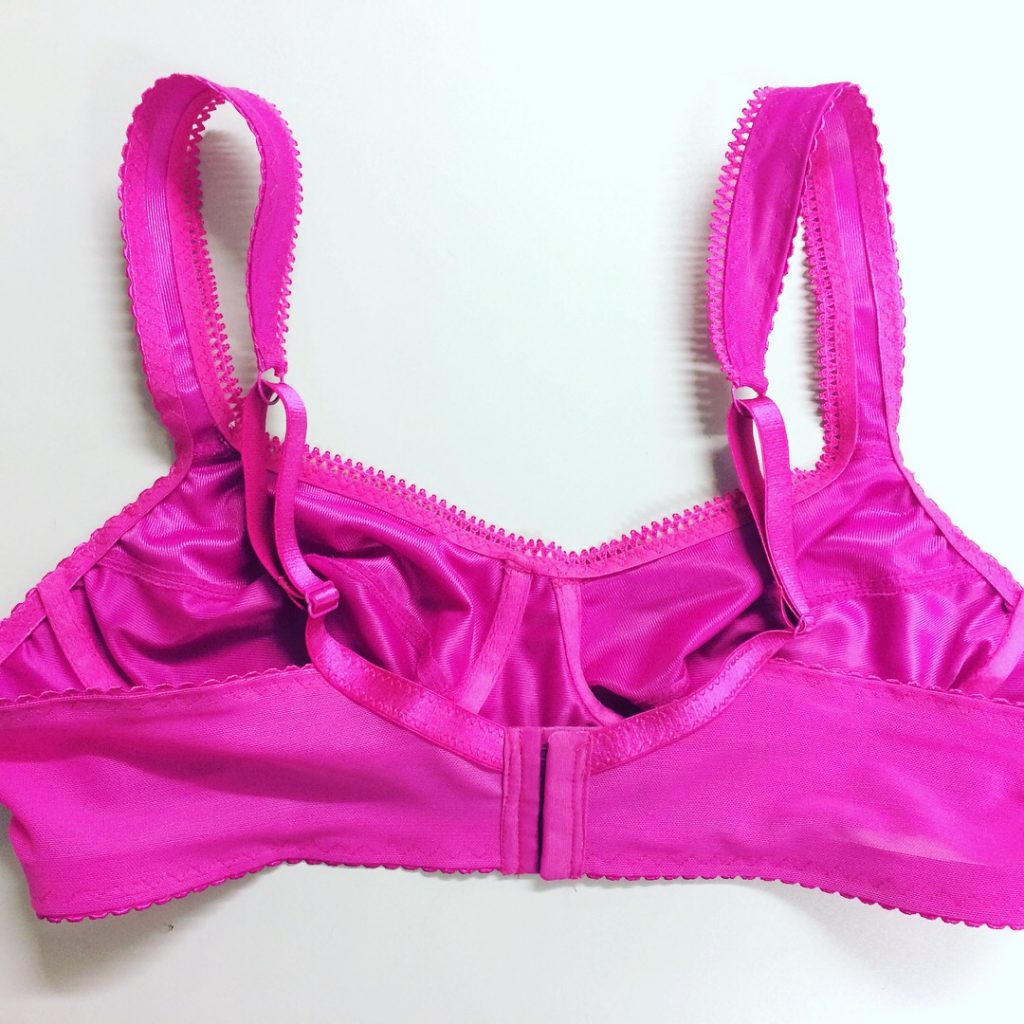
I was very excited to attend the Bra Making Weekender and chose to make a fuchsia / hot pink bra. (I also managed to coordinate my nail varnish to match too!)
There were 8 other students in the class and I was there not only to make a bra for myself, but to help the tutor and other students with setting up machines, finding resources in the classroom and providing additional support with understanding and carrying out the construction.
I had been pre warned that the first bra I made might not fit and like anything that you make for yourself, it’s not always perfect first time. Due to the complexity of bra making you can’t really try it on for fit until you’ve made it, so there’s not much option for amending and altering as you go along. I was OK about this – I was more keen to know how to make a bra – I could work out the fitting of it later.
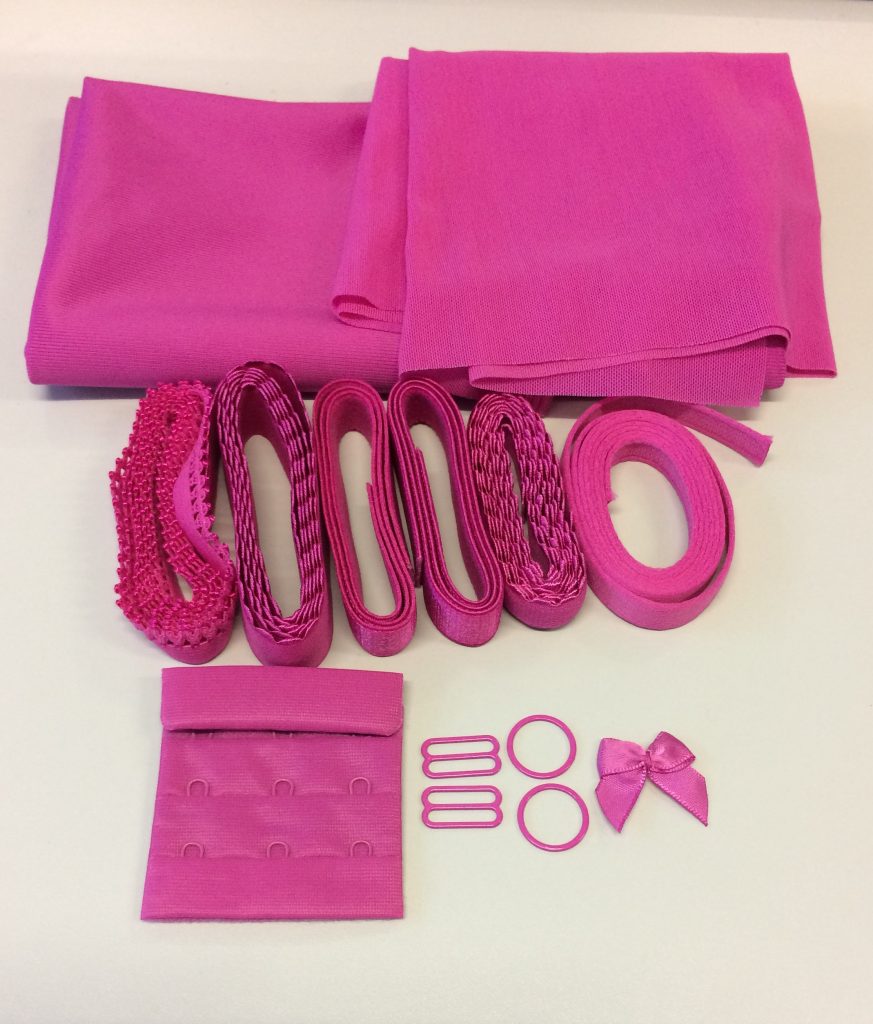
The class began by discussing all the things in our bra making kits (we bought these from fit2sew as they have a huge selection of colours). We started with the fabrics – Duoplex and Powernet.
Duoplex is (as fit2sew says) …’undeniably the best fabric to use for the cups and front frame because it provides great support. It can be used on its own without having to line the cups. It is also a reversible fabric – shiny on one side and matte on the other. Duoplex is a 100% polyester non-stretch stable knit fabric.’
Powernet is ‘perfect for bra back bands – smooth to the touch but strong enough even for girdles and compression garments. Really firm despite its mesh-like appearance, 80% Nylon and 20% spandex, with maximum stretch in the lengthwise direction.’ This Powernet was certainly stronger and more durable than other power net fabric that I have come across – other power net fabrics can be more flimsy and wouldn’t provide the necessary support or comfort required.

The rest of the kit contains all the channelling (for feeding the underwires through and providing the cup shape), band elastic (for the bottom of the bra and under the arms), strap elastic (for the straps of course!), neckline trim (for decorating the top edge and strap edges), slider and rings (for adjusting the straps), the back hook & eyes and a decorative bow. Underwires were provided later as separate and optional item.
Looking at the kit was a little overwhelming… it was making no sense – where does all this stuff go? – I was only going to get to grips with this by putting the bra together.
Next came the measuring… there’s a few different options with measuring bras… the standard way, and a couple of other techniques suggested in the pattern instructions. There actually four ways to measure, as suggested by braandcorsetsupplies on their website
The standard way of measuring for a bra is where you measure the fullest part of the bust and underneath the bust. You then find the difference between the two to give you the cup size and add 4 or 5 inches to the underbust measurement to get the band size.
This method gave me a 38D.
You can see more about that here:
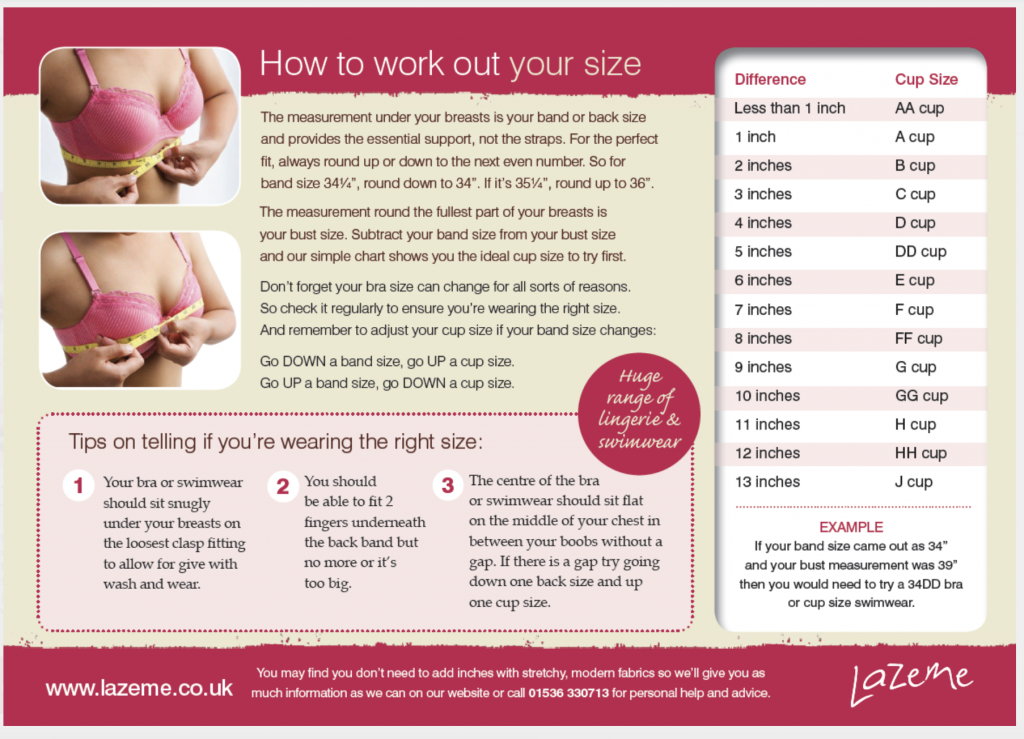
Another way, as suggested by the pattern (and I’ve used this technique for other dressmaking patterns) is to measure the high bust instead of the underbust, and also measure the full bust, taking the difference between the two to determine your cup size and take the high bust measurement as the band measurement.
The alternative method gave me a 38B….mmmmmnnnn which is right?
As I’d not used the pattern before I went for method 2, since this was the method suggested. I traced and cut out my paper pattern in a 38B.
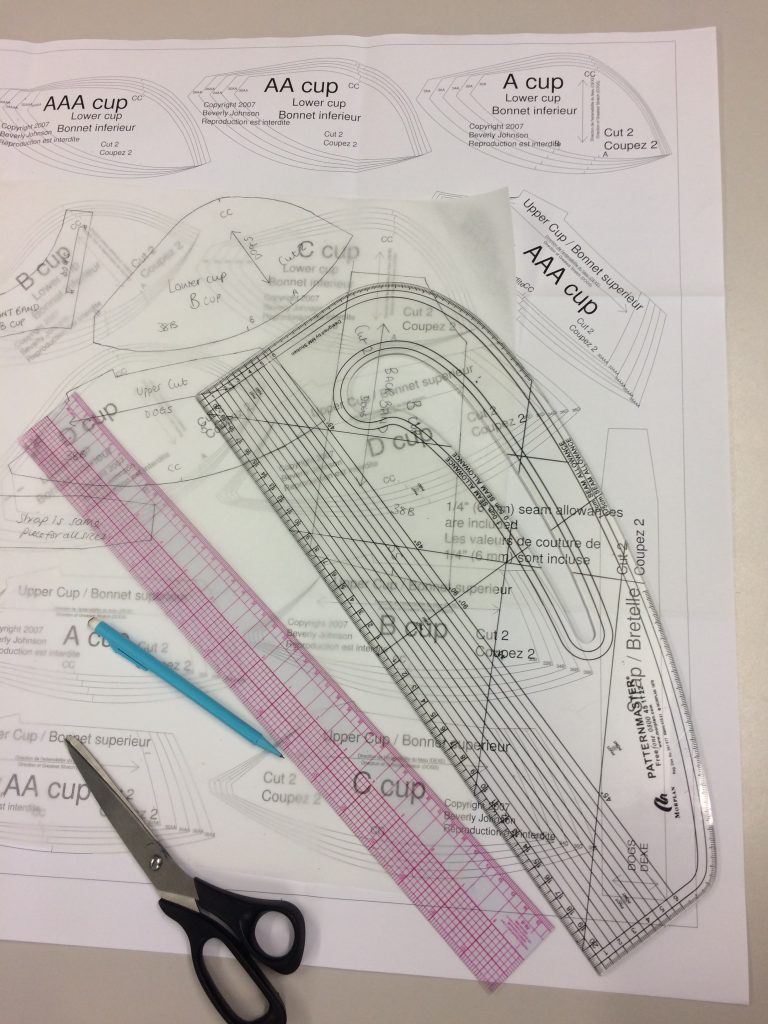
Next we cut out the fabric, making sure we placed the pattern on the fabric correctly, matching up the ‘Direction of greatest stretch’ or ‘DOGS’ instead of matching up a grain line. You get enough fabric in the kit to make 2 bras so I wanted to be economical with my fabric to make sure there was enough fabric left to make another one.
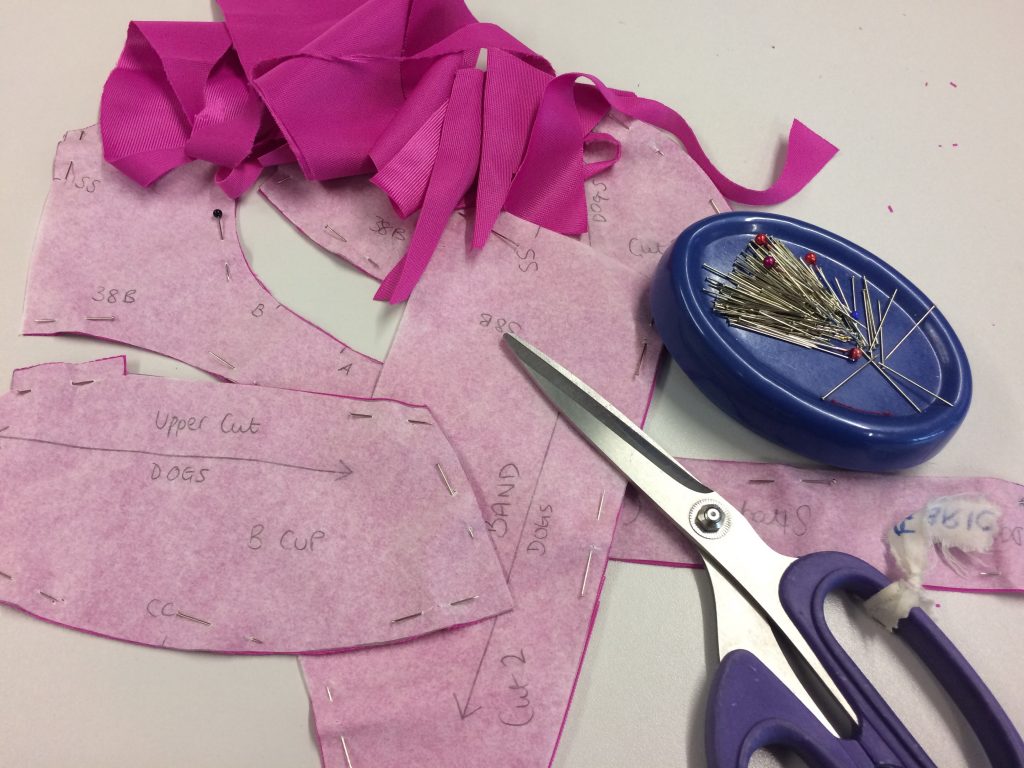
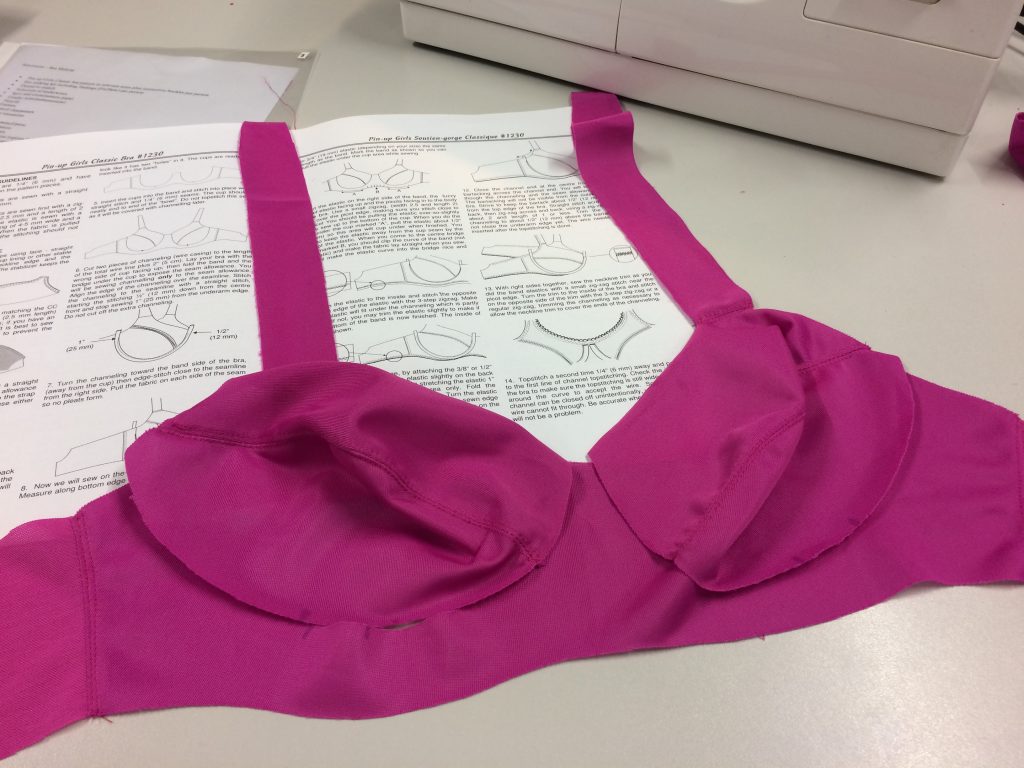
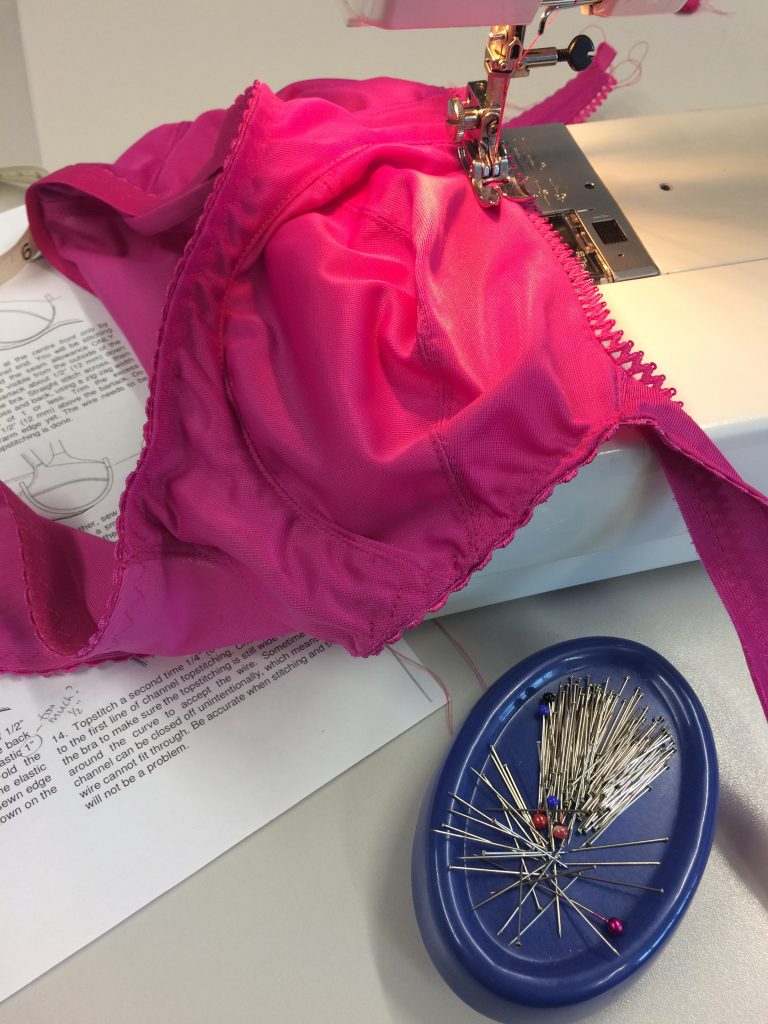
The pattern instructions are relatively easy to follow, starting with stitching the cups together, pressing over a tailor’s ham and then topstitching. I used a 6mm (1/4 inch) foot to help me keep the seams correct…
We used jersey needles which went through the fabric more efficiently than standard needles. After sewing the cup, the straps are attached to the cups, the powernet to the band and the band to the cups.
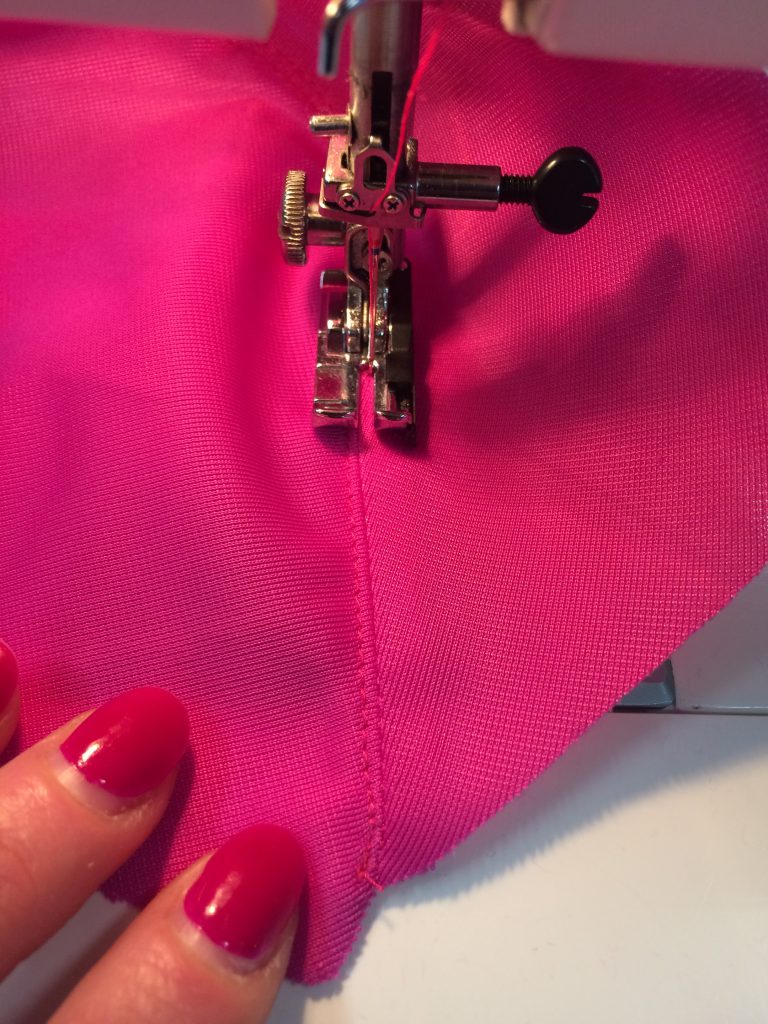
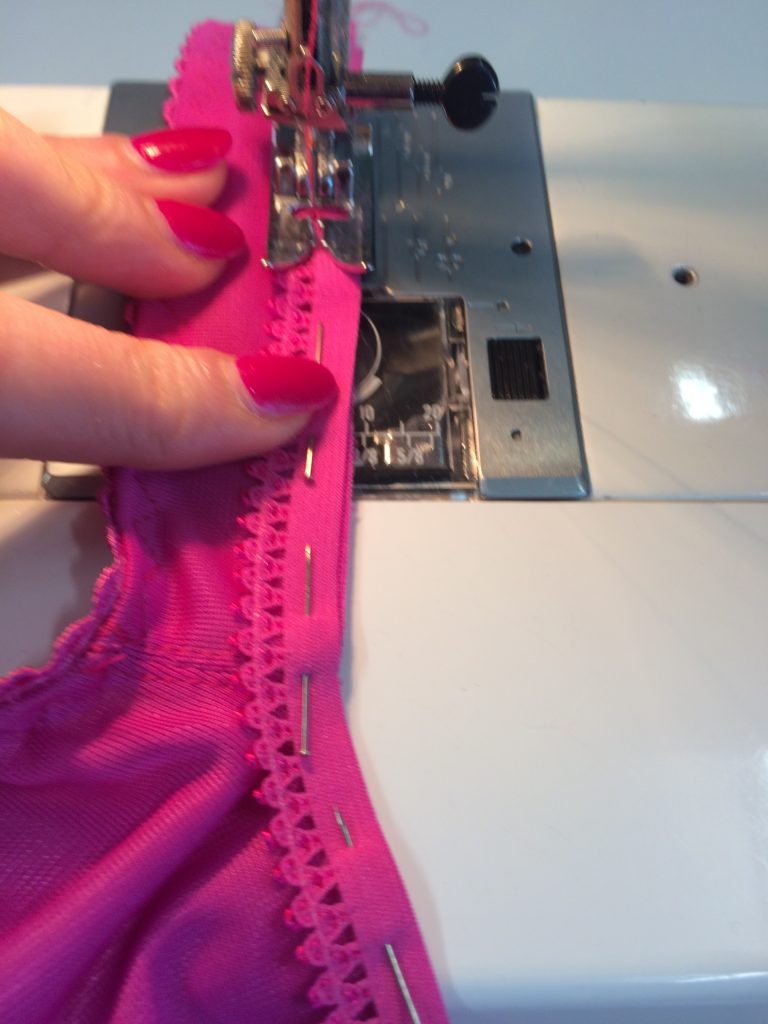
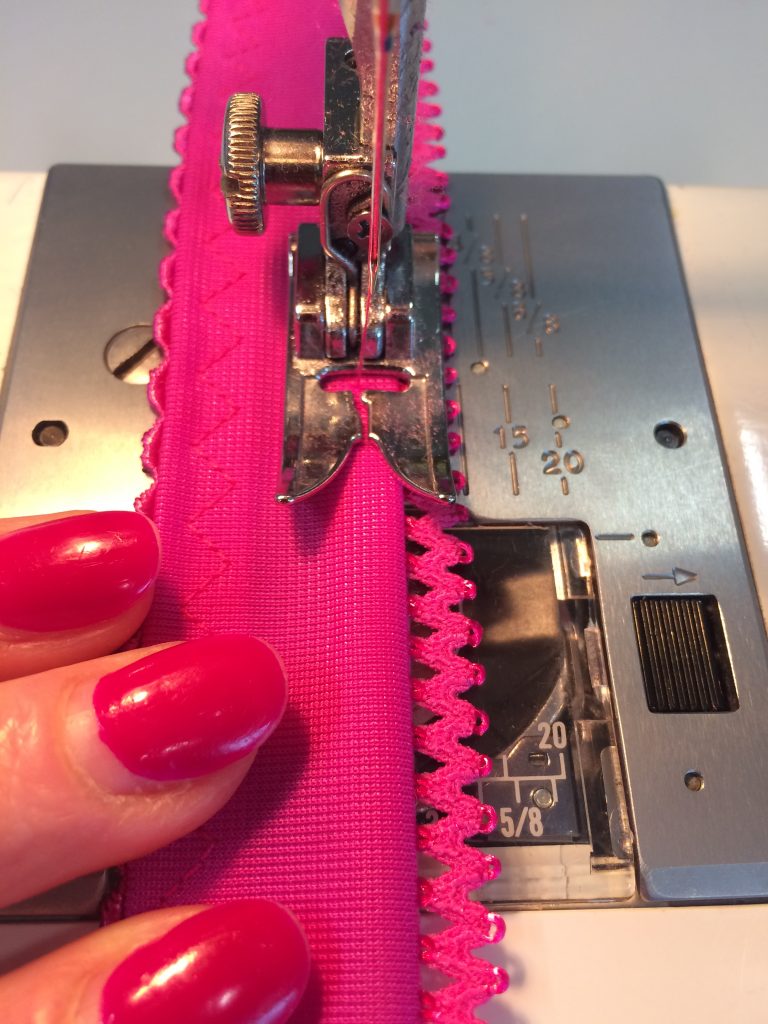
This is all quite straightforward but I did need to do a bit of unpicking to get my 6mm seams correct. The channelling is then attached to the seam allowance of the cup / band and then top stitched.
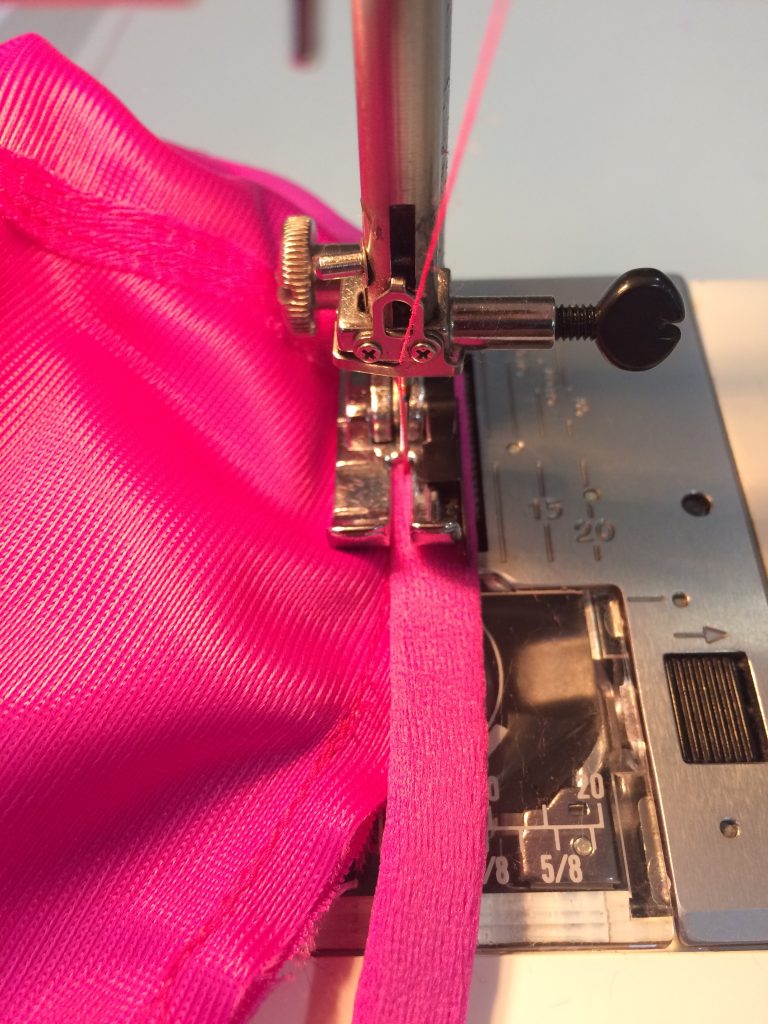
The hard part is applying the band elastic to the lower edge of the bra. I had to do this a couple of times to get it to work. First you apply it with a narrow zig-zag, placing the elastic with right sides together and stitching so you you’ve really close to the picot edge of the elastic. It has to be stretched under the fullest part of the cup which is the fiddly bit, to make sure it is stretched by the same amount on each side.
After this you fold the elastic to the inside and stitch again with a 3-step zig-zag.
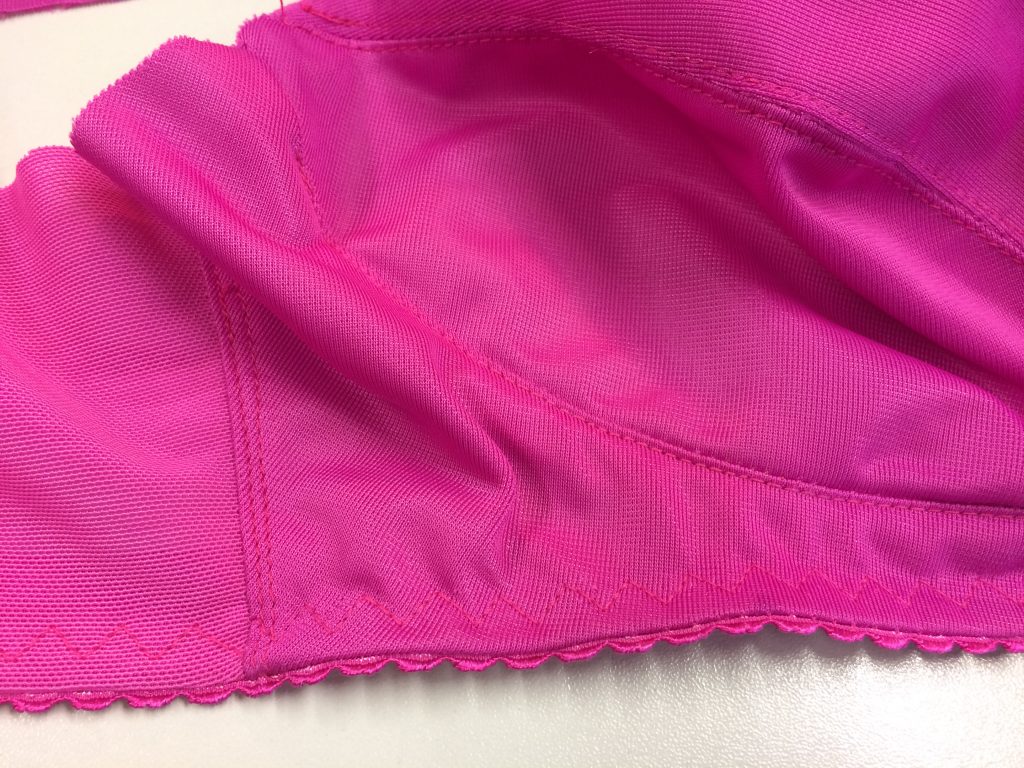
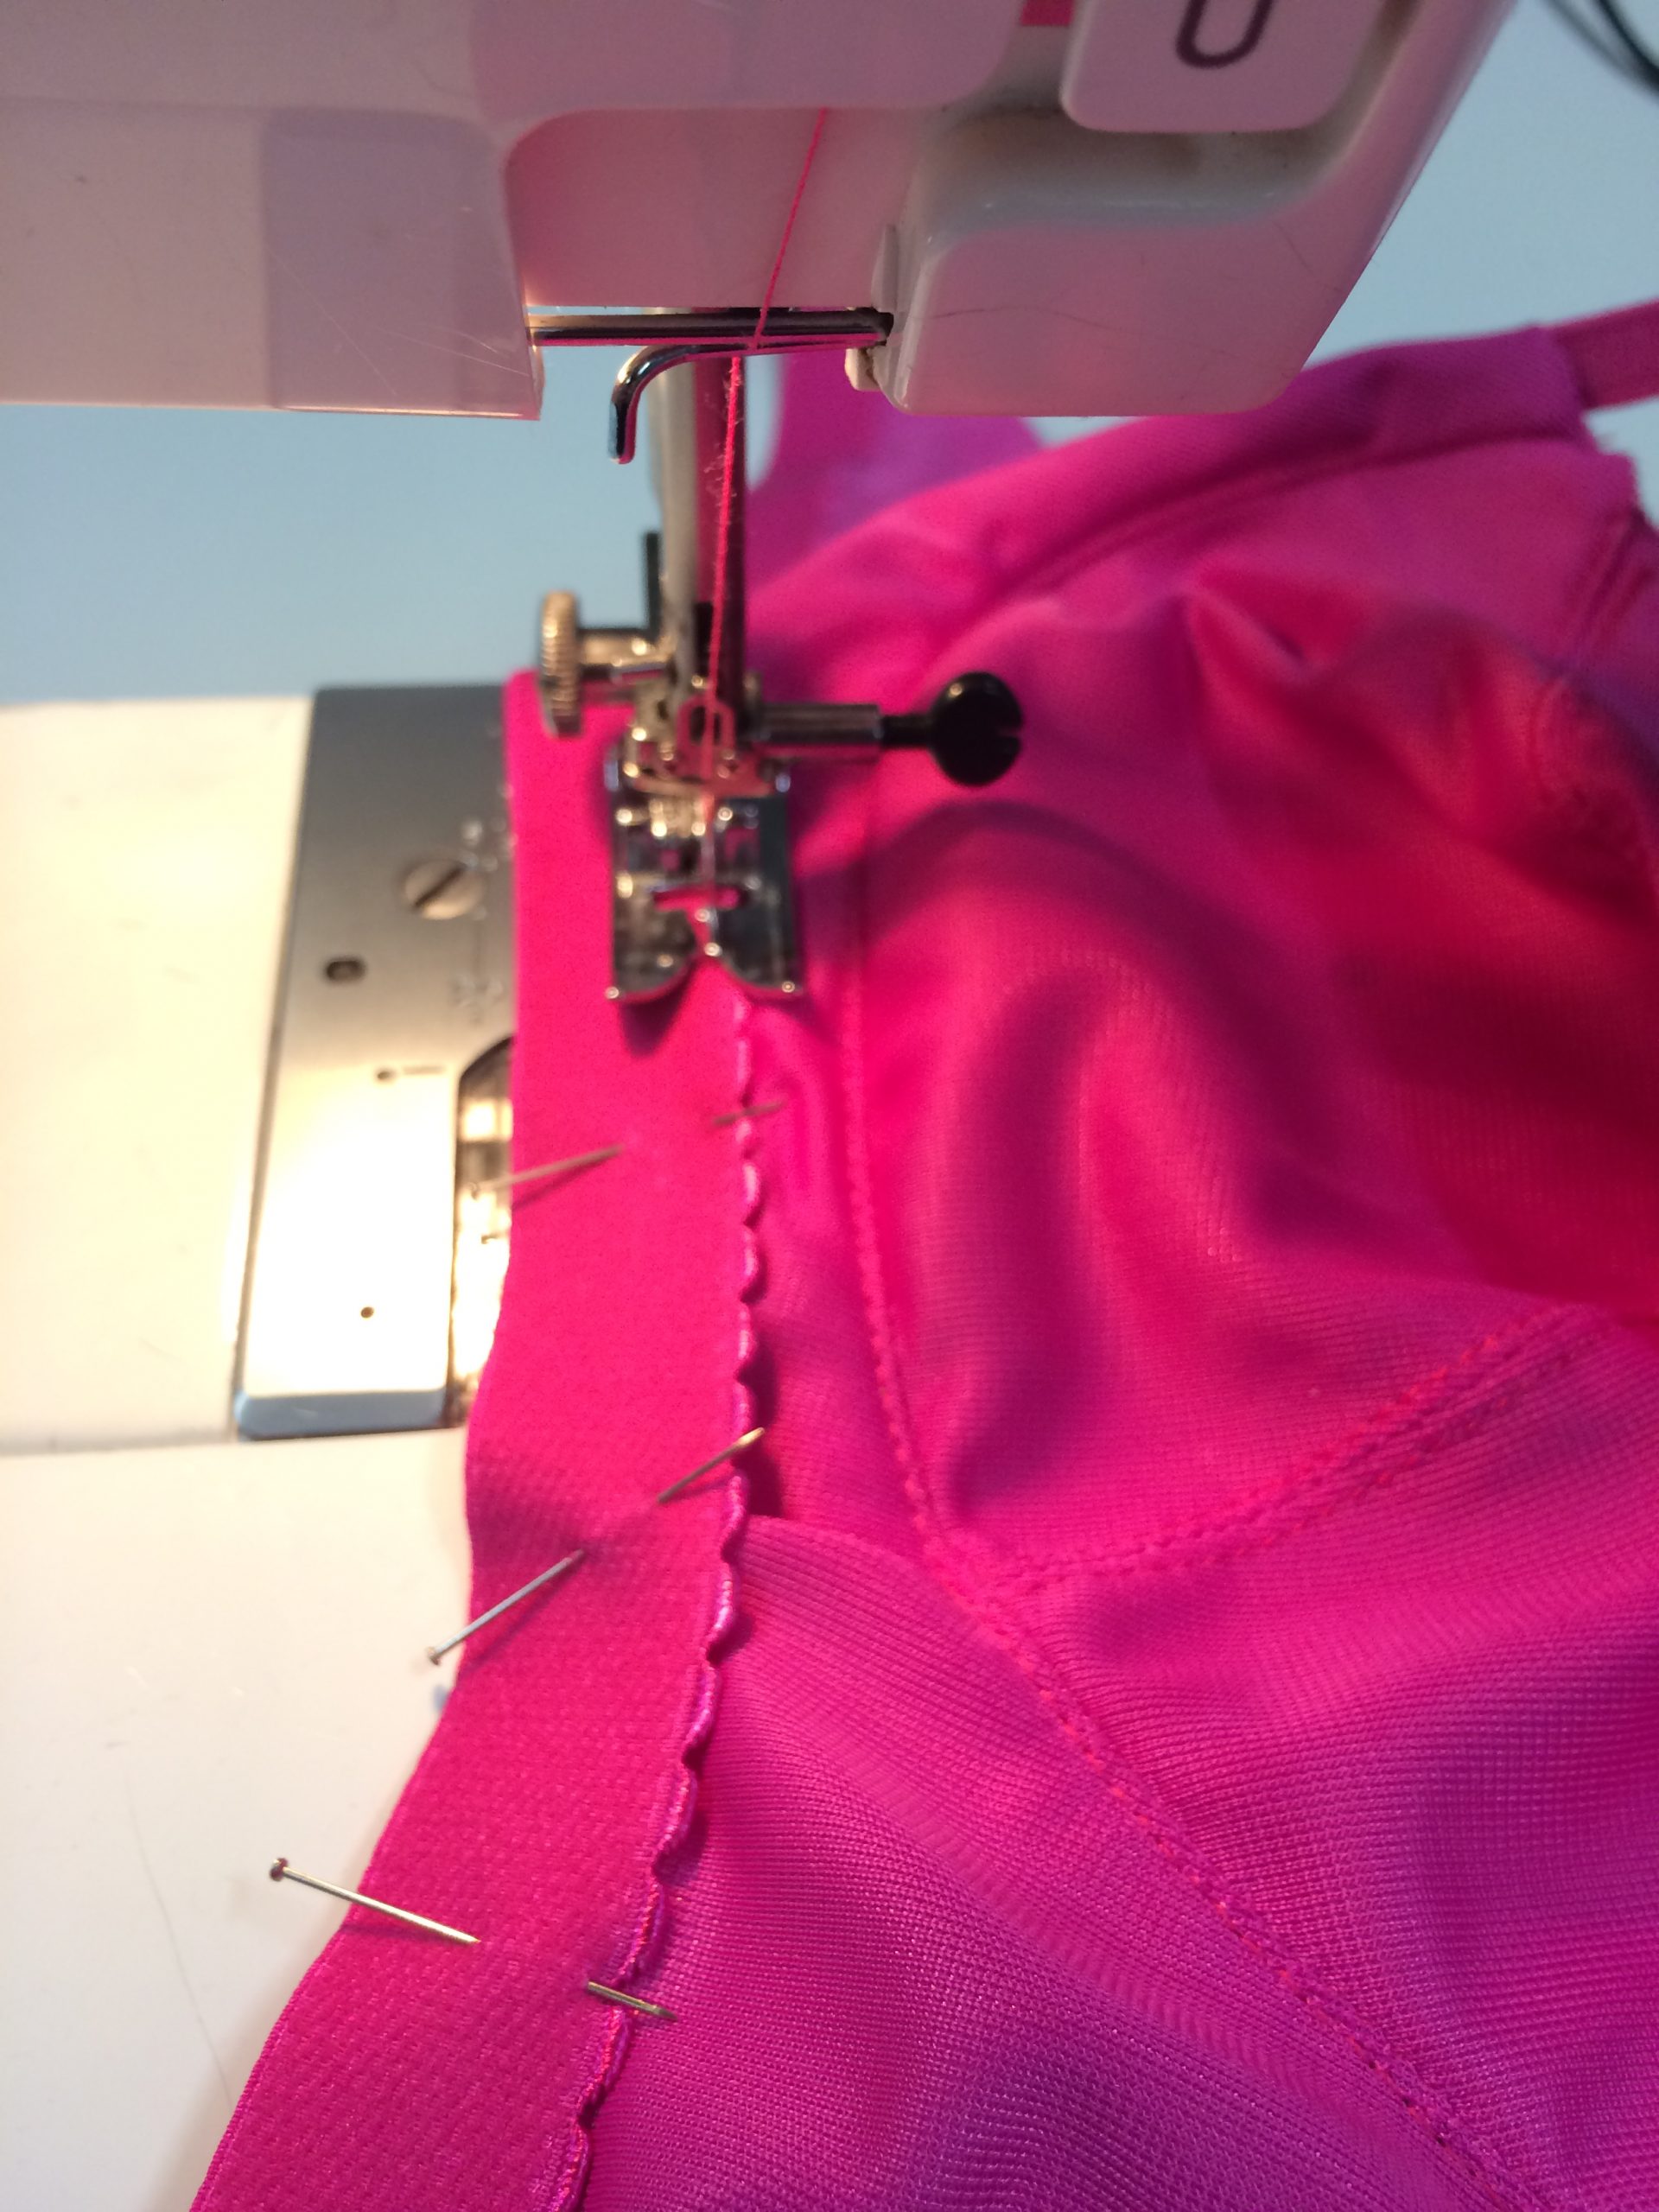
The underarm and strap elastic is then attached in the same way before applying the neckline trim – elastic is used for this but it isn’t stretched and I wondered why elastic was necessary for this part at all – you could just use decorative lace or trim instead.
After all the elastic I applied the rug and sliders are attached to the strap elastic and these are attached to the strap and back band. The final step is to stitch on the back hook and eyes. This bit is actually really fiddly to stitch it neatly but by this point I wasn’t too bothered about neatness.
We had 2 days to create the bra and then learn about how to adjust our patterns for a better fit. I finished my bra part way through day 2 so had lots of time to work out how to amend my pattern and then chat with the other students about potential future projects.
I’m really happy with the finished item! I actually made a bra!
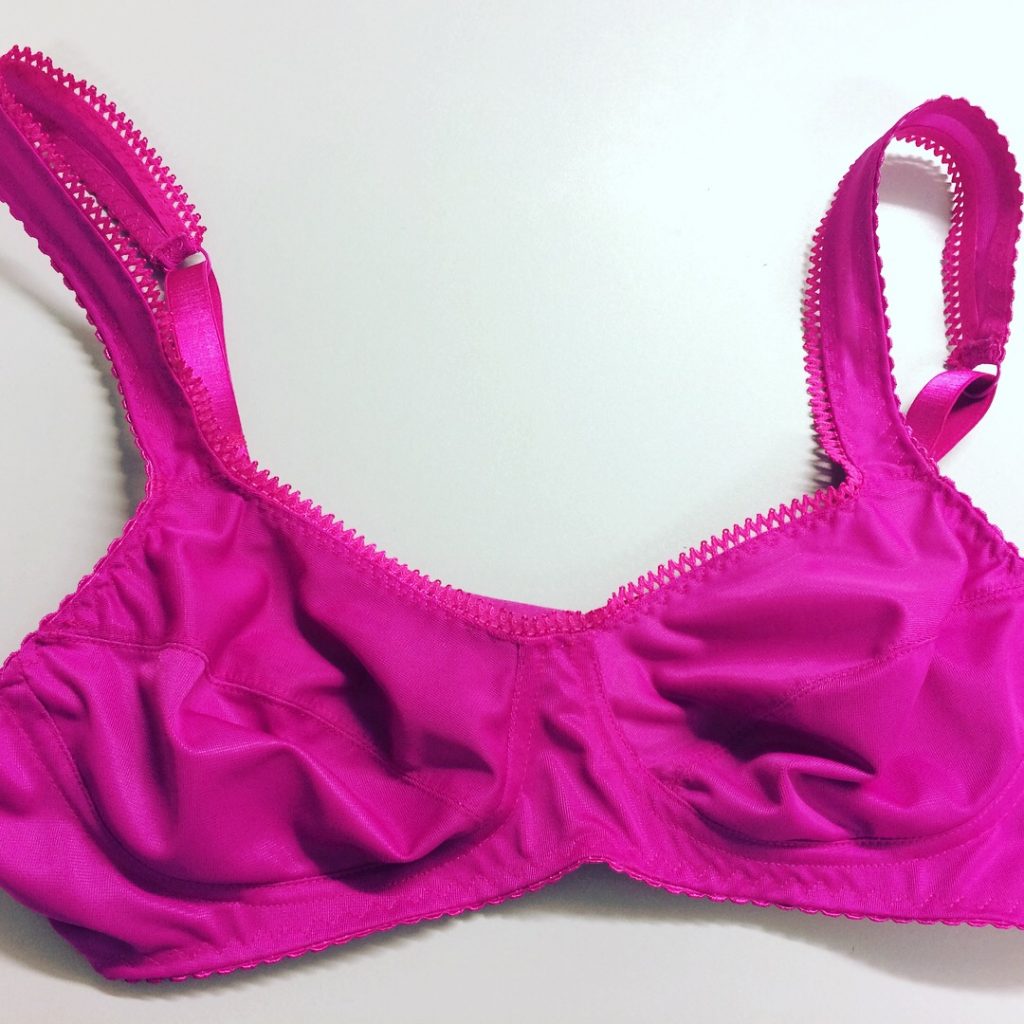
Sadly, it doesn’t fit… the cup is too small… I’m also not sure about the style – it’s not one I’d normally go for. The Duoplex can be used shiny side out or shiny side in and I went for shiny side in as I’m not too keen on the shine. I have learned A LOT and am definitely confident now to try again on my own and make another. I’m going to use the same pattern but add the optional lace trim and also use my ready to wear size as I think this might give me a better fit…