
Have you seen the Burda Style magazine?
Have you ever made anything from it?
Until recently I’d have answered ‘no!’ to the second question but it’s been on my radar for quite a few years.
I came across this magazine about 6 years ago when one of my students brought it into the classroom and wanted to use one of the patterns.
It looked like a complete nightmare… the idea of tracing off from such a muddled sheet of multicoloured lines just didn’t sit too well with me. But…I’m not one to deter my students from trying something new so I went along with it and offered help where I could. To make it more of a challenge the copy of Burda Style was in Polish and I’m not a linguist so couldn’t really assist with the reading of the instructions… and there’s not too many pictures to follow for guidance…
However, my student did make up a rather brilliant top which she adjusted to make unique to her.
Fastforward 6 years and I now own four copies of Burda Style magazine and look through them fondly, thinking about which garments I’d like to make… and still not making them.
I had another student recently with another Burda magazine (again in Polish!) who made a jacket. It was a very challenging make… with me not being able to read the instructions… but I’m pleased to say that my student made a very successful garment….
So… it was about time that I tried it out myself!
I’ve had issue 07/2017 for just over a year… it’s a summer issue and I’m not convinced that summer is over just yet so I decided to have a go at the Flounce Dress 118.
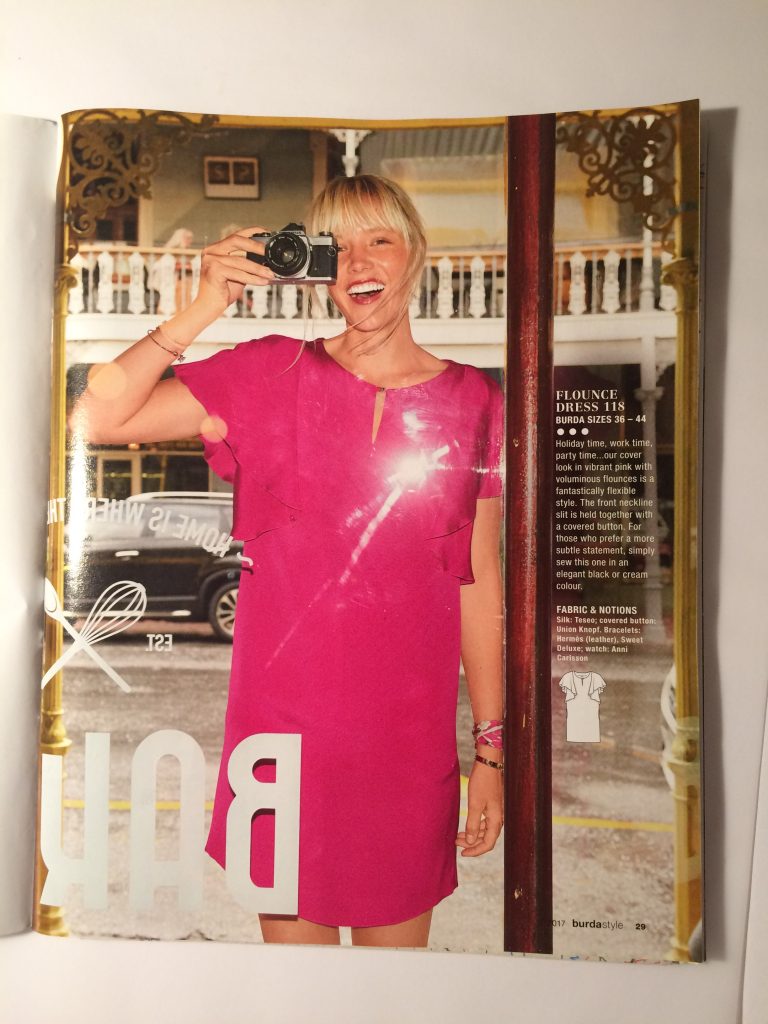
I was really attracted to the flounce sleeves and thought this would be great for warmer weather if I made it in a lightweight viscose or cotton.
I ordered some plain viscose fabric in fuchsia from Minerva Crafts for £4.99 per metre and then set about making an almost identical dress… this is very unlike me… usually I like to make something different and change multiple parts of the pattern but this time… I just stuck to the plan.
I usually take my measurements and then compare the finished garment measurements on the pattern… this doesn’t have any, or not any that I could see…?
I’ve heard that Burda are the ‘pattern that fits’ or at least I’m sure they’d put that on one of their patterns at some point… so I thought I’d trust the ease they had included and just go on my measurements…
I measured myself and mostly fitted into their 44 with more room required around the hips… The pattern only went up to a 44 and I could add a bit on around the hips. I’d also need to add on an extra 20cm / 8 ins to the length since these pattern are made for women of up to 168cm /5ft 6! – I’m 6ft 2.
I checked the pattern pieces required and grabbed myself some tracing paper, pencil and ruler.
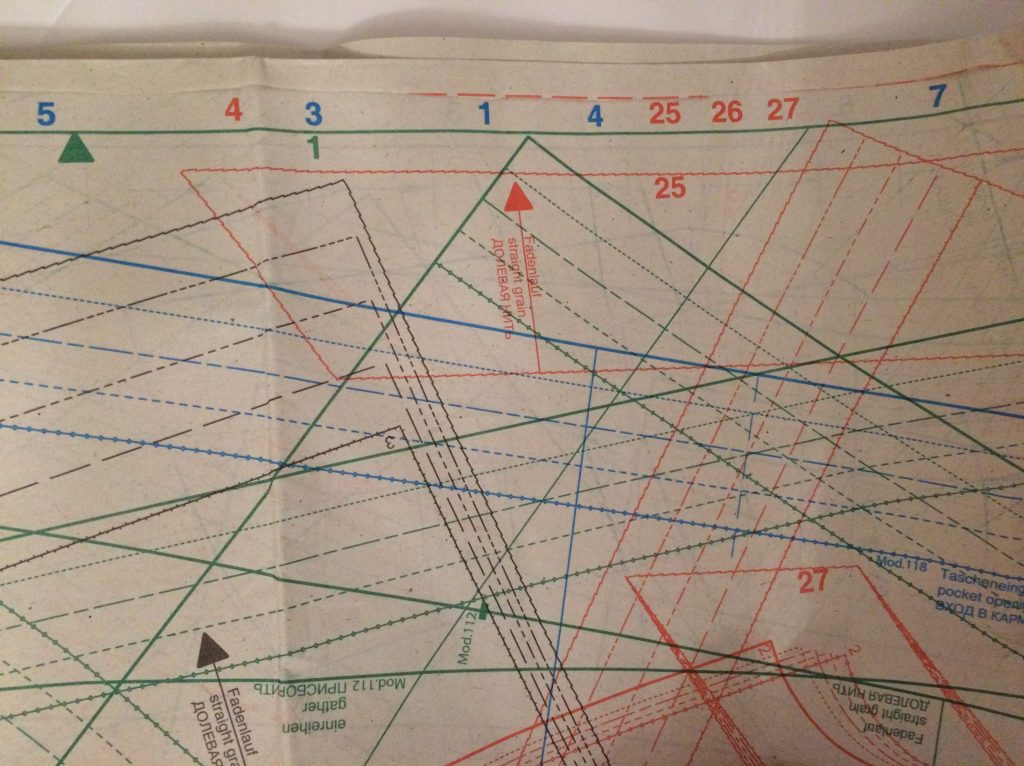
The pattern sheets are actually easier than you might think to navigate. The instructions say ‘Blue pattern line, sheet D, Pattern pieces 1 to 7.’ I didn’t need to stare at each page hoping to find the right pieces, I was directed to the right place!
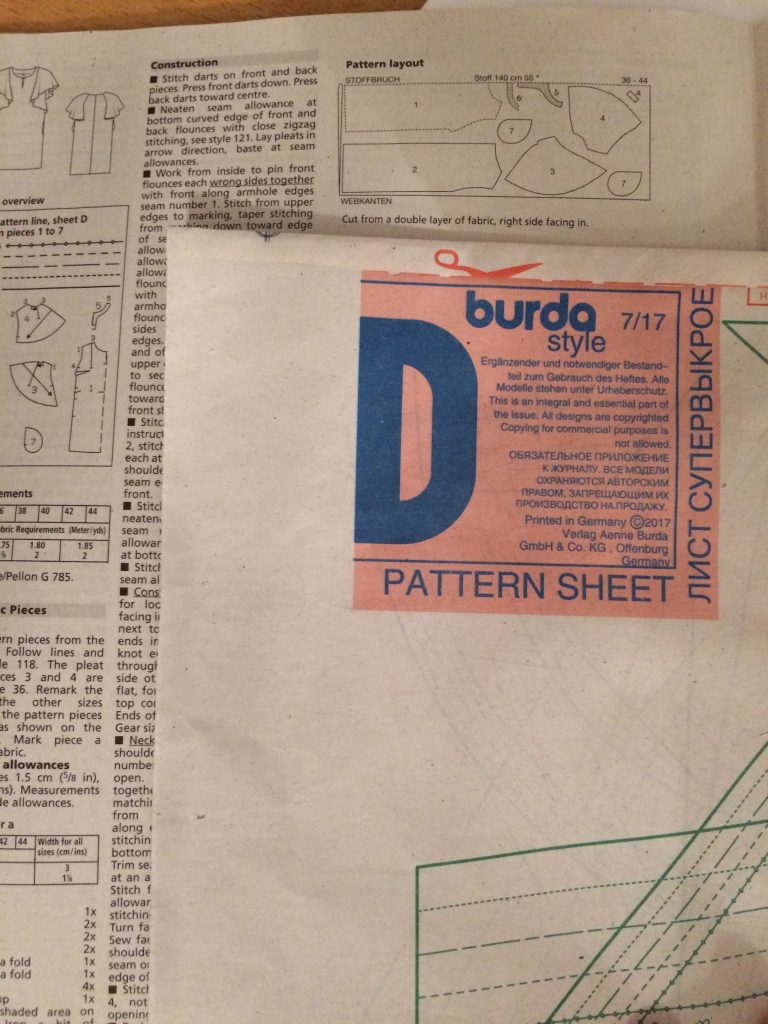
Along the top of each sheet it highlights the numbers of each pattern piece and their colour so you find the right sheet, look along the top for the numbers in the colour you need and then look down the sheet to find that number – much more simple that I’d given them credit for!
But… one very important thing to know about these patterns – there’s no seam allowance included… you need to add that on yourself!
Burda also have their own interpretation of pattern symbols, or lack of… don’t expect any triangular notches or cut on fold arrows. Keep your eye out for any markings that will be useful. It’s worth a scan over the pattern before and after you start tracing to check you’ve got everything down.
So I began the tracing mission…
…and it wasn’t that bad.
Possibly because I only had 6 pattern pieces to trace… and possibly because it’s simply really not that bad…
I will admit… I did miss a couple of the markings and have to go back to add them in…
Normally I make toile when I try out a new pattern but on this occasion I thought I’d just go for it. The fabric wasn’t that expensive and since the fit of the dress was loose (ish) I thought I’d be ok.
I didn’t prewash my fabric (I know… big mistake) and I forgot to add in the extra for the hips that I needed (double error!) I did add on some extra length (about 10cm) and was keeping my fingers crossed that it was a rather roomy fit! I also remembered to add the seam allowance.
The darts are created first and then the edges of the sleeves are finished. They suggest a ‘close zig zag stitch’ , I thought better of it and got out the overlocker.
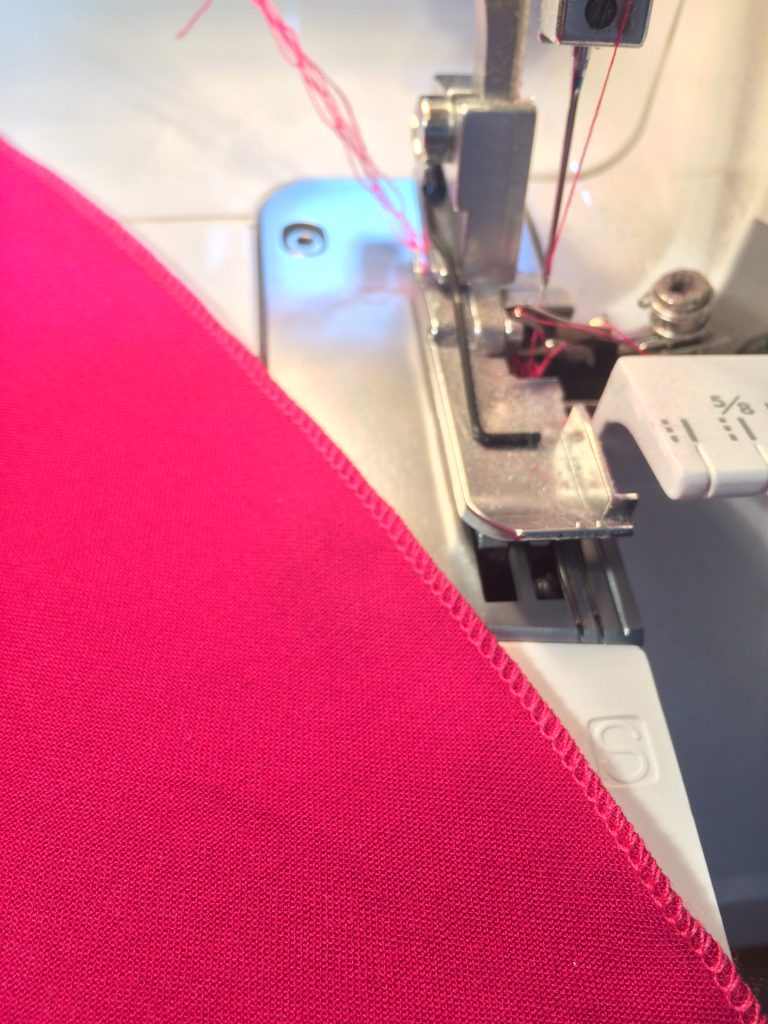
I thought the overlocked rolled hem would be a much better finish on this drapey viscose than a close stitched zig zag and it worked perfectly.
To set your machine to rolled hemming you need to:
- Create the narrowest of stitches – do this by removing the left needle, leaving you with just the right needle – this will instantly make your stitch narrower. Then remove the stitch finger (you’ll find the stitch finger on or close to the needle plate (check your manual on how to remove the ‘stitch finger’ or ‘chaining finger’ .
- Use a short stitch length for better coverage (like a close zig zag stitch) you may have a setting for R (rolled hem) or F (fine hem) on your stitch length dial, or set this to 1/1.5.
- Adjust the tension on the lower looper, turning this up to 7 or 9 depending on your machine / neutral setting. You want the tension to be tighter on the lower looper threads so they pull the threads round and make the edge start to roll.
I’ll make a video on this at some point…
The creation of the sleeves is rather clever, I did have to take a double check on the instructions since they appeared incorrect to me but… I had faith and stuck to it.
I wasn’t too keen on the loose fit at the waist and thought about adding in some shirring elastic or an elastic channel with bias binding. In the end I opted for making a removable elasticated belt.

It’s not particularly exciting but it does the trick.
I cut a strip of fabric the width of my hips + 3cm x 9cm (including 1.5cm of seam allowance all around.) I folded the strip right sides together along the longest side then stitched, trimmed and turned through. I then closed up the short edge leaving a gap through which to feed the elastic.
I cut the elastic the measurement of my waist plus 3 cm (just in case) and then fed the elastic through the belt, pinned the ends and tried it on for size. I used a 2.5cm wide elastic so it fitted really well into the channel. After some adjusting I machined the ends of the elastic and hand stitched the gap closed.
I can wear the dress with or without the belt, depending how to mood takes me.
I’m not sure about the front opening and think I might make this a touch lower as I’m not used to high necks and feel it’s strangling me a little.
The good news is that this actually fits quite well! – The extra length was definitely needed and thankfully there is plenty of design ease around the hips… It could be a bit more roomy but it’s certainly not tight. I’ve still got my fingers crossed though since I’ve not washed it yet and I’m hoping there’s no shrinkage.
I managed to find this necklace in the local Oxfam and it goes perfectly!
Tah-dah!
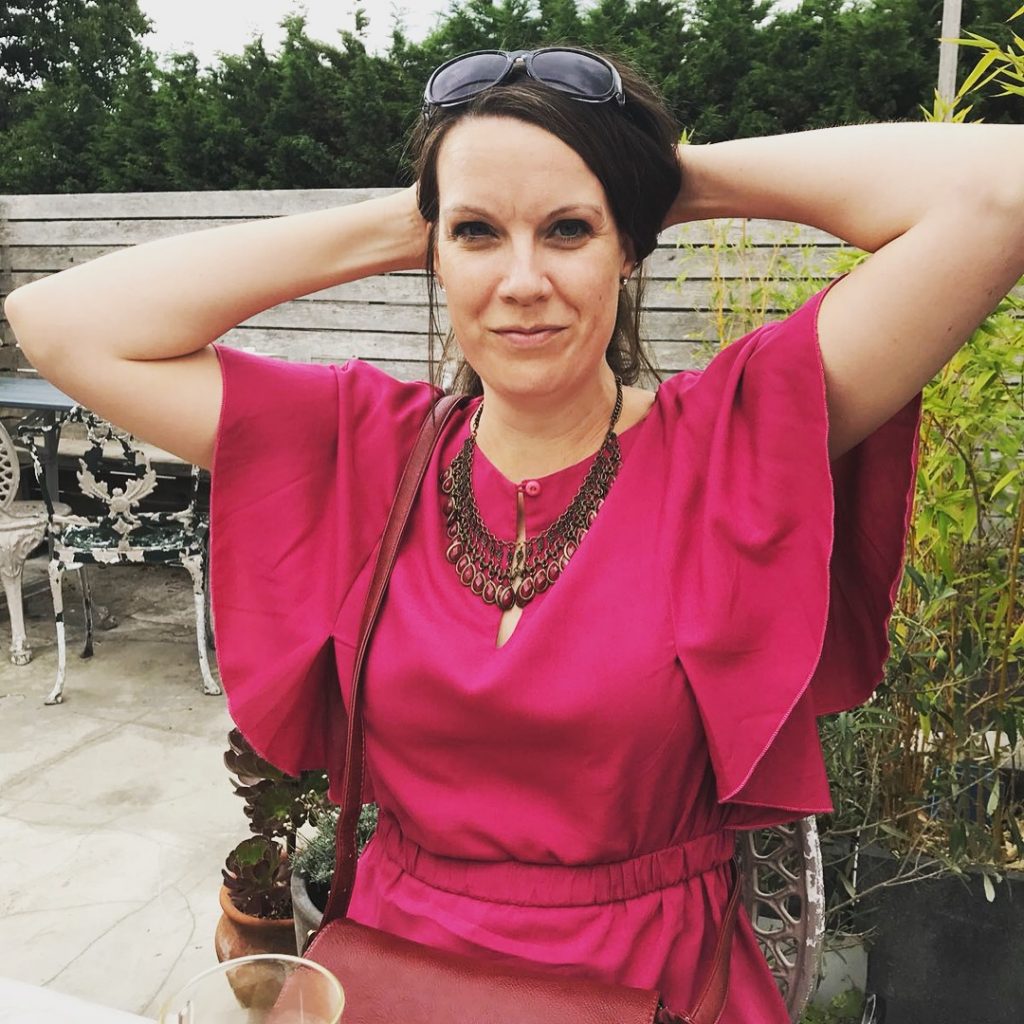
For some reason I can’t pose in this dress without my arms in the air!
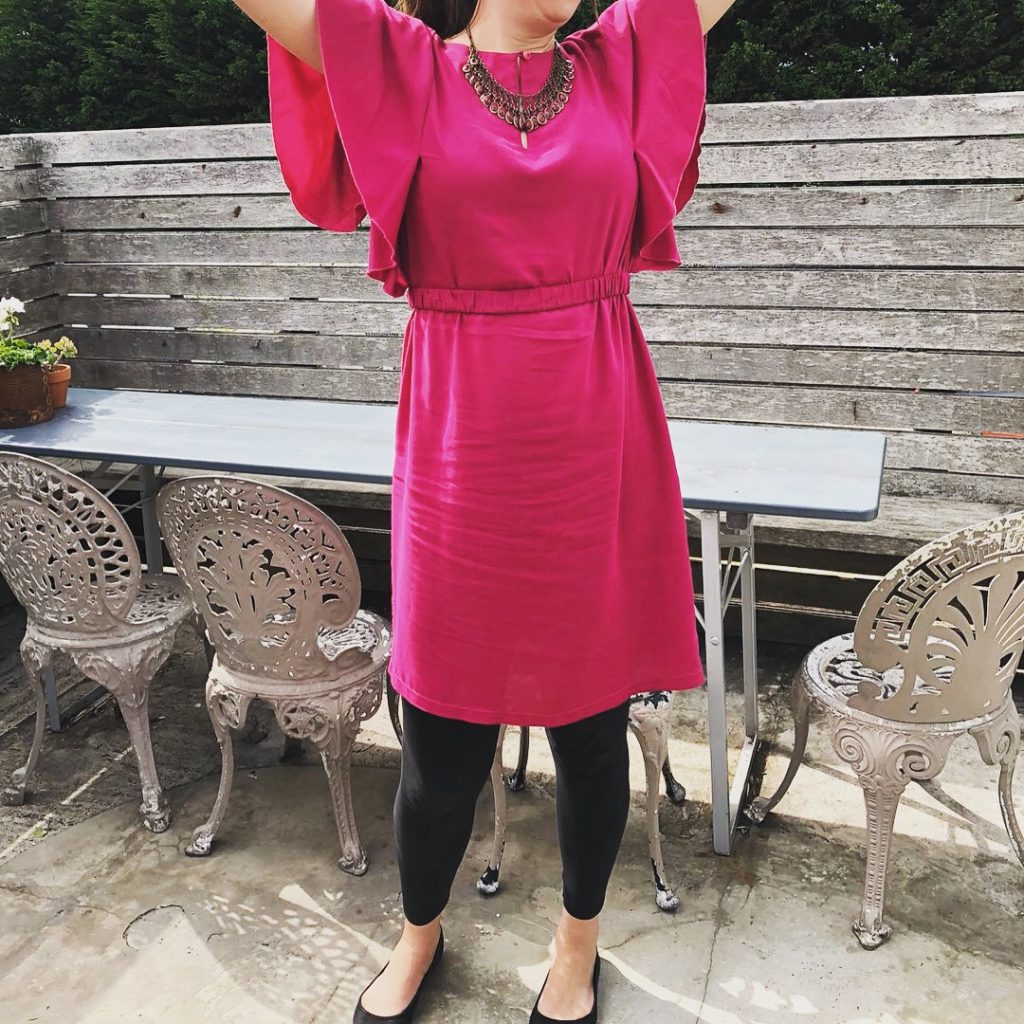
I really love this dress and am totally inspired to make up more of the Burda magazine patterns now.


