I’d decided to make my bridesmaid dresses for a few reasons. I hoped to save money by doing this, I could also customise them to a style I wanted, and it would be a challenge for me. In my mind I wanted everything to be ‘made by me’ for this wedding – except for the male clothing – this would have been a step too far!
I’d chosen my three bridesmaids; my best friend and my two soon to be step daughters. I knew one of the step daughters wouldn’t be too keen on wearing a dress so I consulted with her first on the colour and style of the dress. She agreed to wear something blue and was happy with a knee length style. The wedding was planned for October so it could still be relatively warm. When I say warm… this is the UK and really we were just hoping for blue skies and no rain!
I started looking at bridesmaid dresses online to see if there was anything out there that I liked. I initially thought the dresses would be royal blue, so I’d researched different royal blue dresses. If I found something reasonably priced, there was a chance that I’d just buy them and save myself the hassle of sewing them.
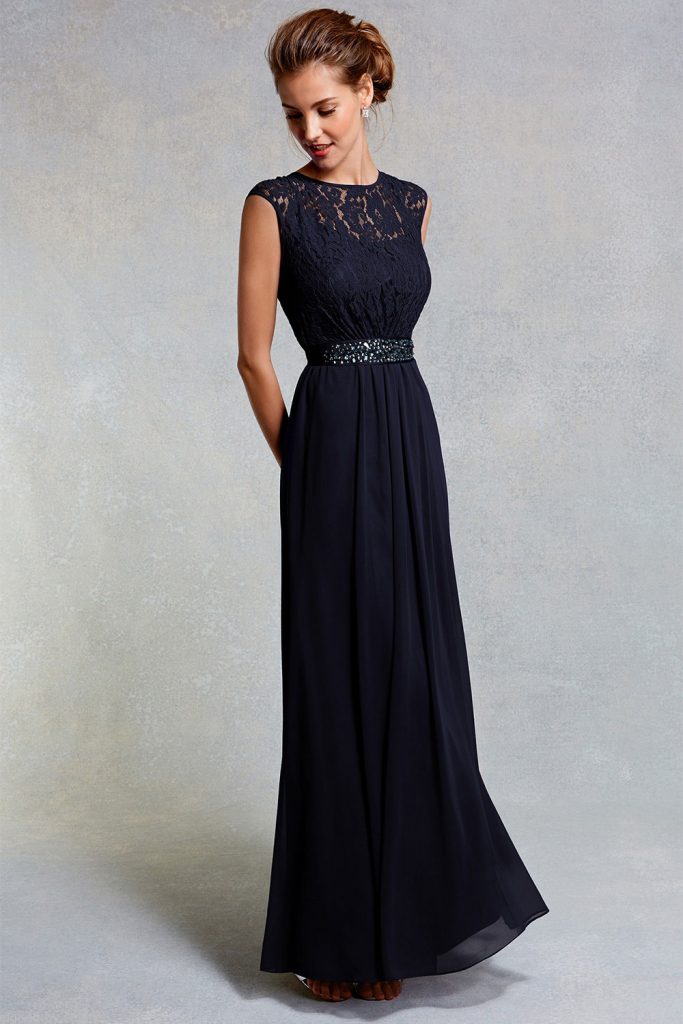
I wanted a fitted bodice with a full skirt and liked the idea of combining lace with other fabrics. After a search on the internet at a variety of bridesmaid dress shops and other high street brands, I came up with these:
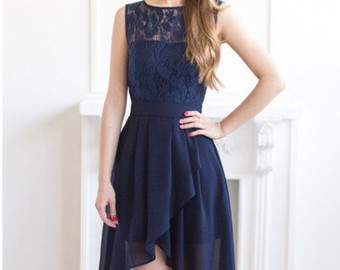
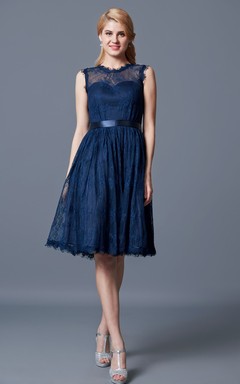
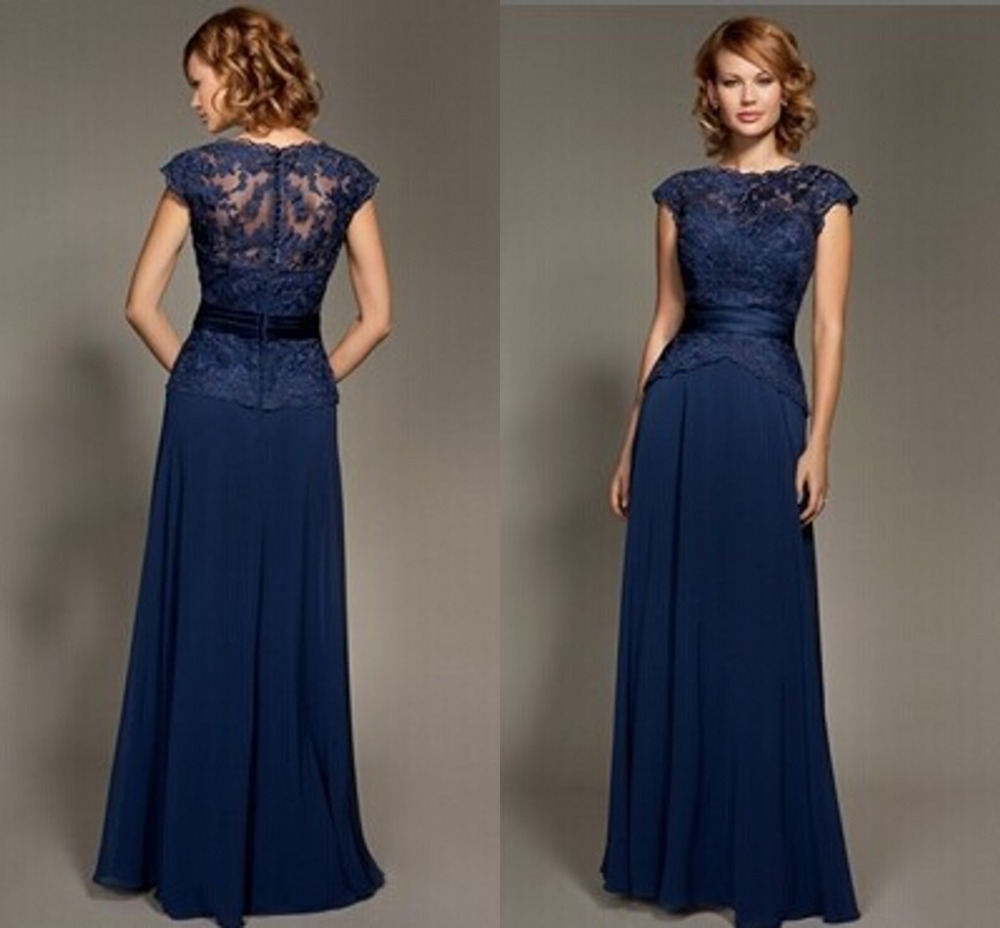
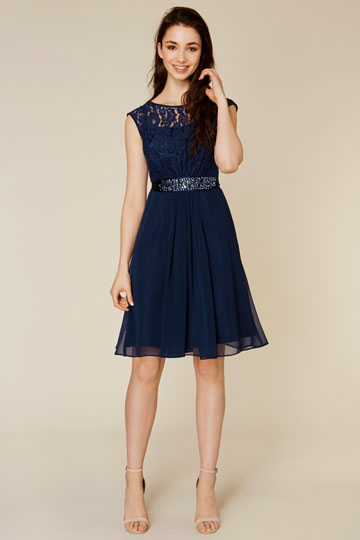
My favourite dress was this last one, a Lori Lee short lace dress from Coast. It was £109 in the shop, so a total of £327 for all three dresses if I were to buy them.
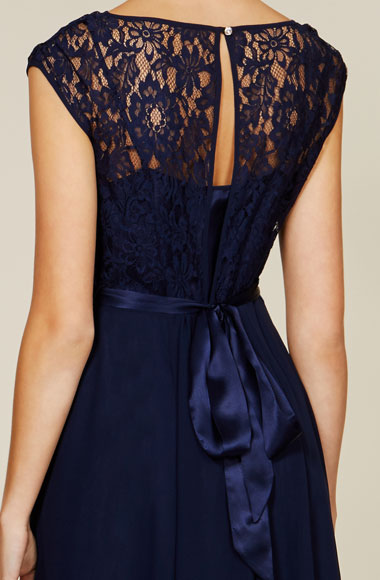
Although that’s not a huge amount of money to spend on beautiful bridesmaid dresses, I decided to steal the style idea from Coast and create my own bridesmaid dresses. I hoped to spend around £100 on all three dresses, rather than just one. I ran the idea past the three bridesmaids and they were very happy. I wasn’t too keen on the sparkly belt and wanted a fuller skirt in heavier fabric. It looks like the Lori Lee dress skirt is made in chiffon fabric which I hate sewing with and would also be a little bit too floaty.
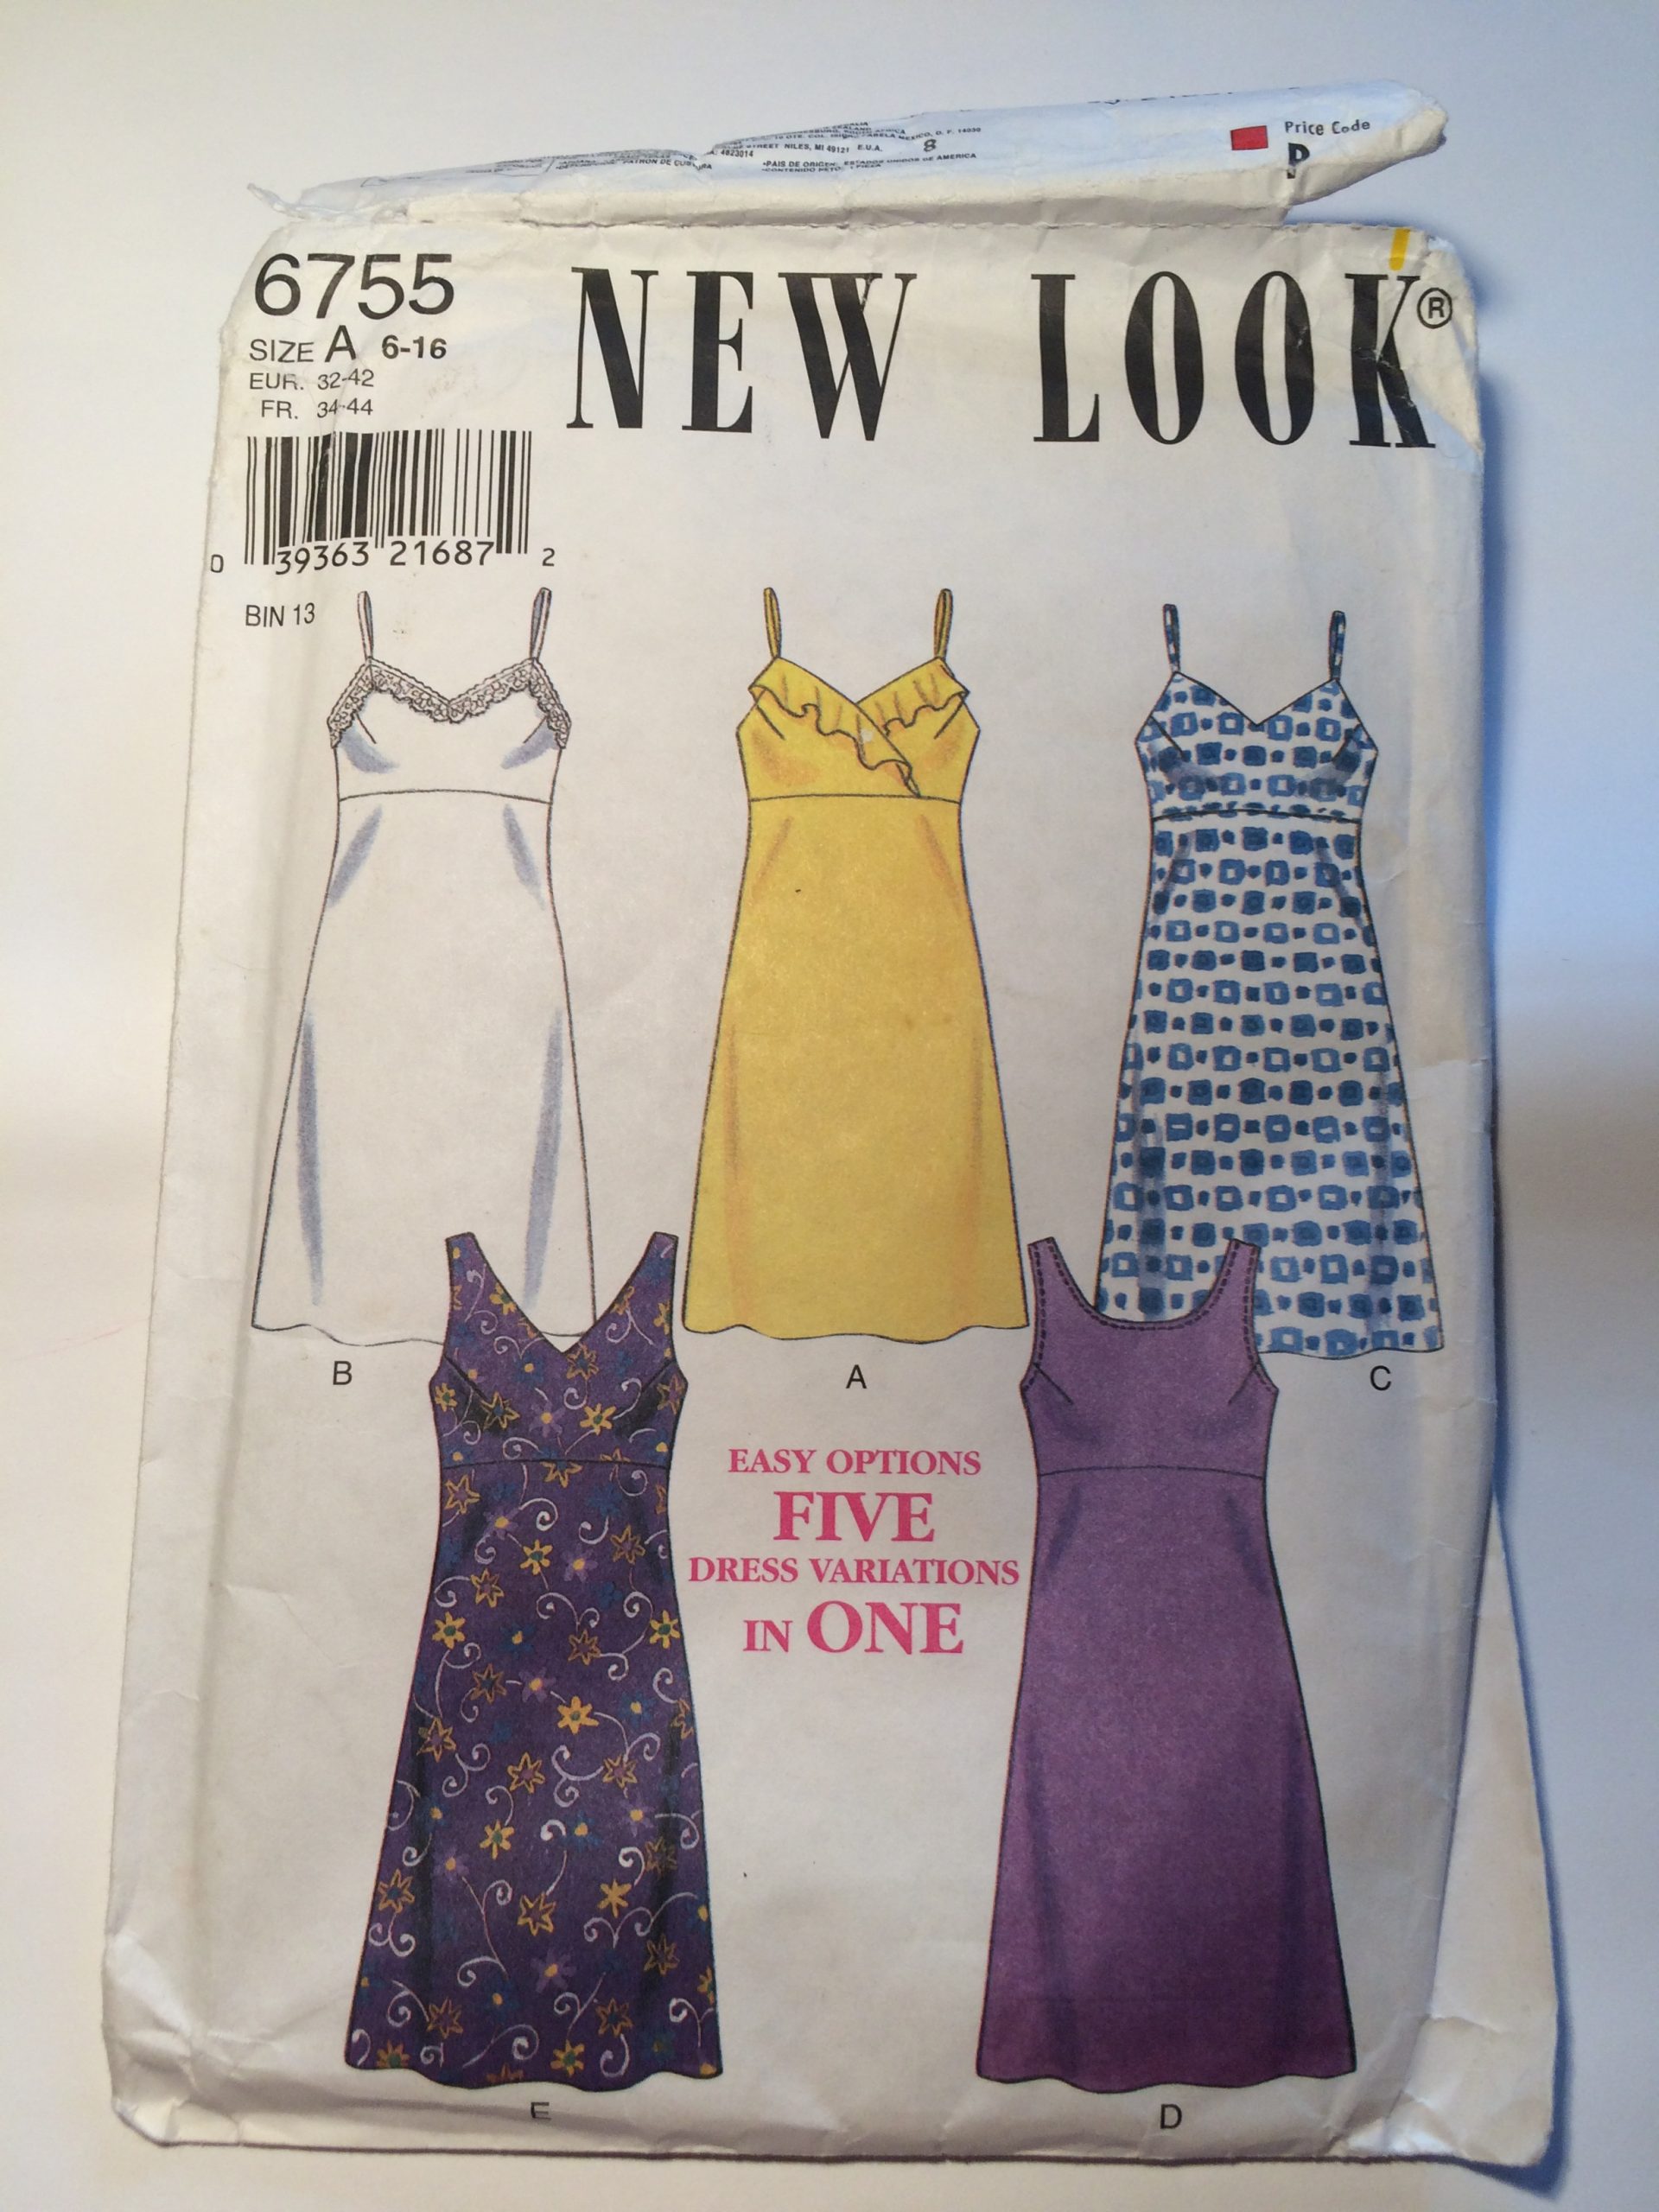
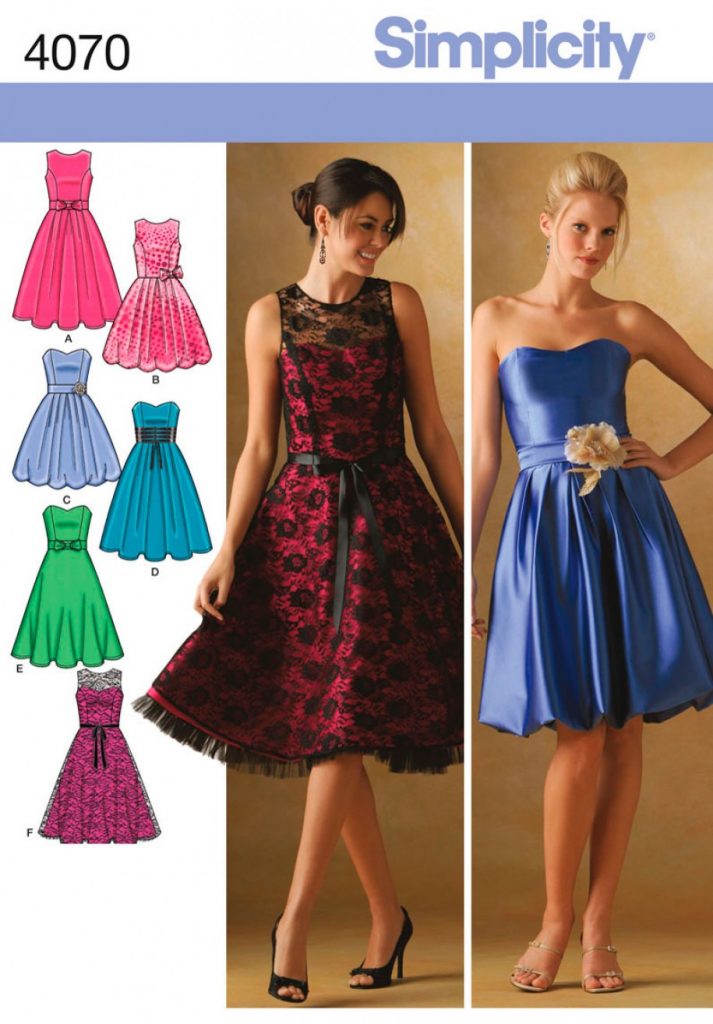
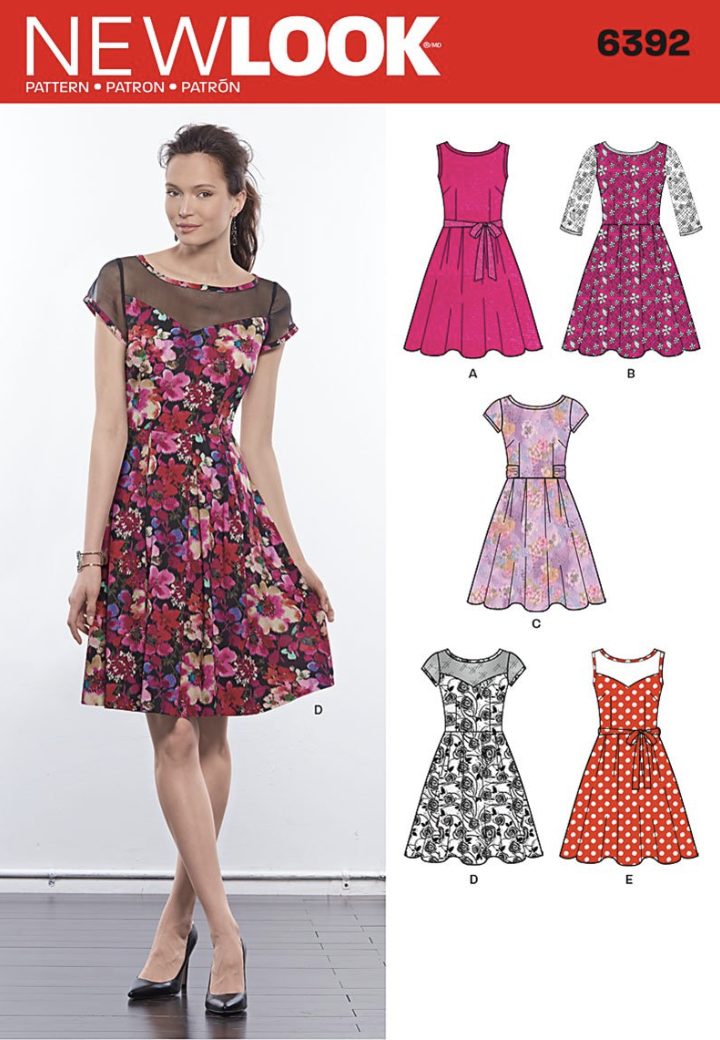
I went looking for commercial sewing patterns to adapt. As I wanted a lace bodice, I needed a slip dress to go underneath. I found the ideal pattern for the slip in my pattern drawer, New Look 6755. I wanted to add a midriff band to this, so I needed a pattern for that. I dug out another pattern, New Look K6023 which had the band I wanted. I also needed a pattern for the outer dress layer. I could use the midriff band from K6023 again and chose the full pleated skirt from Simplicity 4070. For the bodice I would adapt New Look 6392.

This might be a strange, long winded way of creating a pattern, but this method works for me – mix and match and adapt commercial patterns, instead of drafting from scratch.
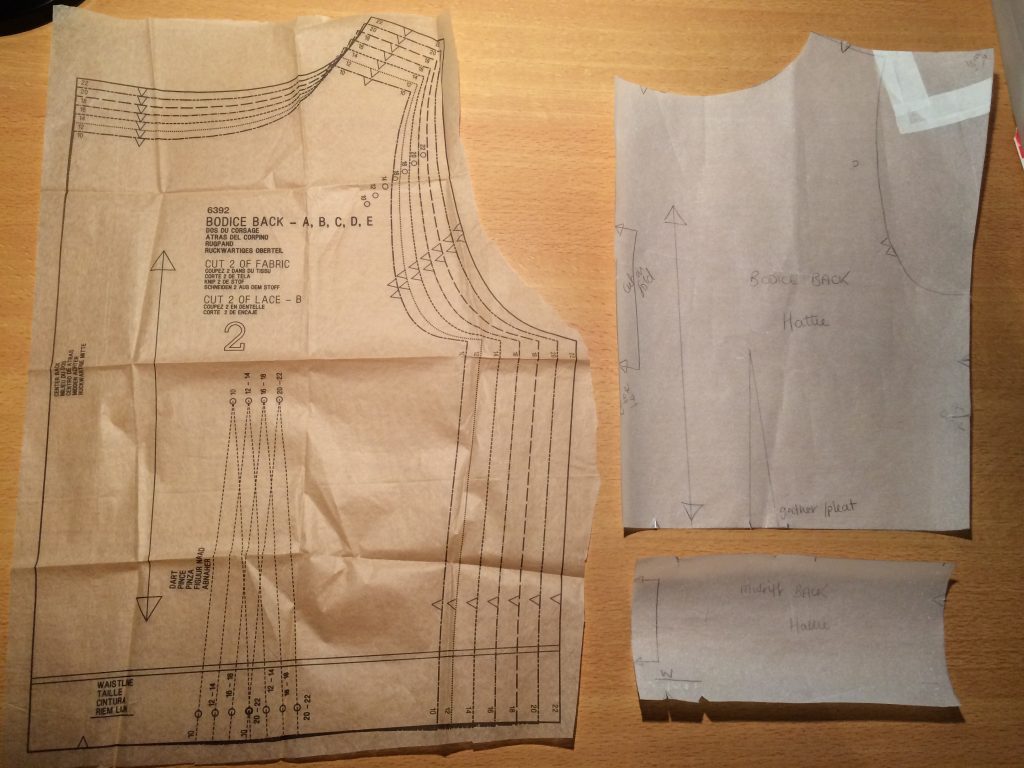
I set about adapting the pattern for the lining first. I traced the midriff front and back bands from New Look K6023 and picked style C from New Look 6755. I needed to extend the length of the front and back bodice pieces, match the bottom of these to the midriff band, and then match this to the skirt section.
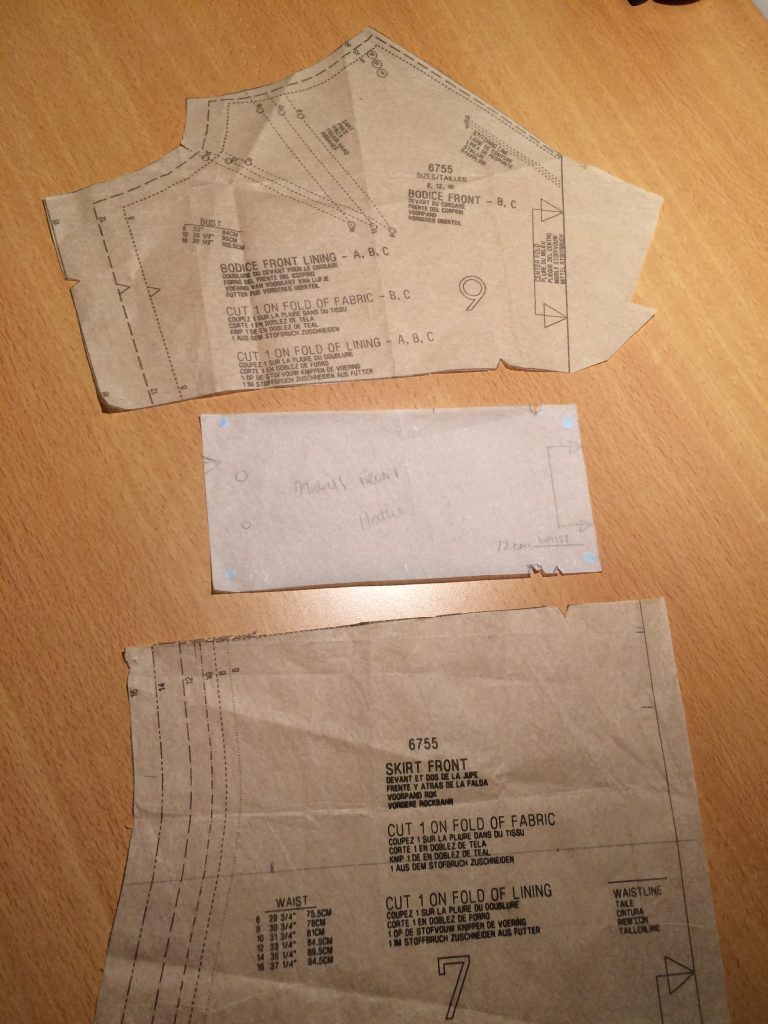
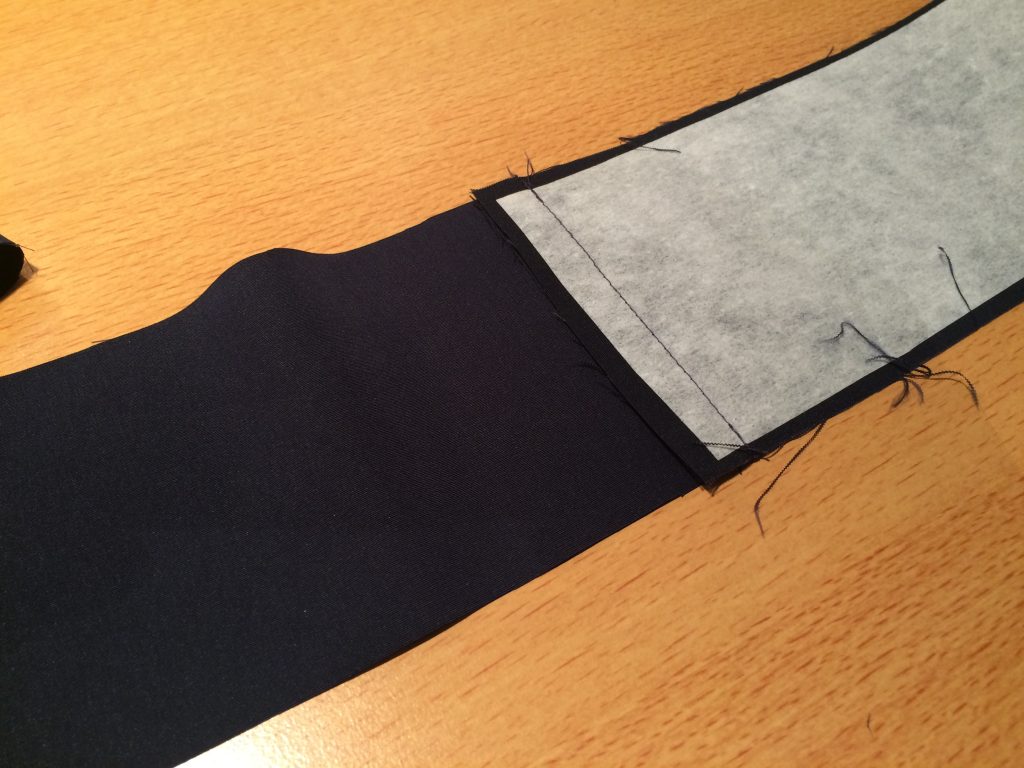
Both the midriff band and the skirt pattern had the waistline marked, so I could work out how much I needed to extend the top. I matched up the midriff band to the skirt pattern and measured how much there was left above this. This was the amount I needed to add to the bodice pattern, less the seam allowances.
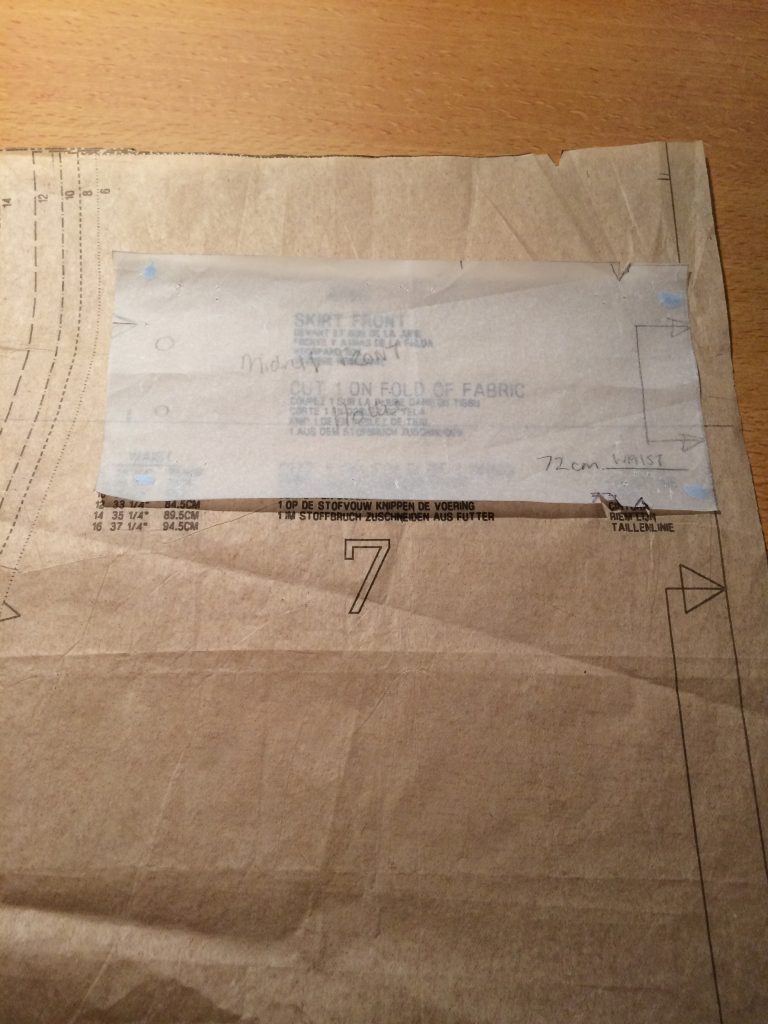
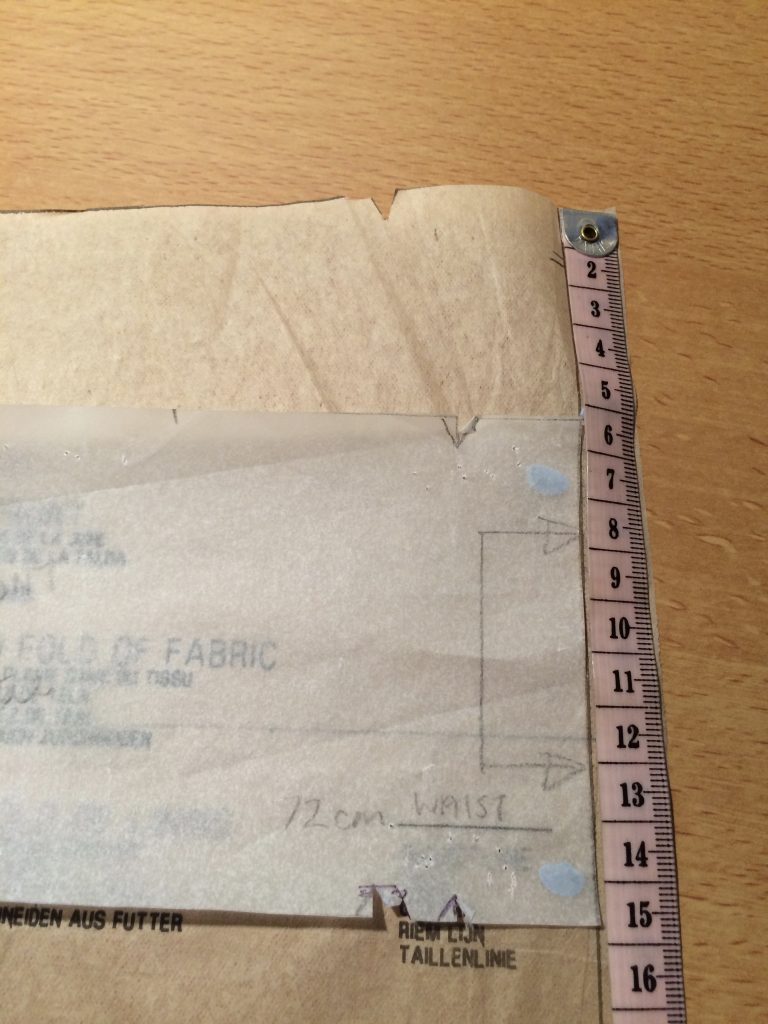
The section of skirt above the midriff in the photo is approximately 5cm. This includes 1.5cm of seam allowance. There was already seam allowance on the bodice section so I just needed to add 3.5cm to the bodice.
I traced the bodice front and added the extra 3.5cm to the bottom of the pattern. I made sure the midriff band and the bodice would match and added some notches. I then used the skirt pattern from New Look 6755 as a basic shape and traced off the section I needed from below the midriff band, making sure this would match the midriff band and also fit at the hips. I added a bit of extra flare to make the skirt slightly more full. The shoulder strap didn’t need any adjustments.
I made similar adjustments to the back pattern pieces and chose to have a side seam zip, instead of the centre back zip – this meant taking seam allowance off the centre back so the back would be cut on the fold.
I now had all my pattern pieces ready for the dress lining.


The next part was to create the pattern for the outer dress.
I could use the pleated skirt from Simplicity 4070 and midriff from K6023 but I would need to adapt the bodice from New Look 6392. I’d chosen this bodice pattern because I wanted a pattern with darts and not princess seams. The lace needed to have as few seams as possible and my intention was to change the darts to gathers, so the lace would drape loosely over the lining.
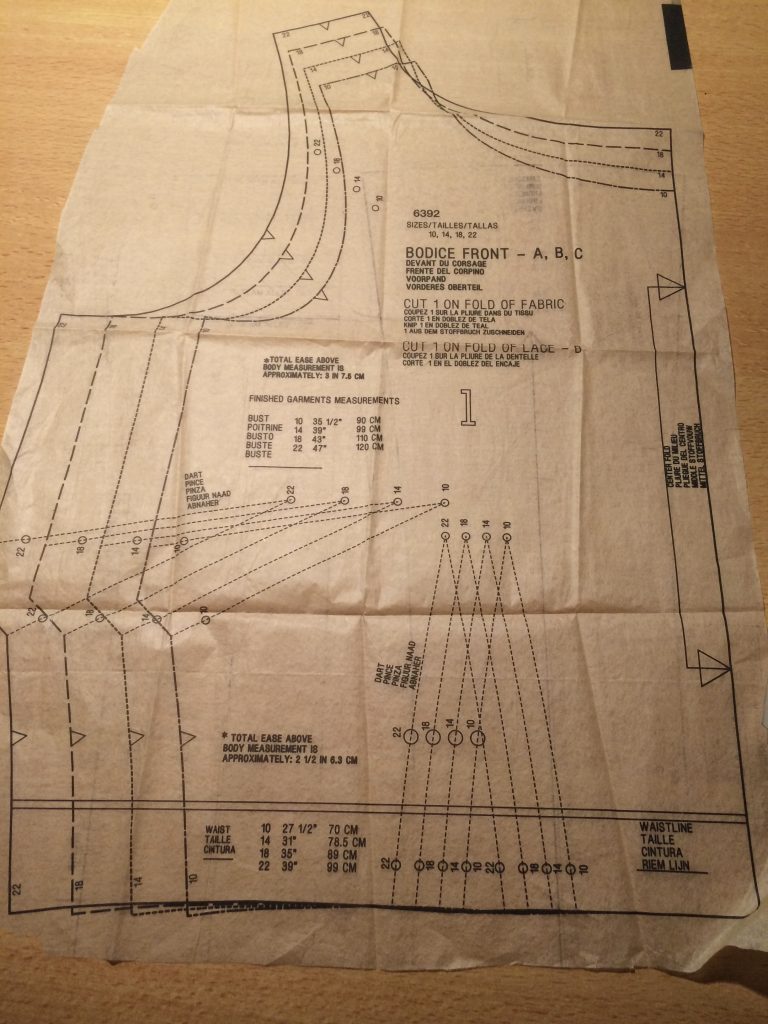
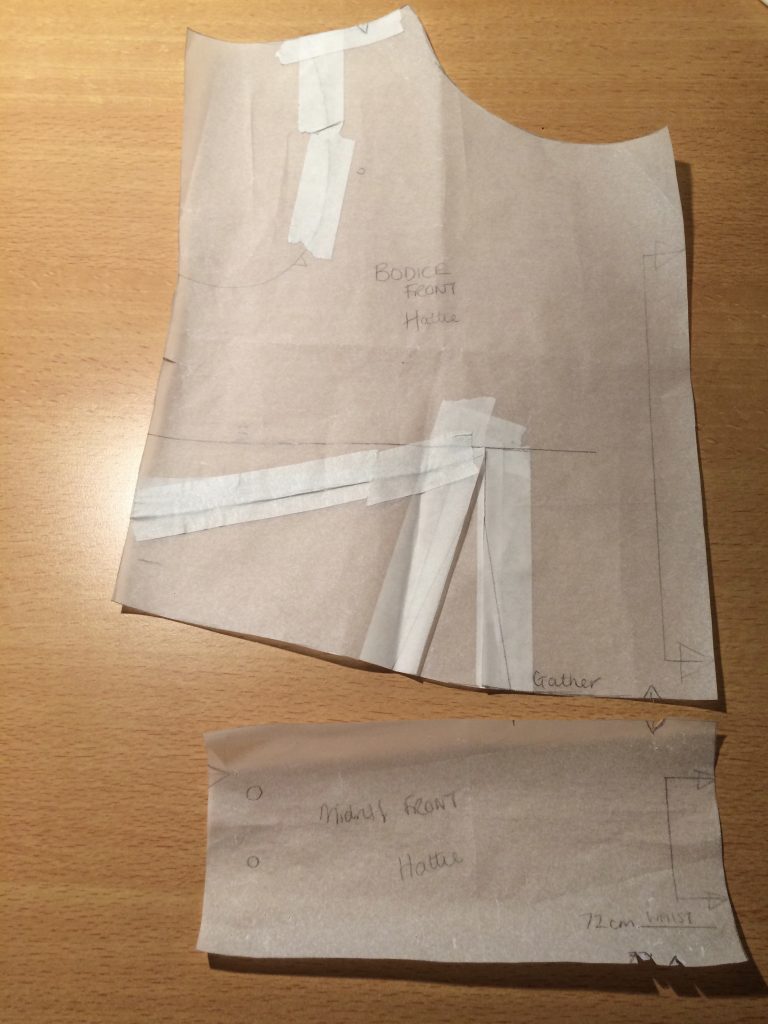
The bodice front could be easily adjusted. I needed to shorten it, to accommodate the midriff band, extend the shoulder seam to create a ‘grown on’ cap sleeve, close up the underarm bust dart and open up the waist dart. I traced off the pattern, shortening it by the required amount, extended the shoulder, cut up through the centre of the waist dart and folded the underarm dart closed. I put some paper under the pattern where I’d opened the waist dart and added in notches to match to the midriff band.
The back was adapted in a similar way, shortening the pattern to accommodate the midriff band and lengthening the shoulder seam to match the front. The back was to be cut on the fold, so the seam allowance was taken off the centre back.
Now all I had to do was create patterns for the other two bridesmaids and make the dresses!
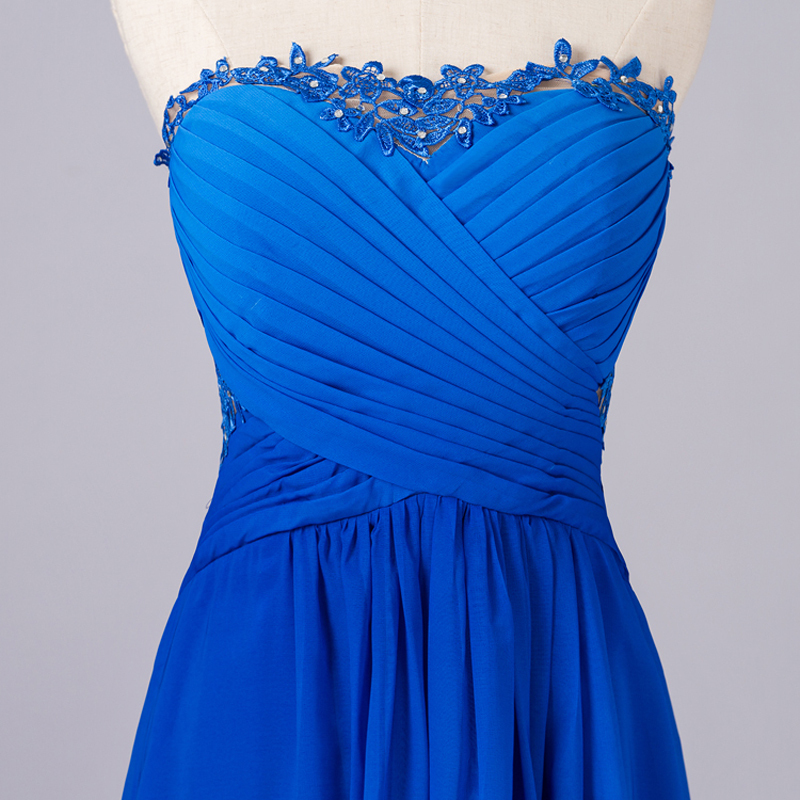
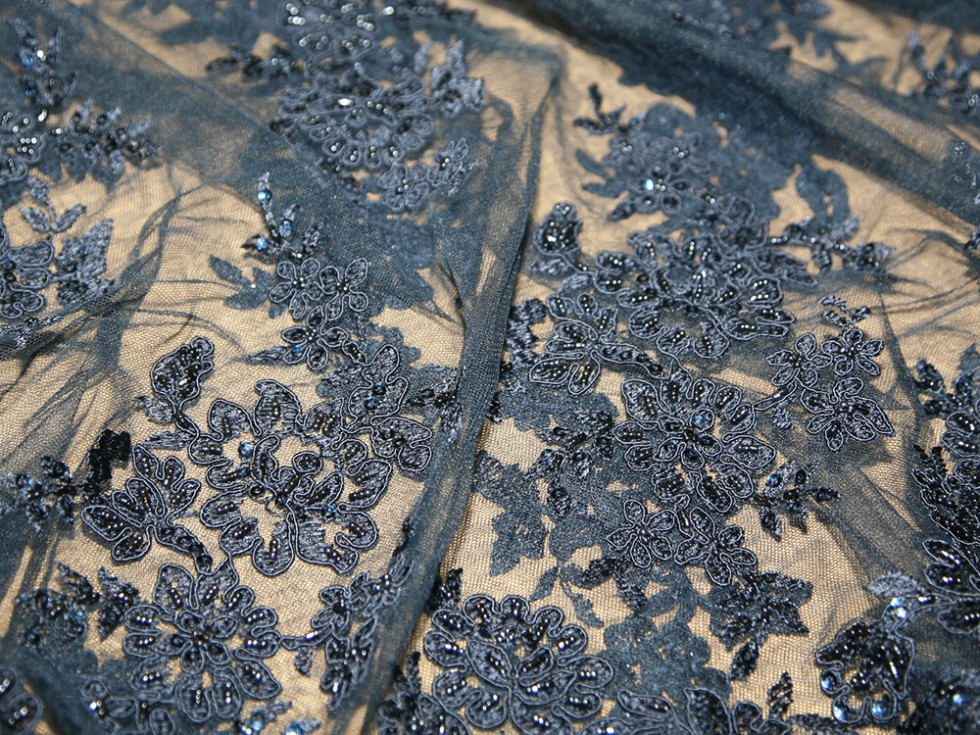
I’d been looking for fabrics for a while and had gone off the idea of royal blue. I’d decided on navy blue and was planning to team it with hot pink shoes and flowers. I had a lot of difficulty in finding a lace that I liked which wasn’t too expensive. I also had lots of trouble trying to find the exact same navy blue colour for each of the fabrics. I finally chose the Naomi beaded lace from Minerva Crafts and found a viscose fabric in Fabric Land for the lining. For the main skirt I’d chosen a navy polyester peachskin fabric from Minerva Crafts which had a really excellent weight and drape.
I made toiles of the dress first and then fitted these. After a few adjustments I was ready to make the real thing.
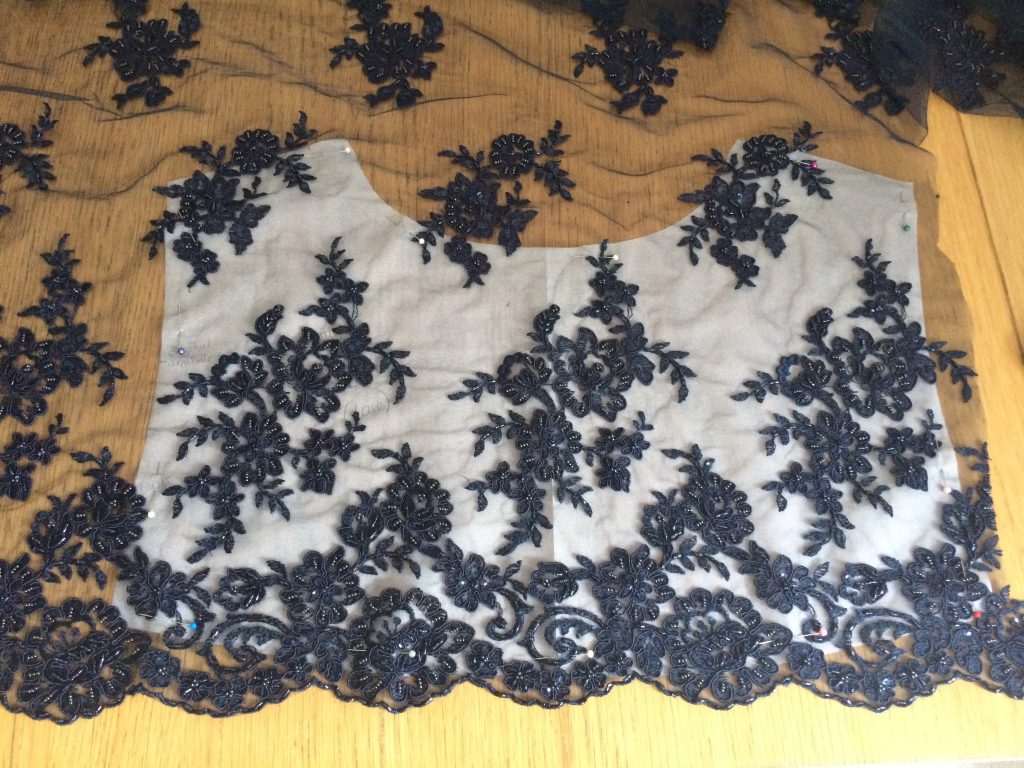
I was really scared about cutting the lace fabric as I knew I’d got just enough for the dresses, and didn’t want to spend more money to buy extra if I went wrong. I needed to place the pattern in exactly the right place to align the motifs evenly. I decided the best way to do this was to cut out a whole pattern piece for the front and the back, rather than one which would be cut on the fold. I also found it easier to place the pattern under the fabric to work out the best position before cutting.
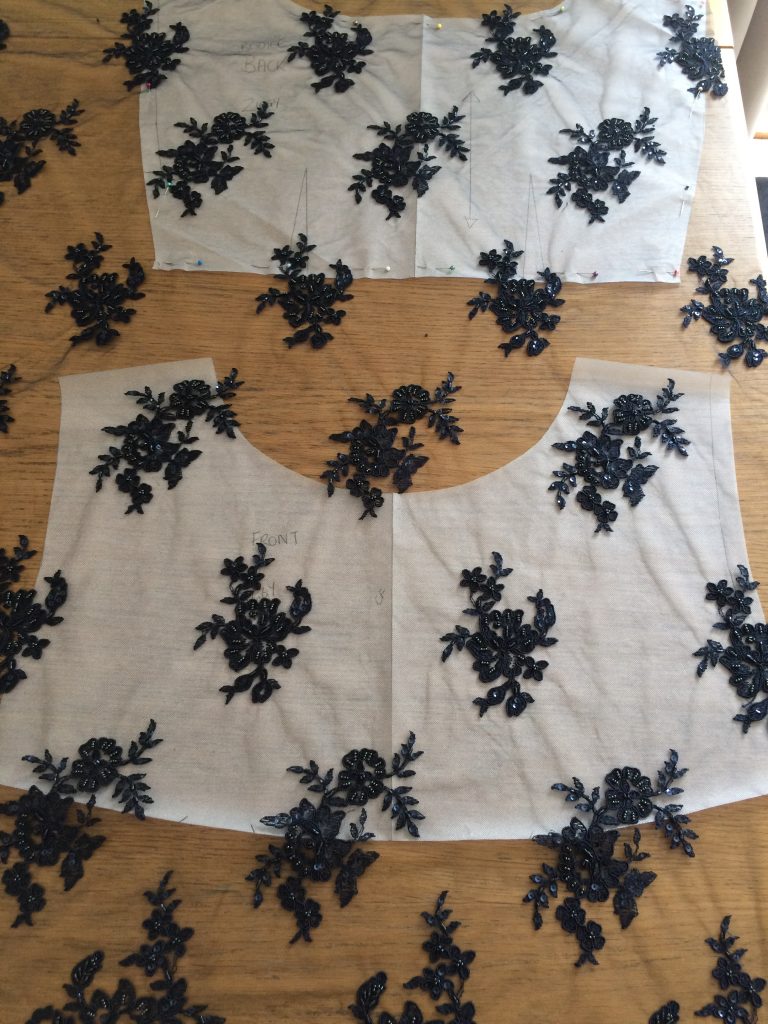
For the first dress I thought I’d cut out and stitch additional lace motifs in the gaps.
I transferred the markings for the centre back and side seam using yellow thread.
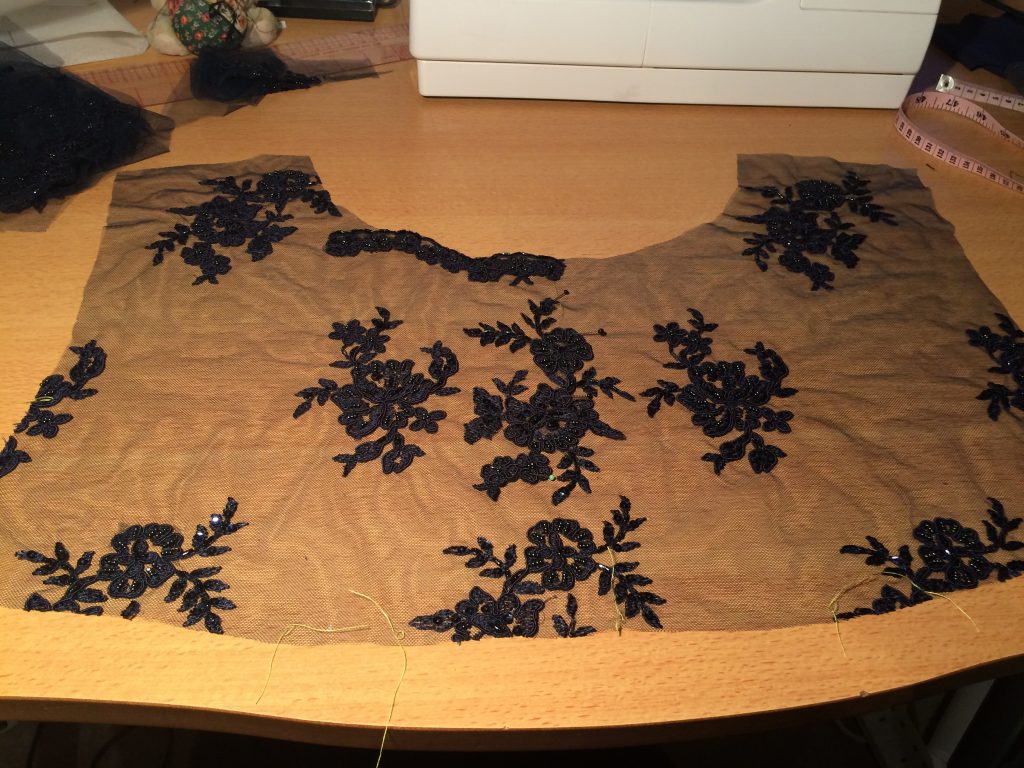
Having hand stitched the lace motifs onto the front to fill in the gaps I rethought my plan, and cut the next dress front from a side border section of the lace.
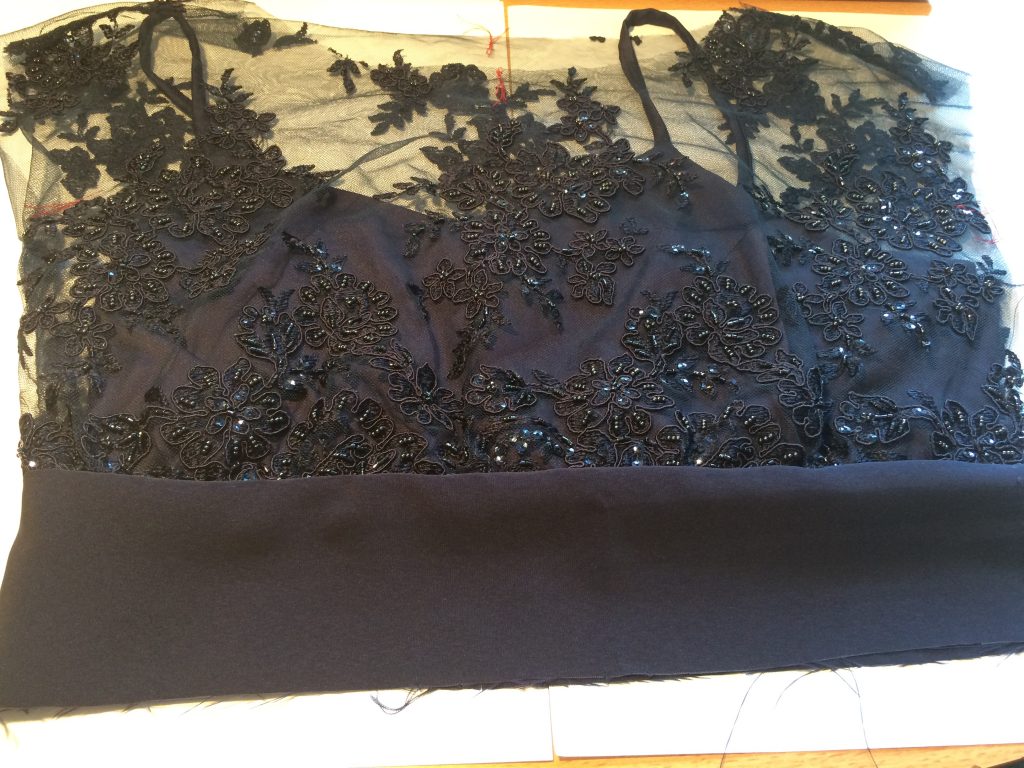
I cut out the lining pieces and constructed the bodice section. I attached the front to the back and left the side seam open. I then made up the lace bodice section, using French seams for the shoulder seams and side seam. I attached the lace bodice to the lining at the bottom, to keep these layers together. The midriff band was added next, attaching the lining midriff and outer midriff bands at the same time.
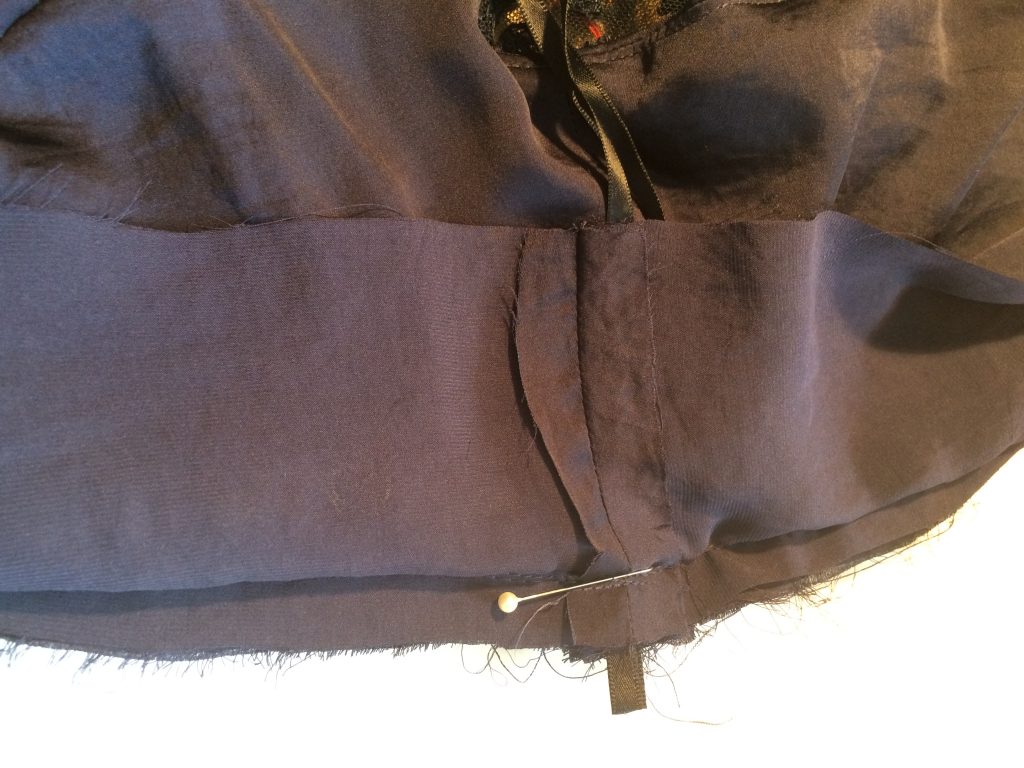
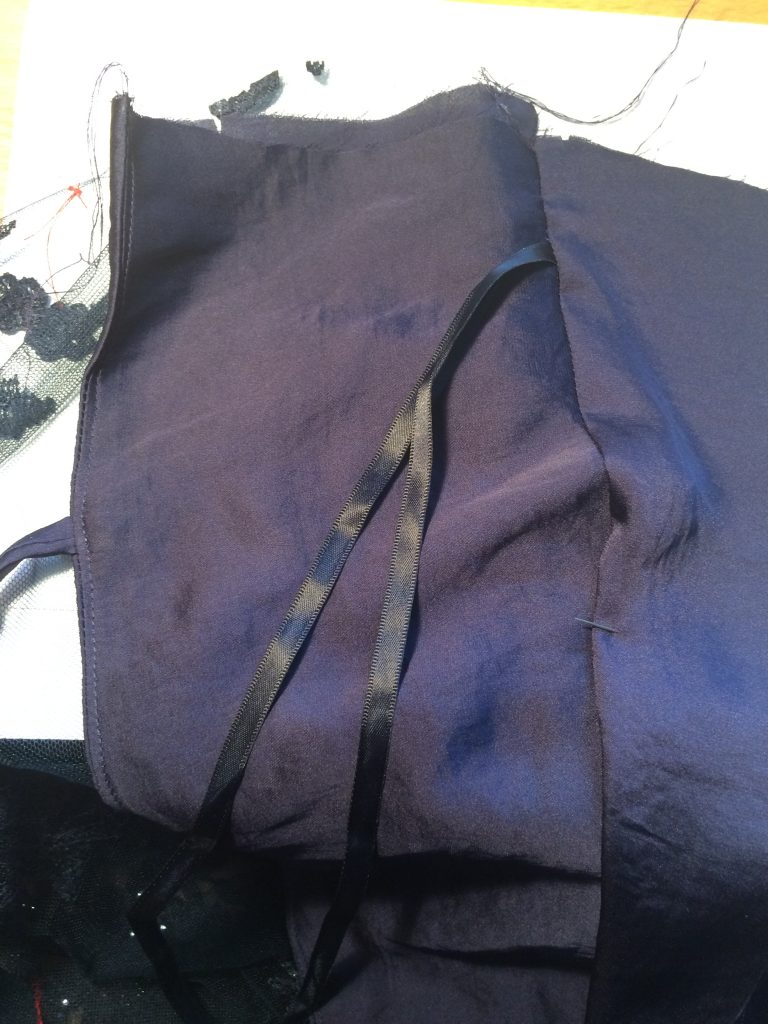
On the lining section I added some ribbon loops to support the dress when it was hanging up – I didn’t want the lace to take the weight of the dress on the hanger and stretch out of place.
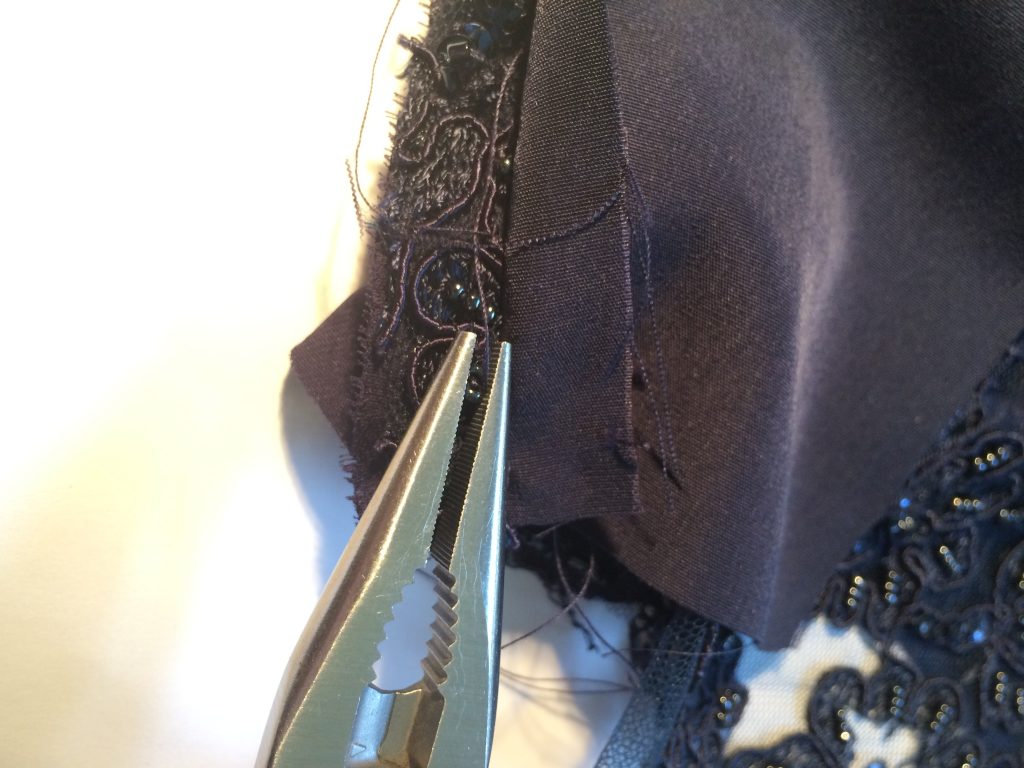
To reduce the bulk from the beads which were now within the seam allowance, I used pliers to squeeze and break the beads.
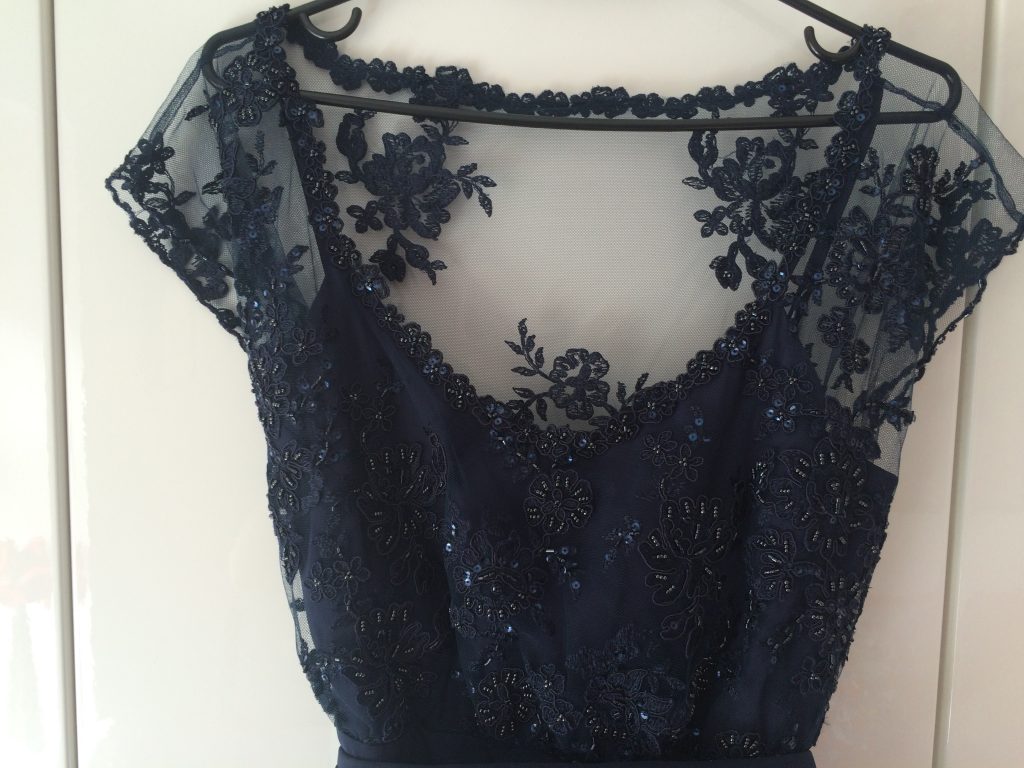
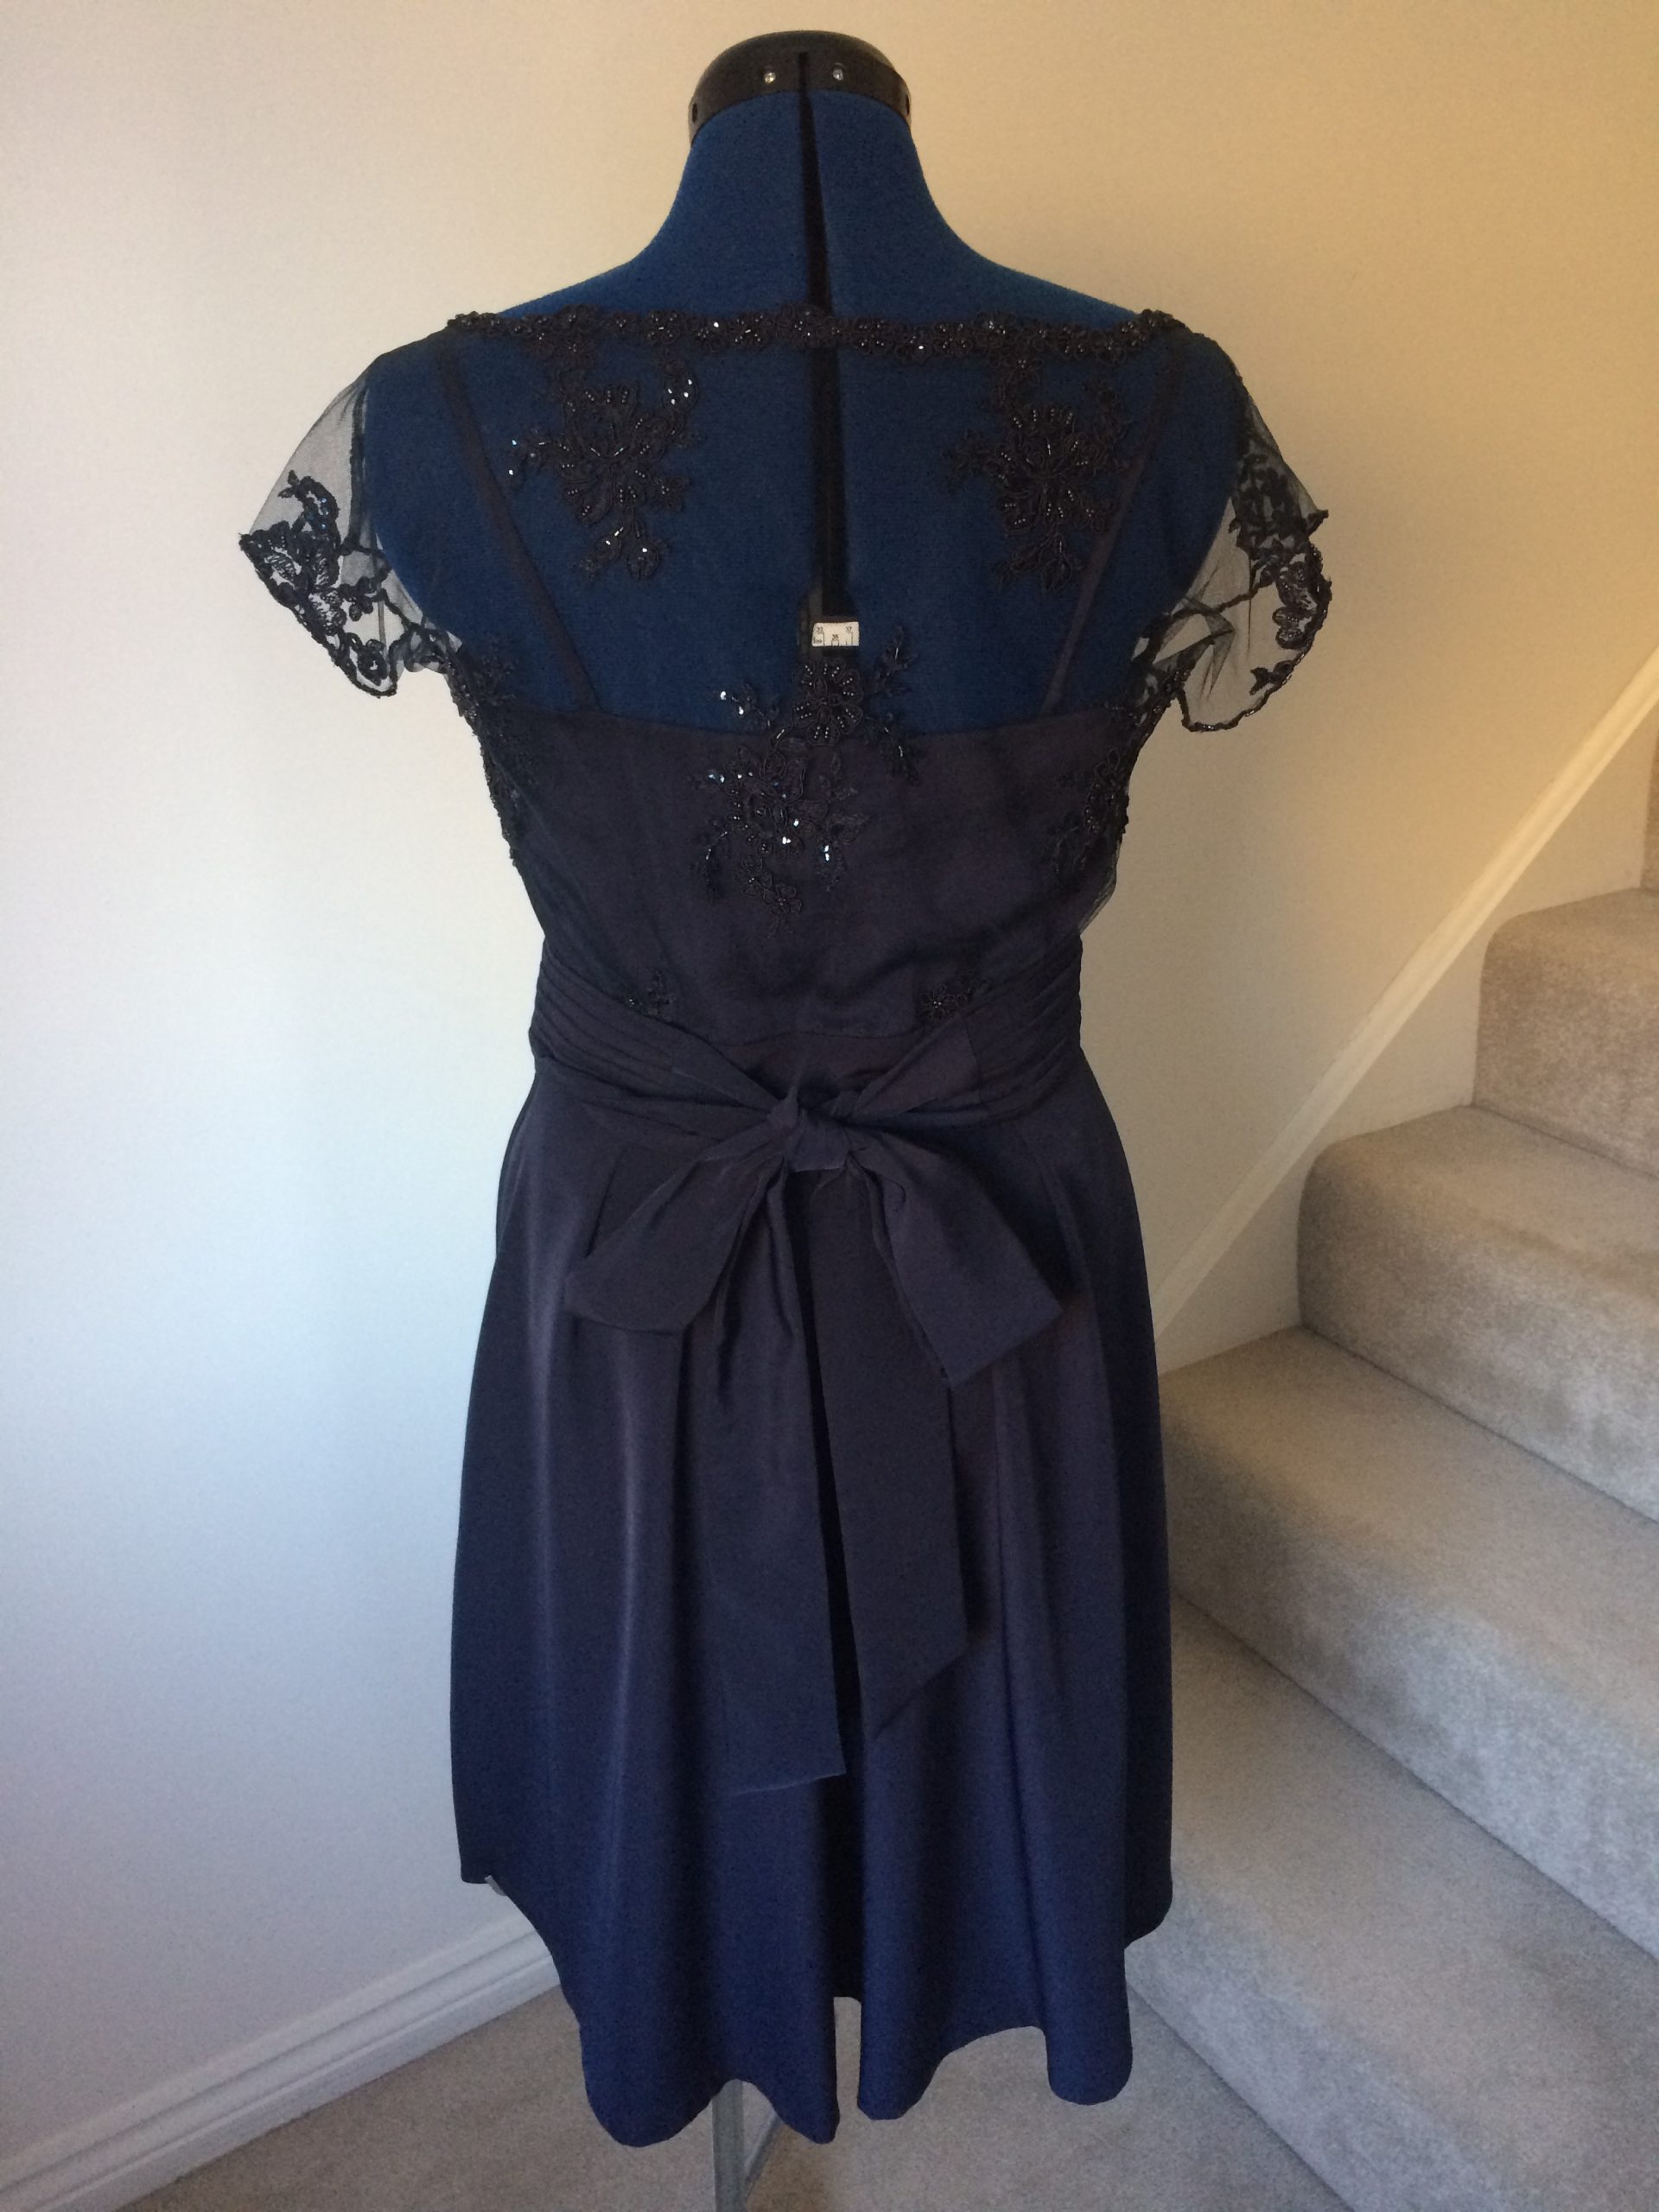
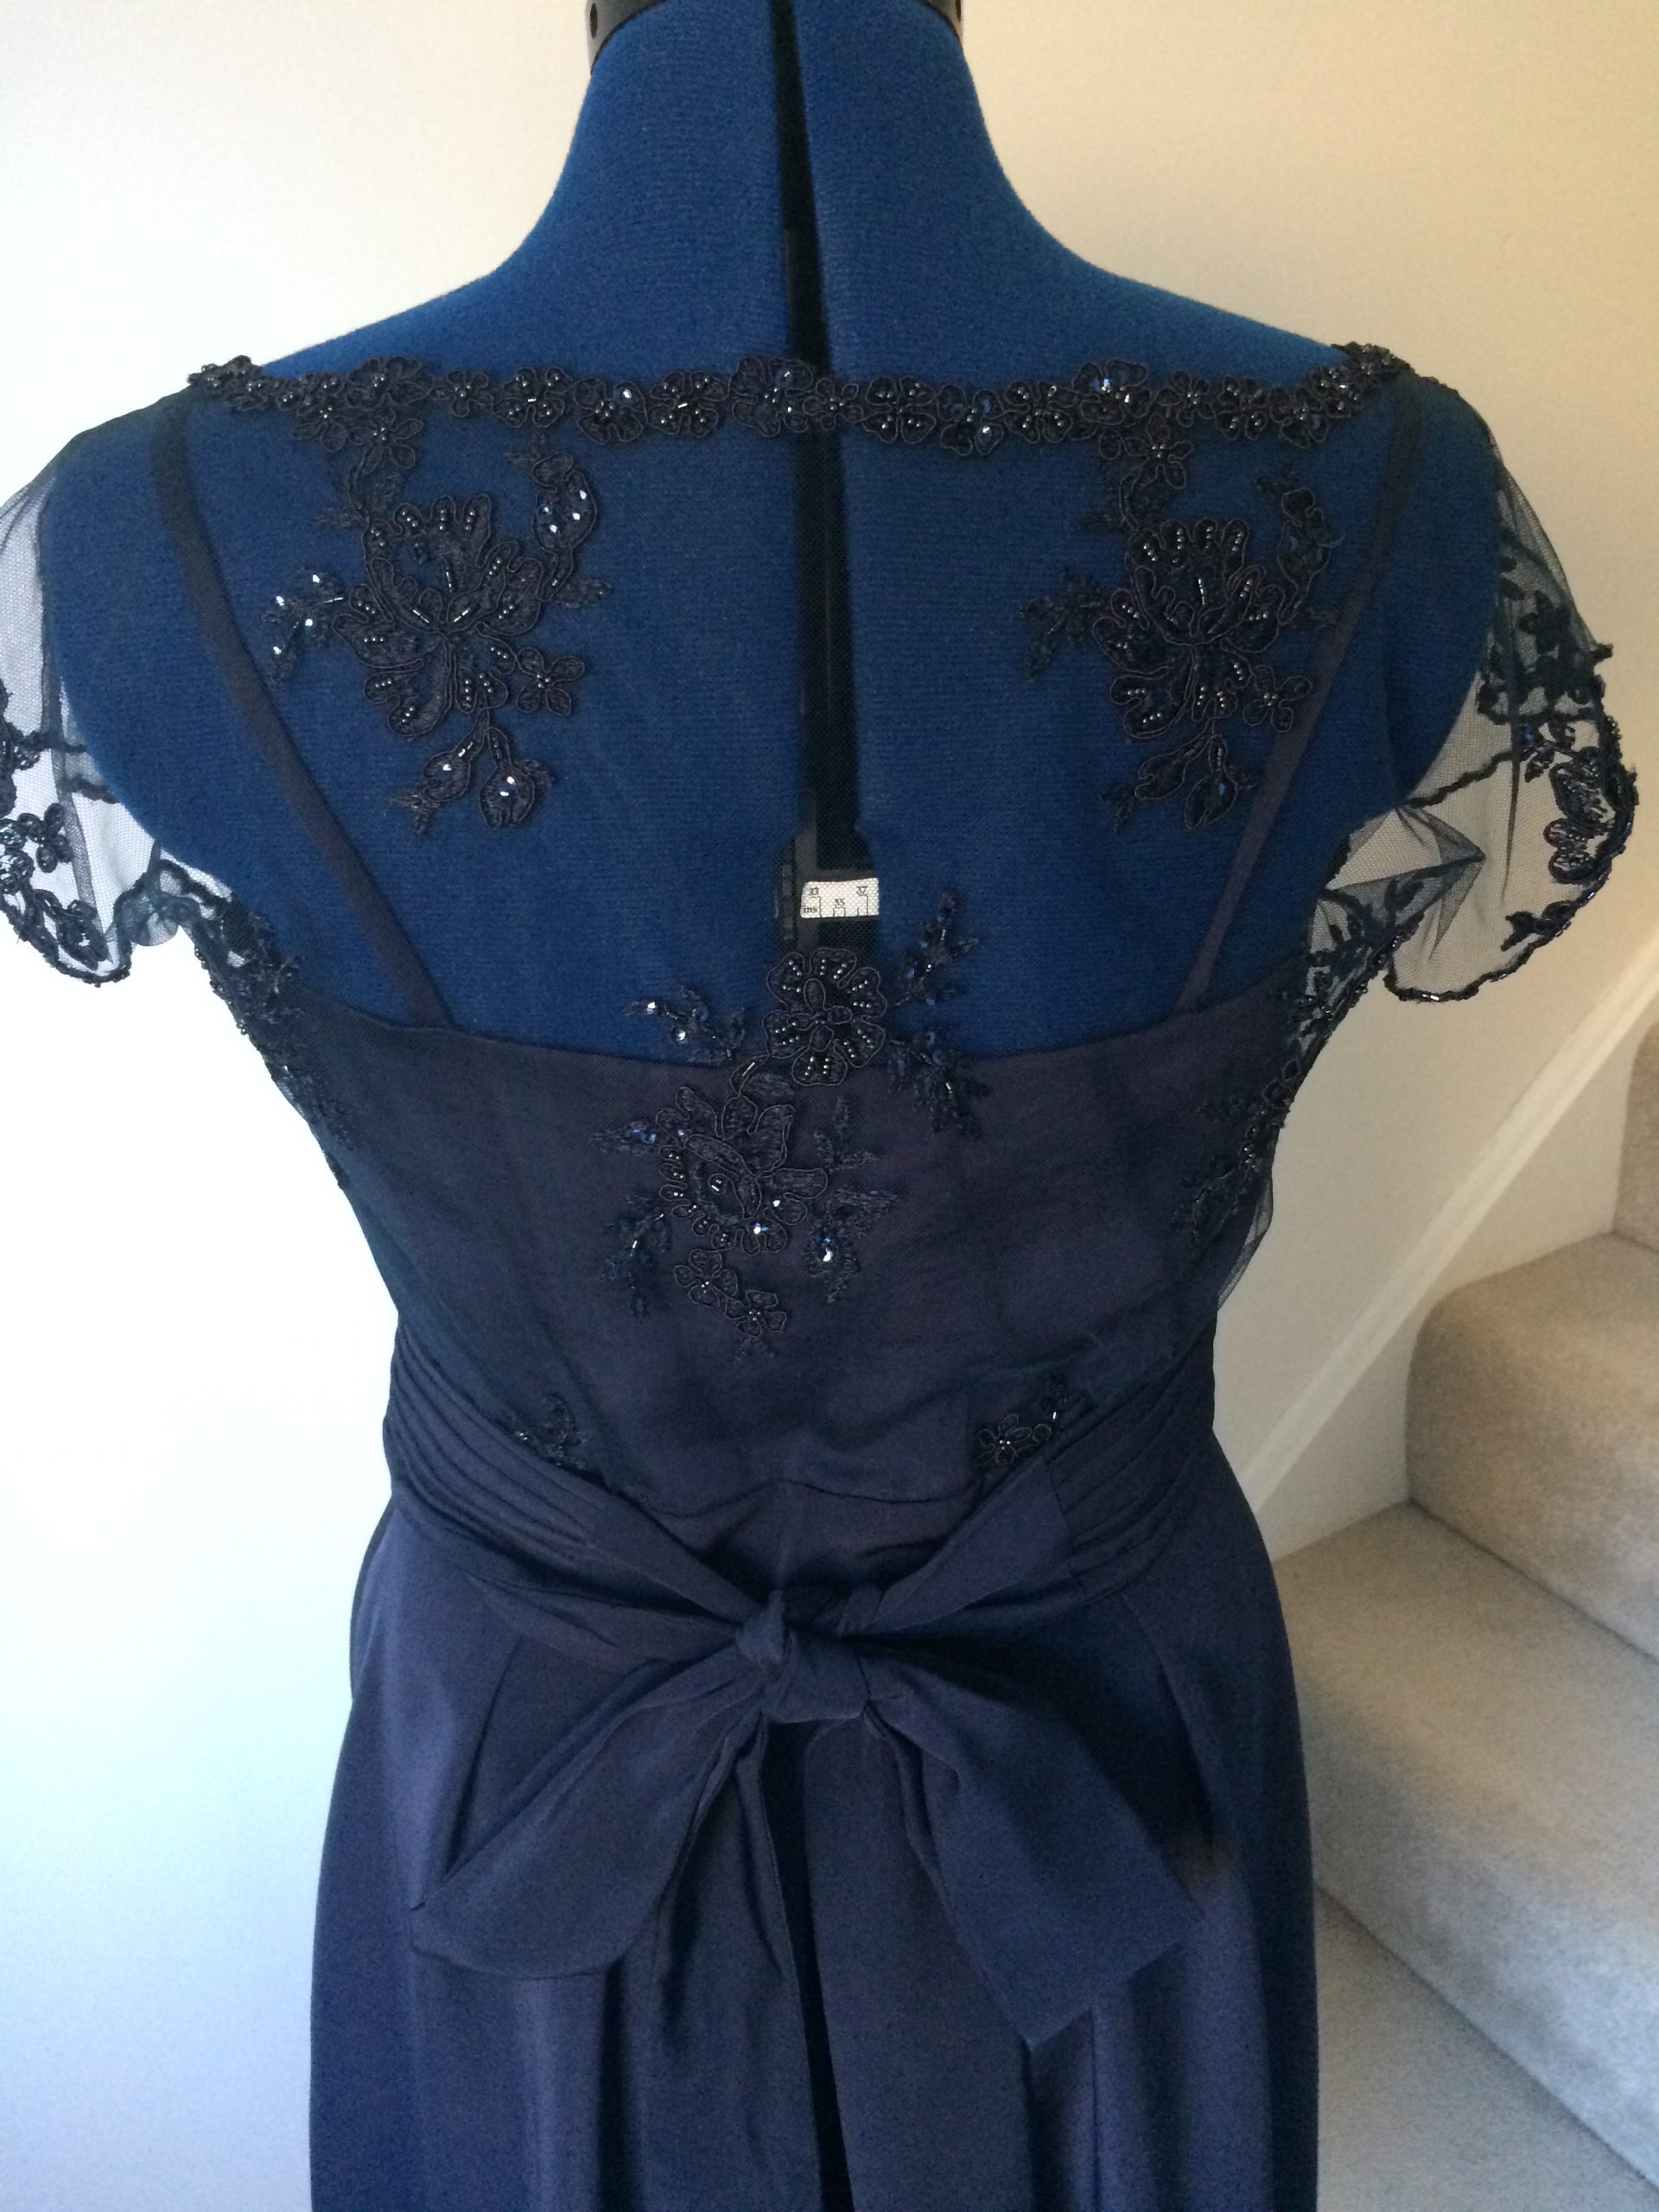
The skirt sections were added next, both to the outer layer and to the lining. I tried the dress on the mannequin to see how it looked. The next stage was to insert a concealed zip. The dress was then fitted to the bridesmaid, the hem length marked and the neckline lowered so the neckline would follow that of the lining.
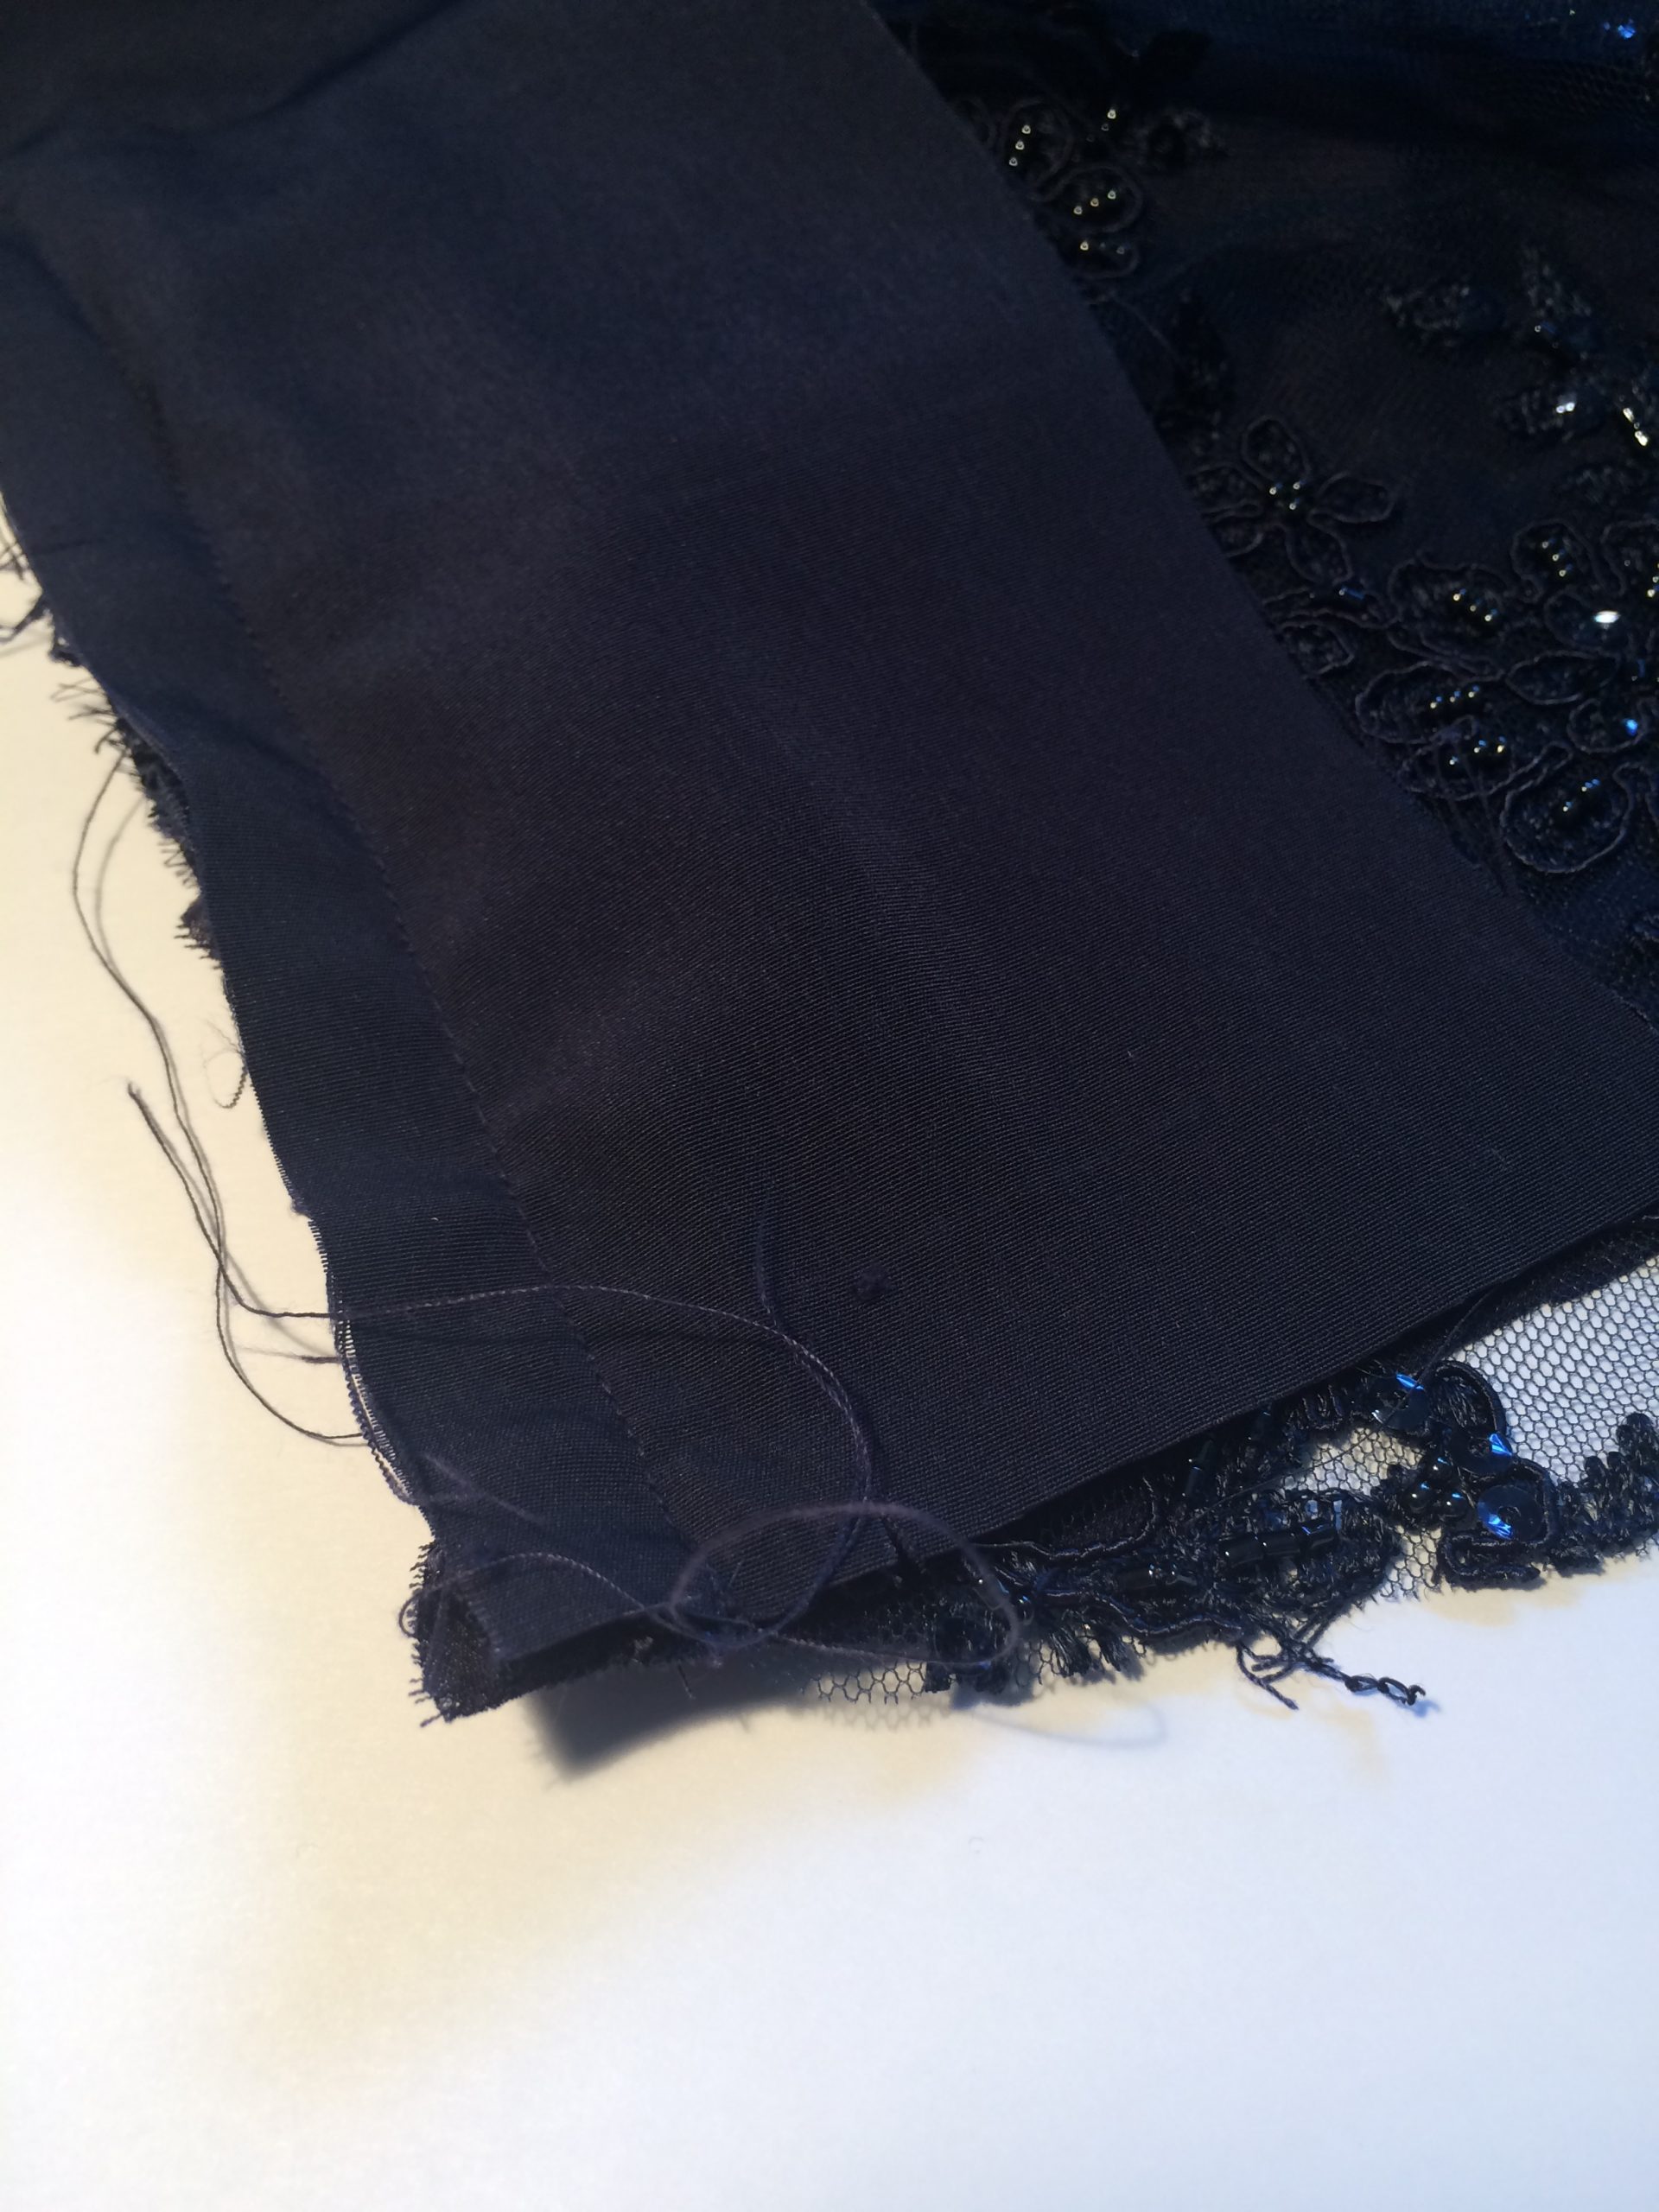
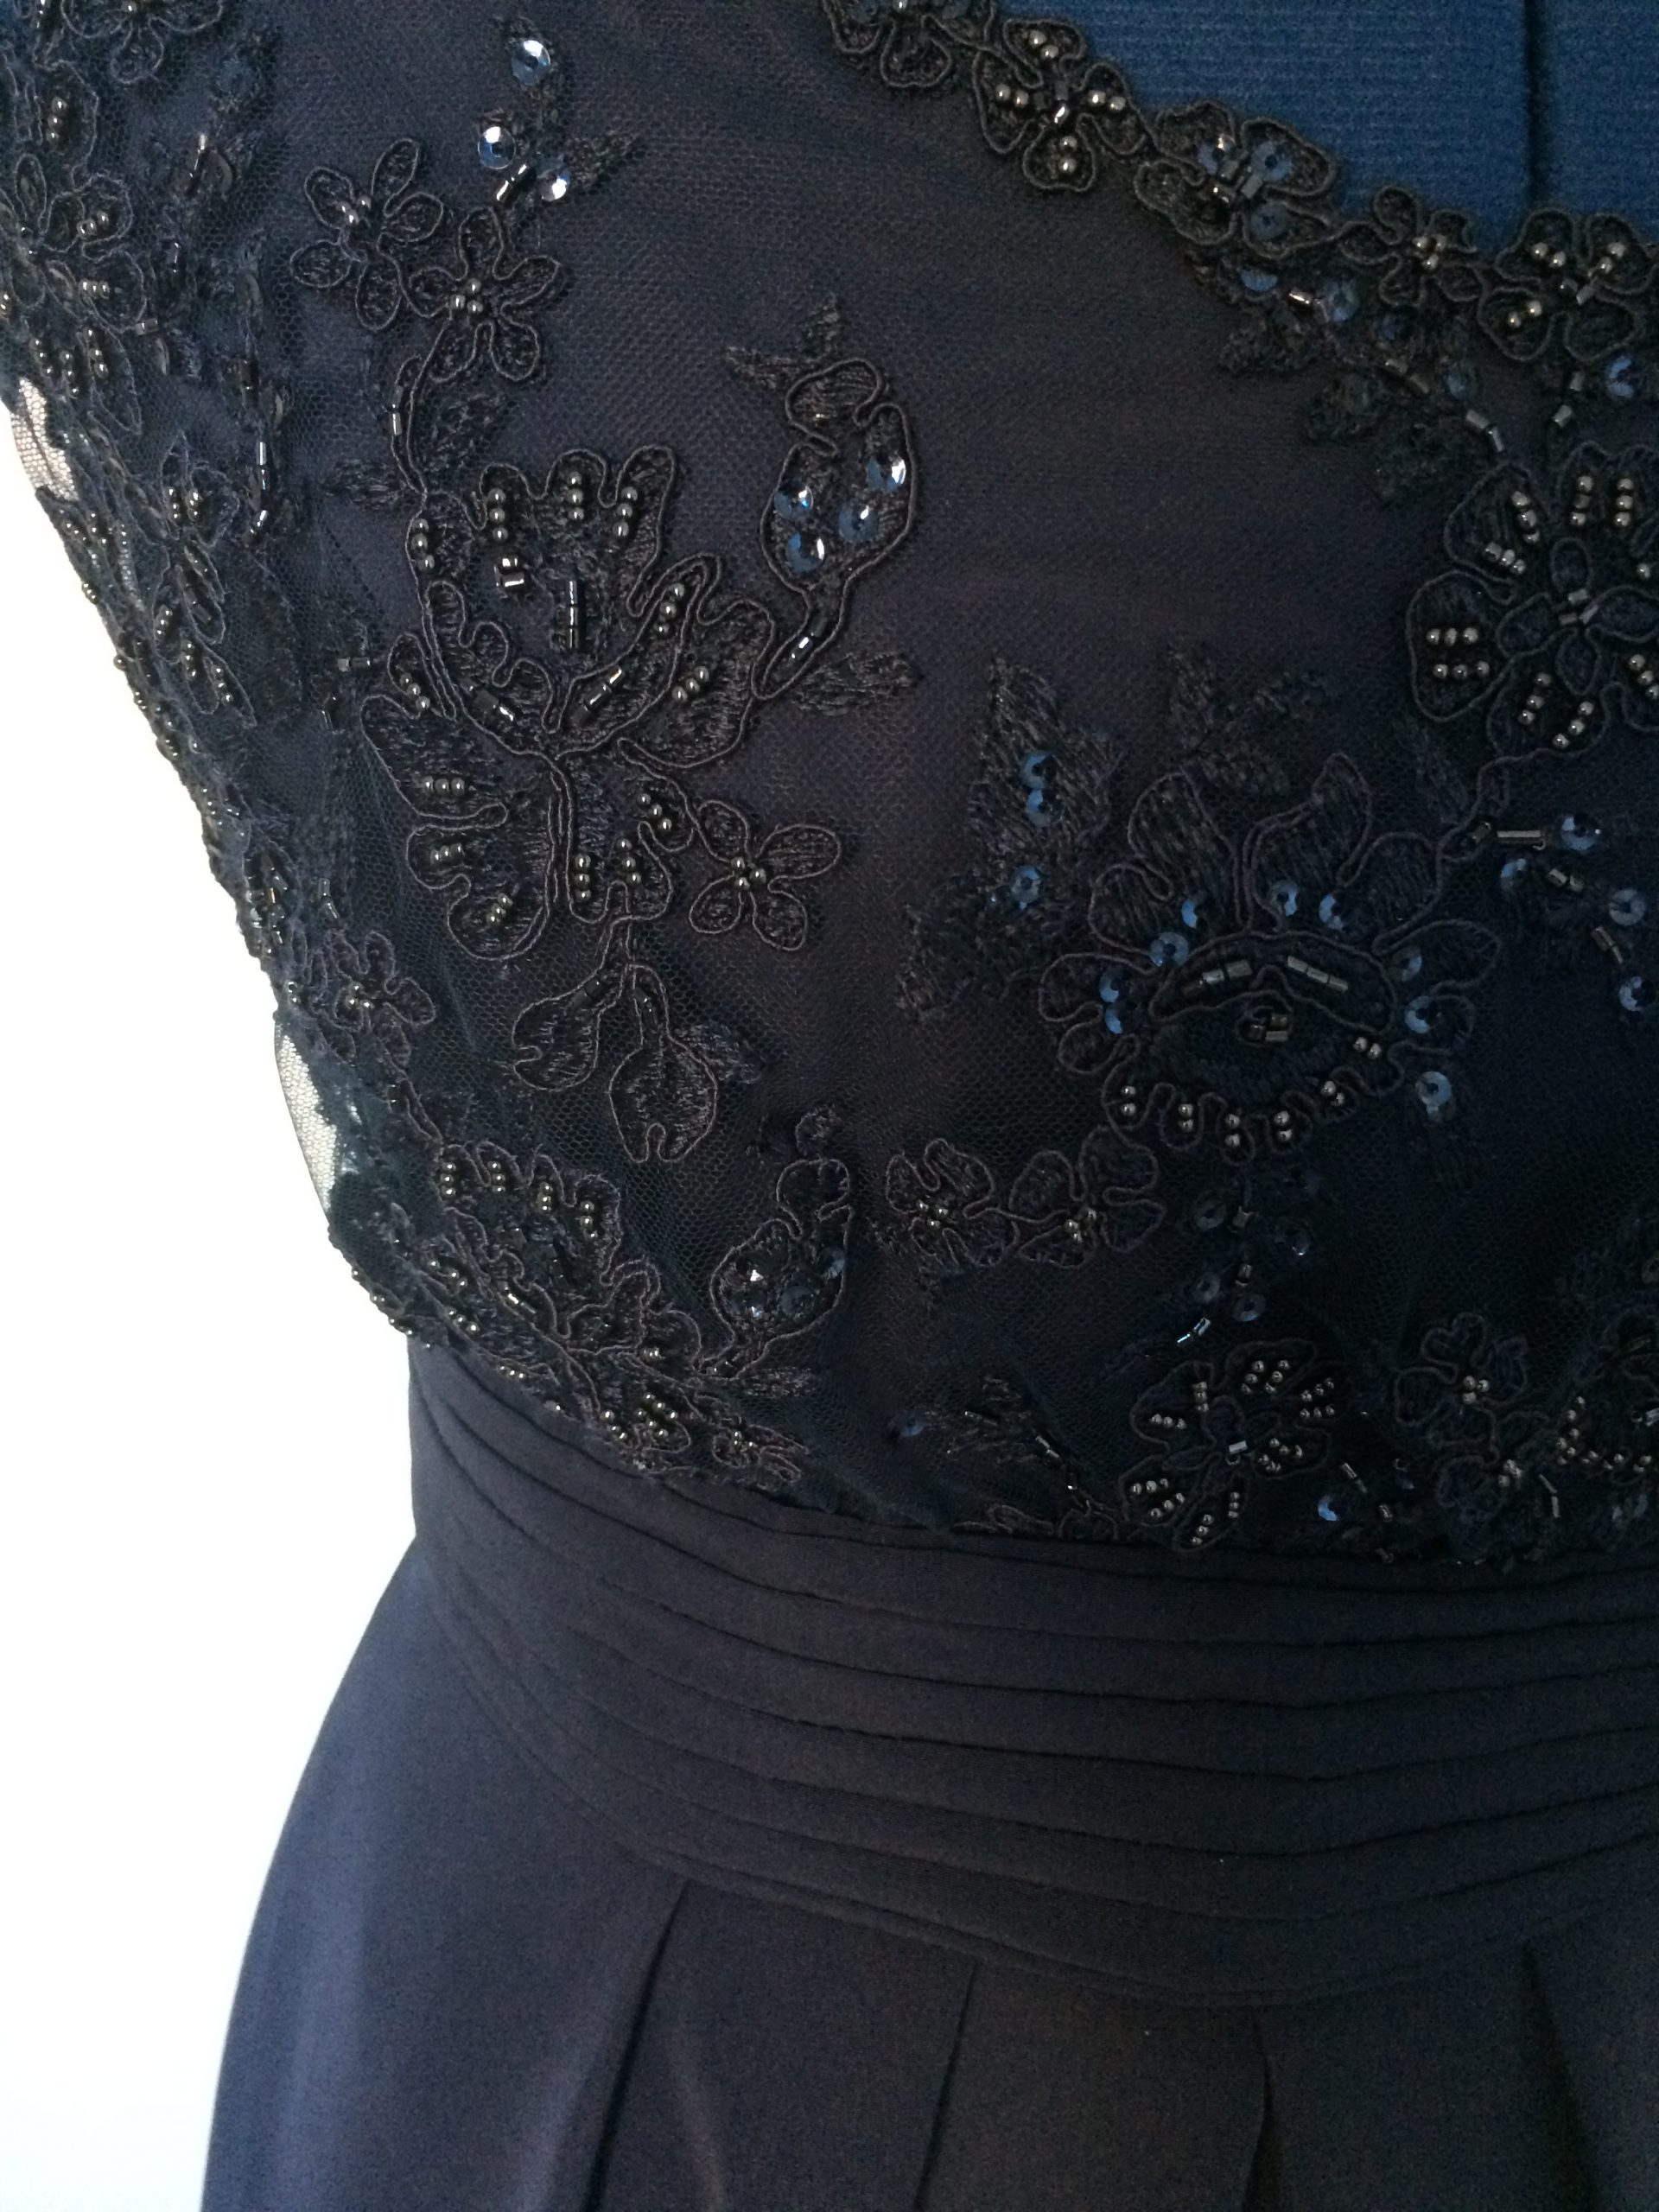
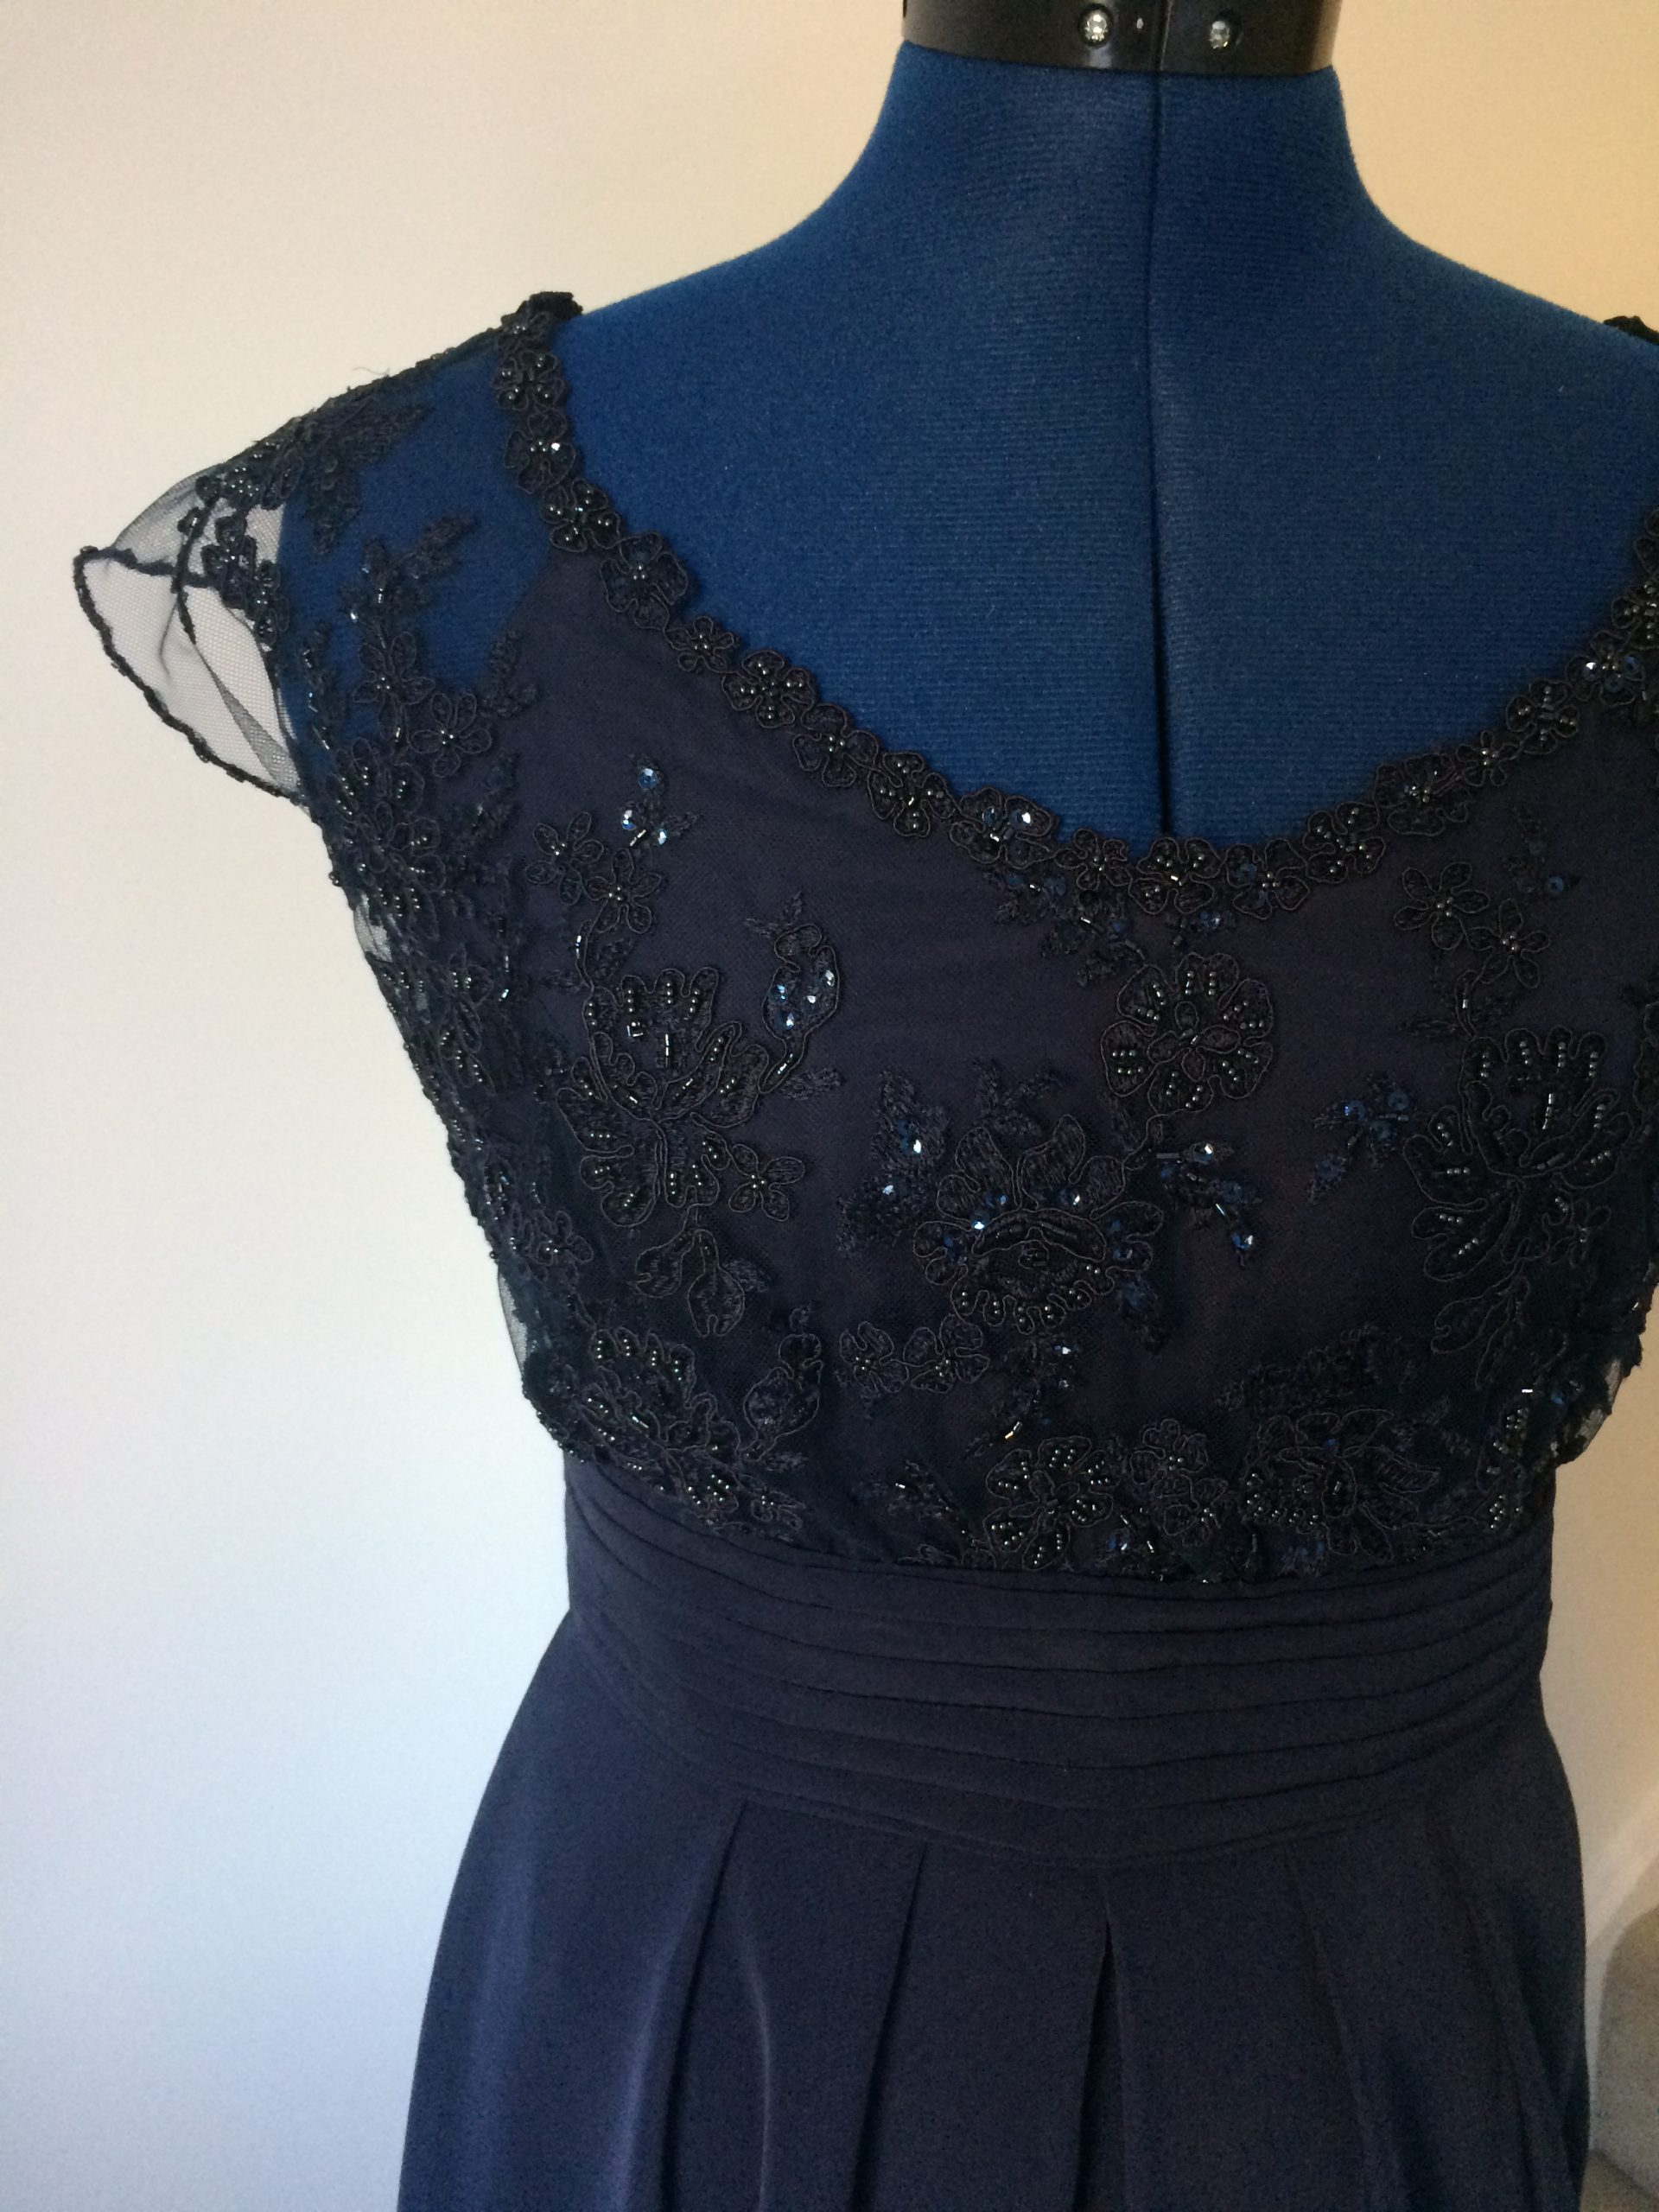
To tidy up the neckline I chose to use the border or lace from the fabric and for the armhole edges used the border of beads from the fabric. I pinned and then hand stitched these in place.
The next stage was to create the belt.
To make the belt I tried a few different ideas, before finding one which worked the best. I wanted the belt to appear ruched, gathered or pleated but didn’t know how to do this to get the desired effect. I looked at different cummerbunds and sampled a few ideas, running long stitches length wide down the fabric and gathering these but this didn’t look good. I tried pleating the fabric on the right side but this wasn’t right either
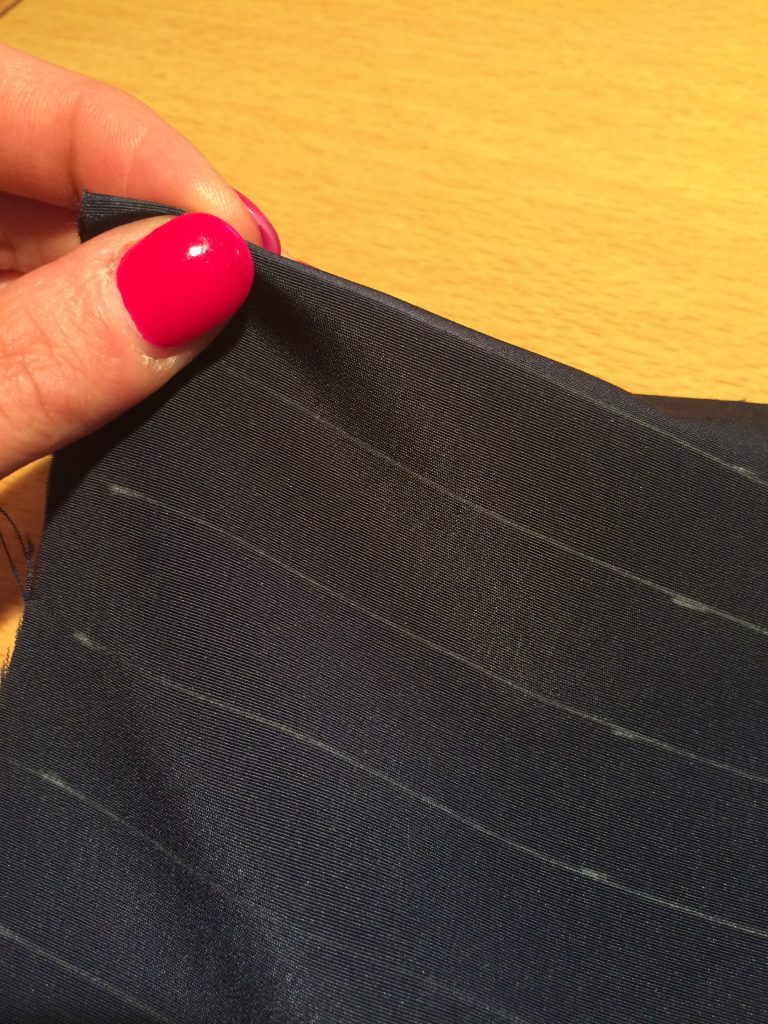
My solution was to stitch regularly spaced tucks onto the wrong side of the fabric. If I didn’t press the fabric, because the peach skin was a bit ‘bouncy’,the tucks gave a pleated effect on the right side.
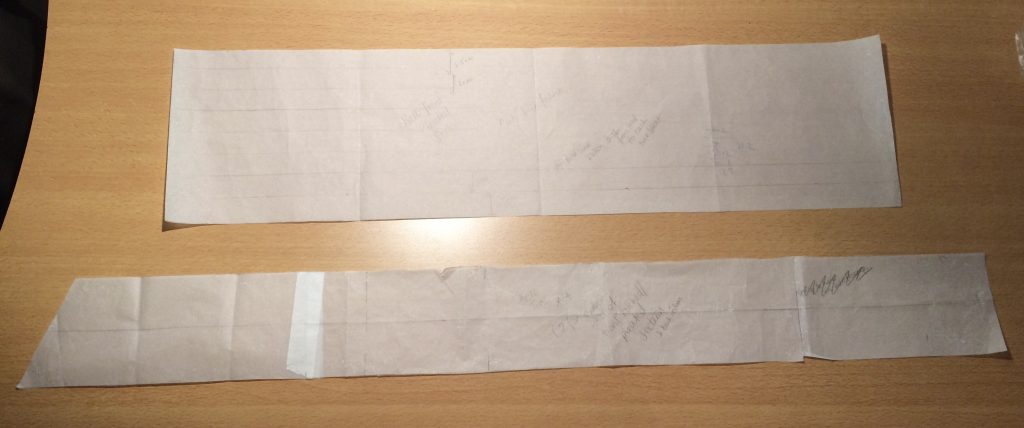
I used the midriff pattern for the front to work out the width of the panel. I calculated how much extra fabric to add to allow for the tucks then cut out a pattern. I left 2.5cm at the top and bottom of the band and then drew lines for the tucks with 2cm gaps in between. I cut a pattern for the back of the belt, or ties which would form a bow. I needed these to be 85cm long and be the same width as the midriff band.
For the front, tucked section I chalked the tuck lines onto the wrong side of the fabric.
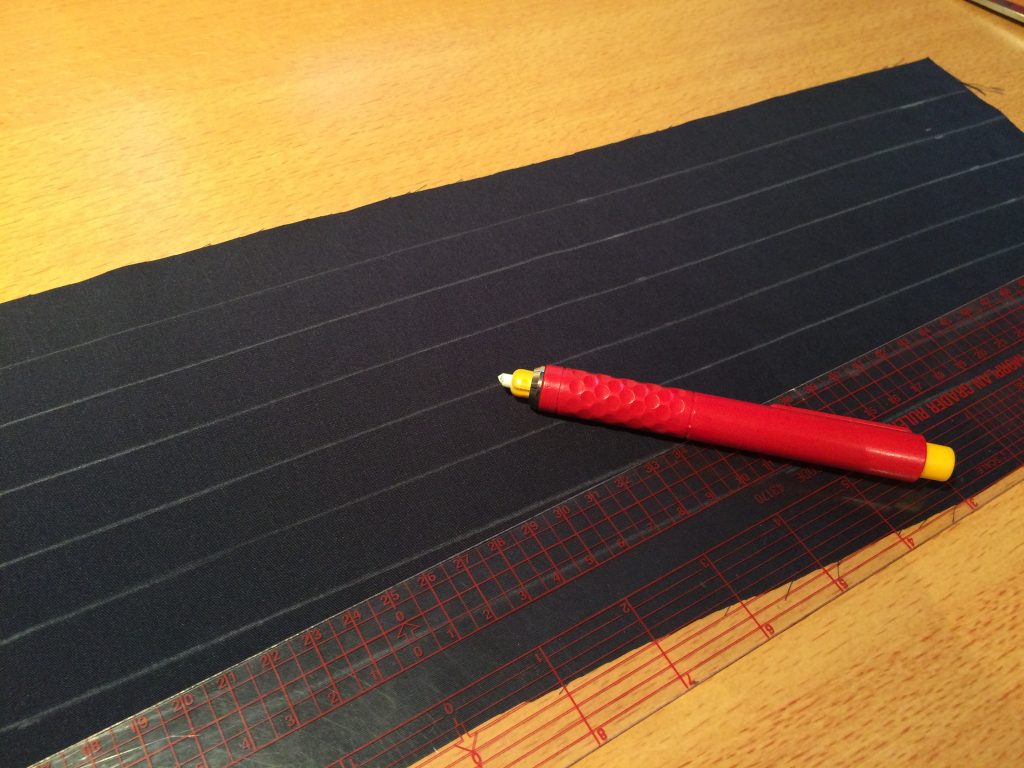
I folded along the top line and pinned the fabric in place.
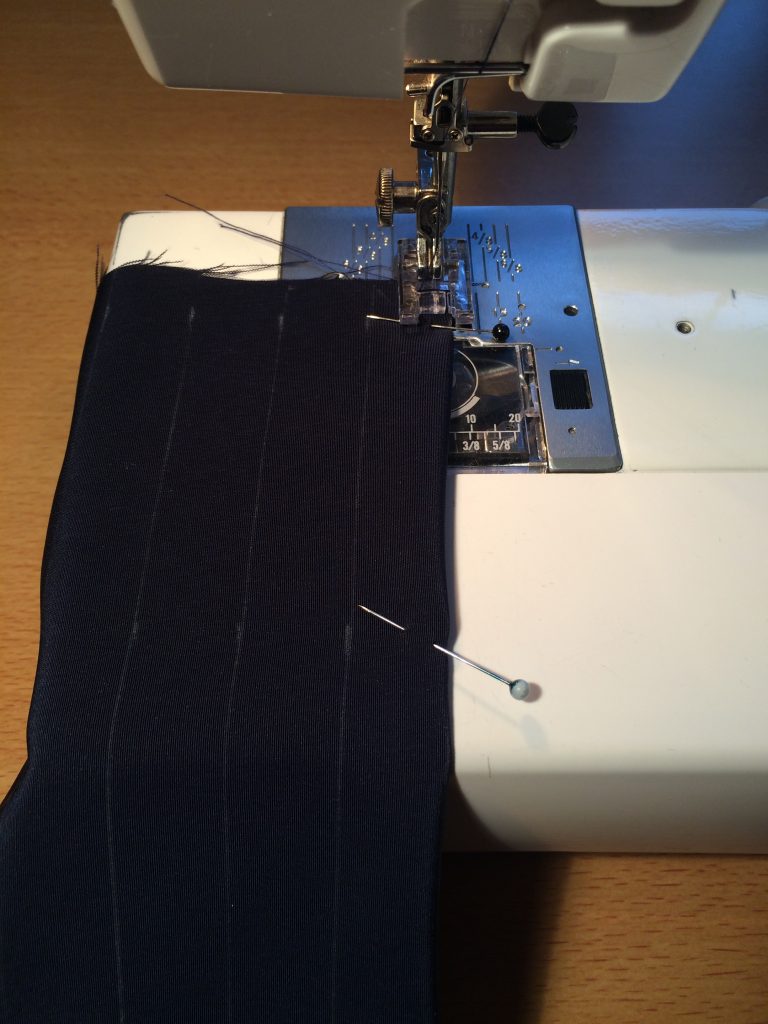
The tucks were each stitched 5mm from the chalked line.
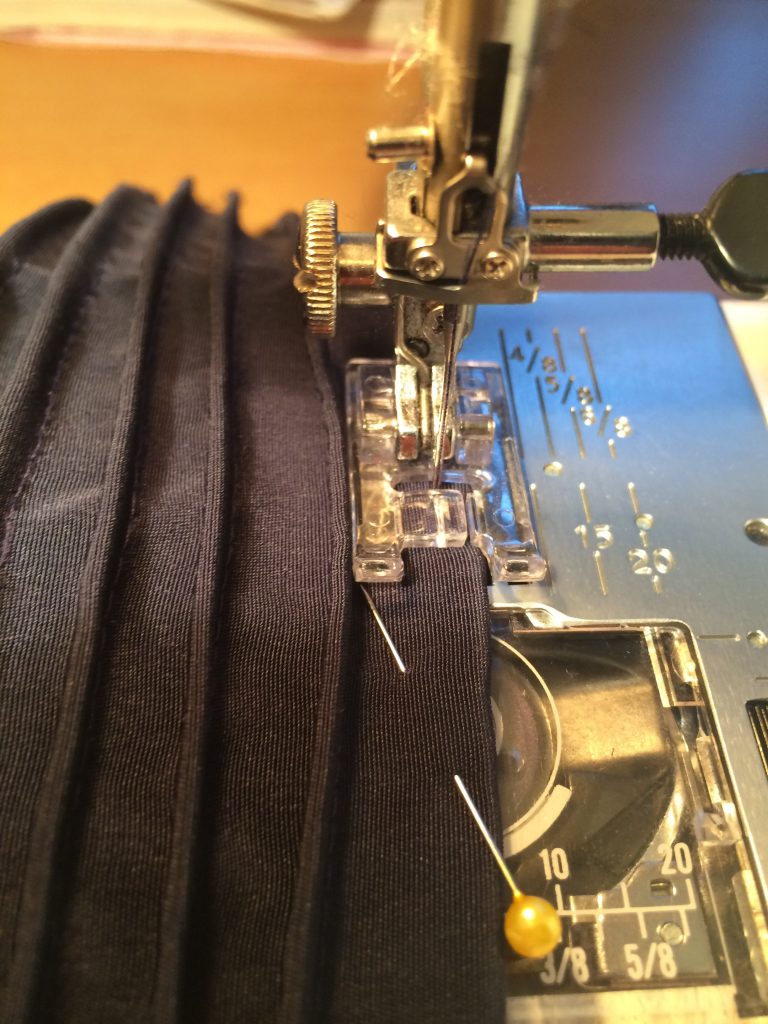
The front panel was then stitched to the back ties. Another piece was cut for the back of the tucked section, using the front midriff band as a template. This section was interfaced to add additional structure to the front of the belt. The interfaced front was then attached to the back ties. The two strips were then placed right sides together and stitched all the way round, leaving an 8cm gap in the front for turning.
The belt was hand stitched to the midriff band at the front.
The hem was stitched by hand after overlocking the raw edge.
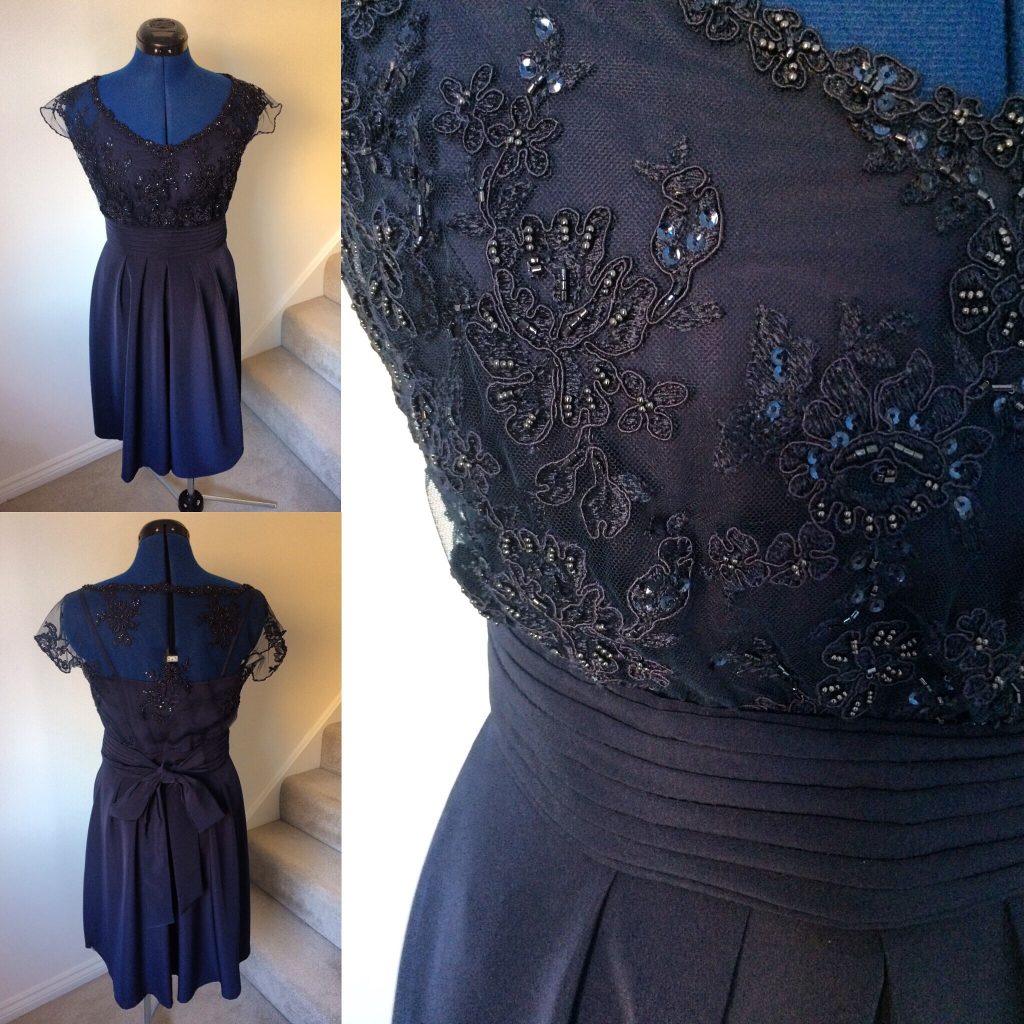
The peachskin fabric was an absolute joy to work with and although relatively cheap to buy, I think it looks quite luxurious on these dresses. It doesn’t like the iron so much though, as I found out mid construction and had to replace a skirt panel which had an iron mark on it!
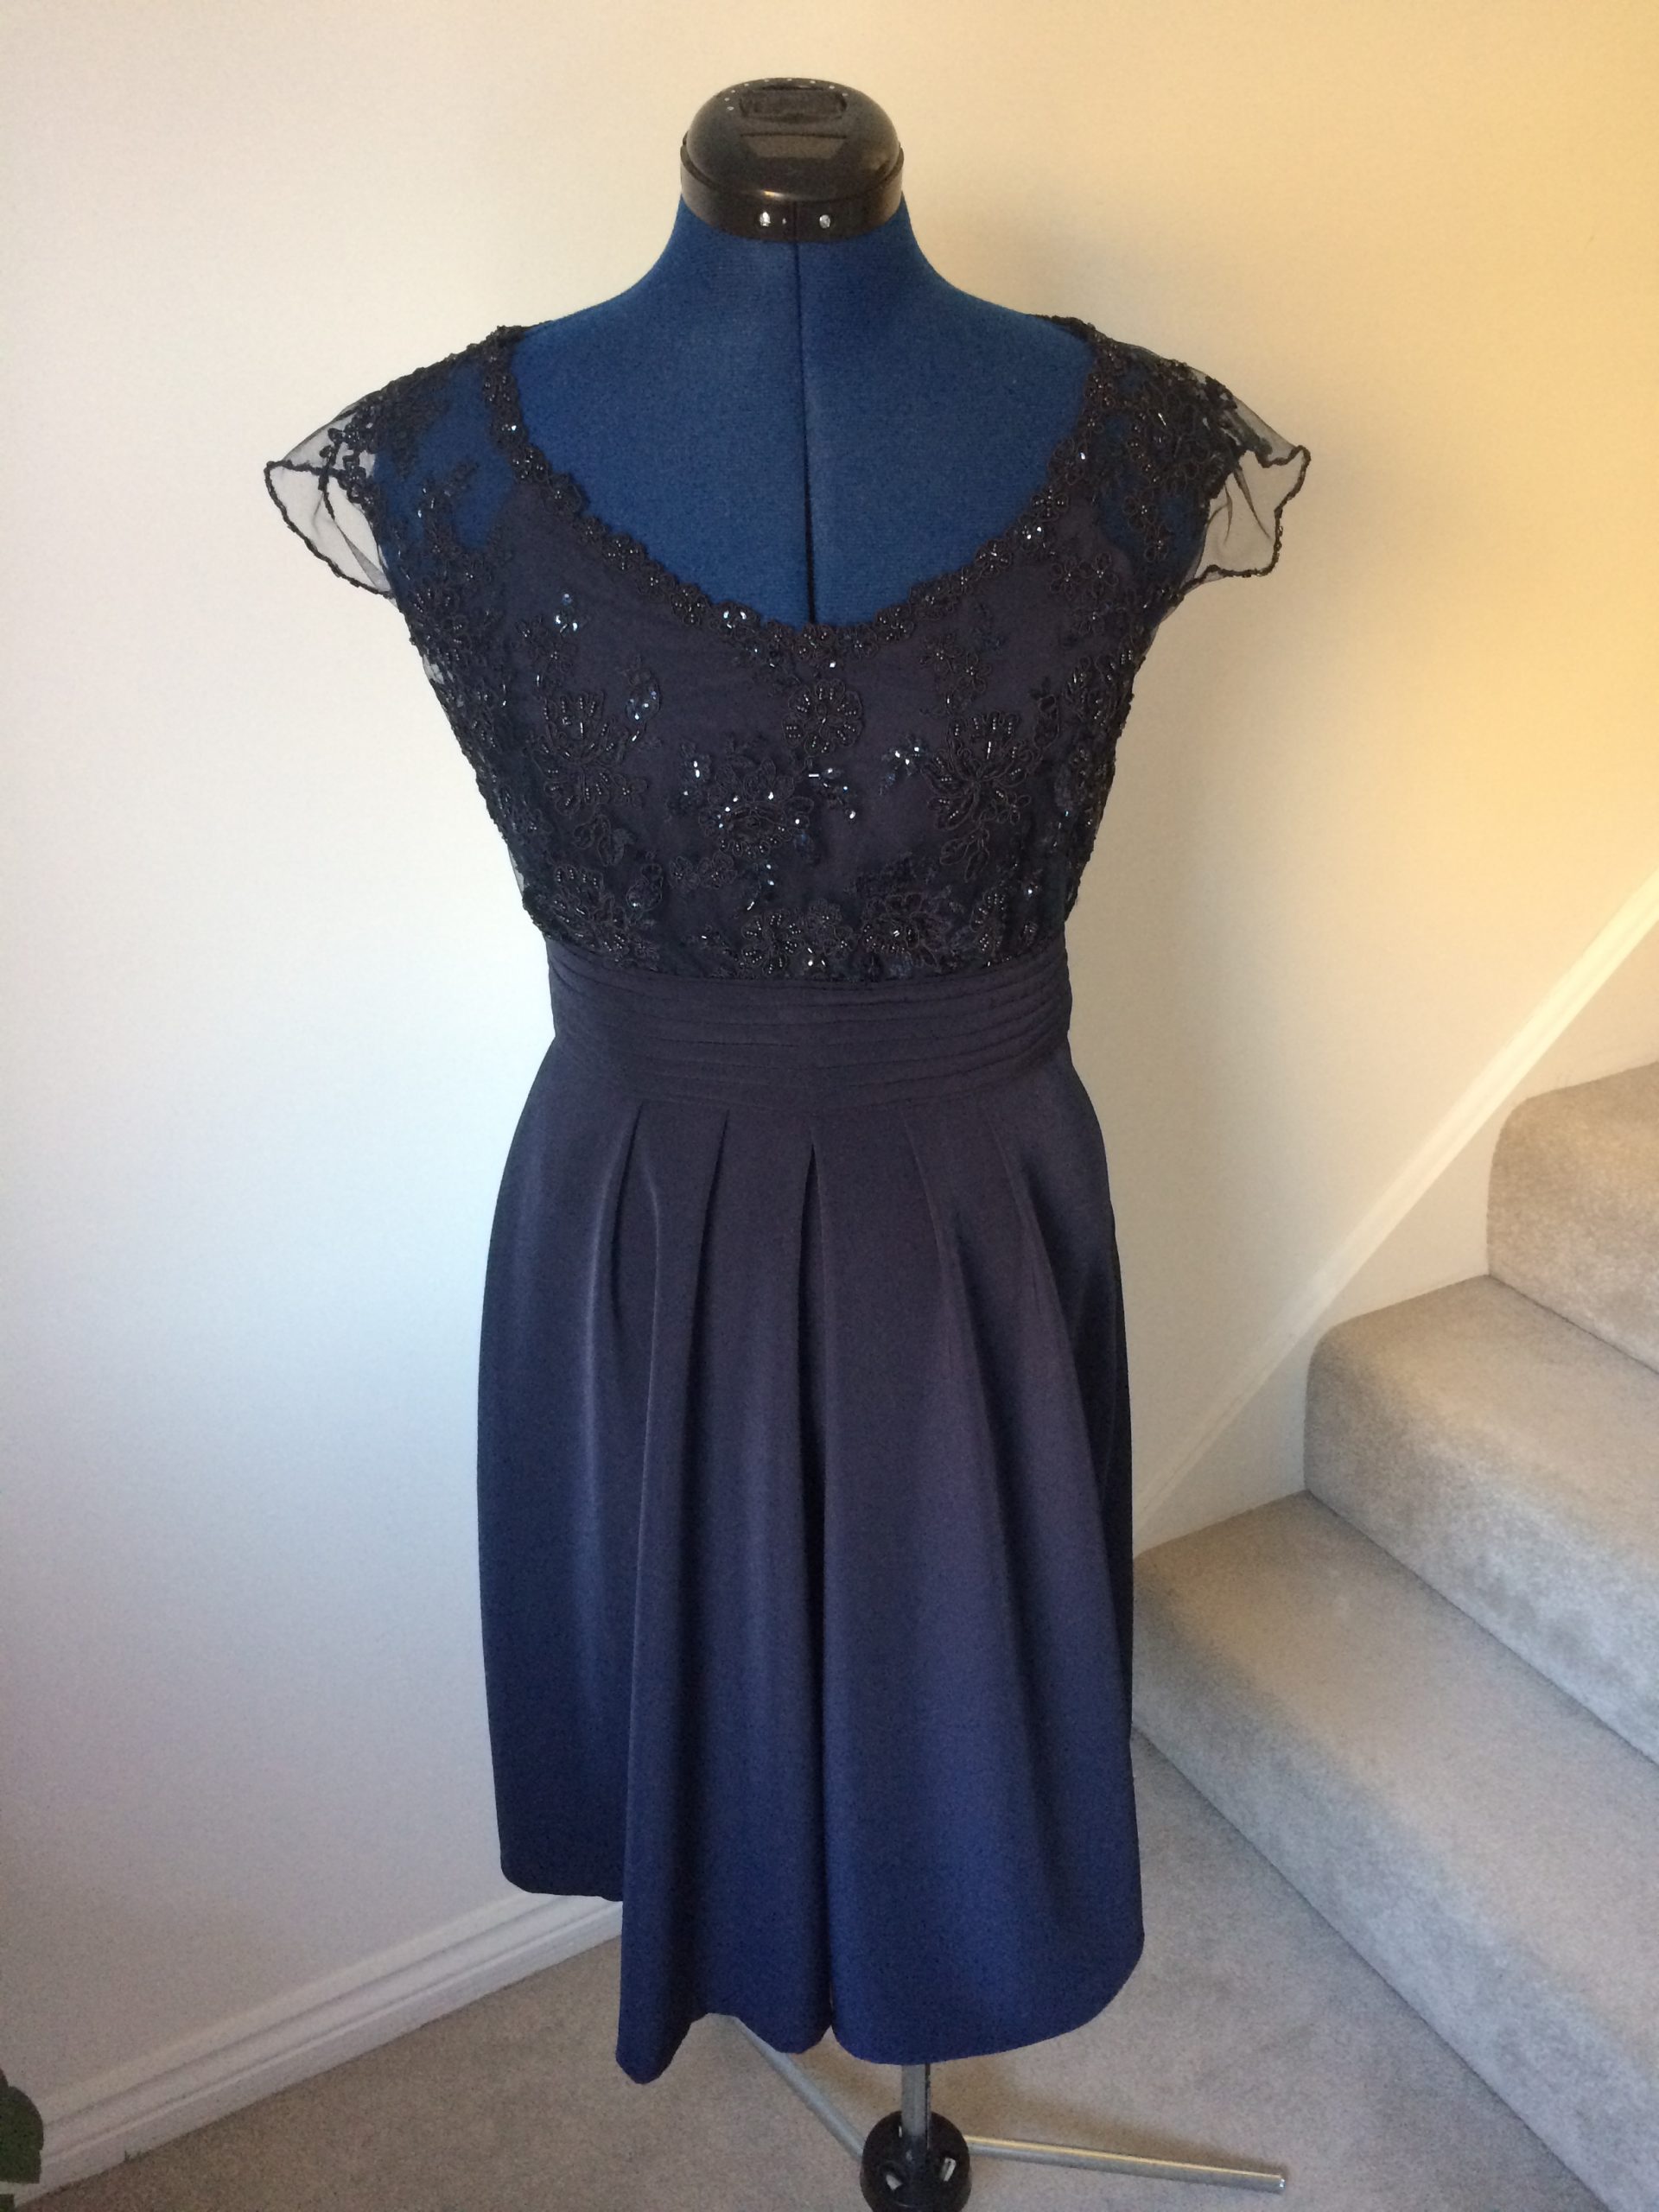
I did eventually make all three dresses, but sadly at the last minute one of my step daughters was unable to attend. Thankfully I found a last minute stand in and did a few additional alterations to her dress to make it fit. I’m so pleased with how these dresses have turned out I’ve entered the above photo in the Dressmaker of The Year 2016 competition!
My bridesmaids looked stunning in their dresses as you can see below!
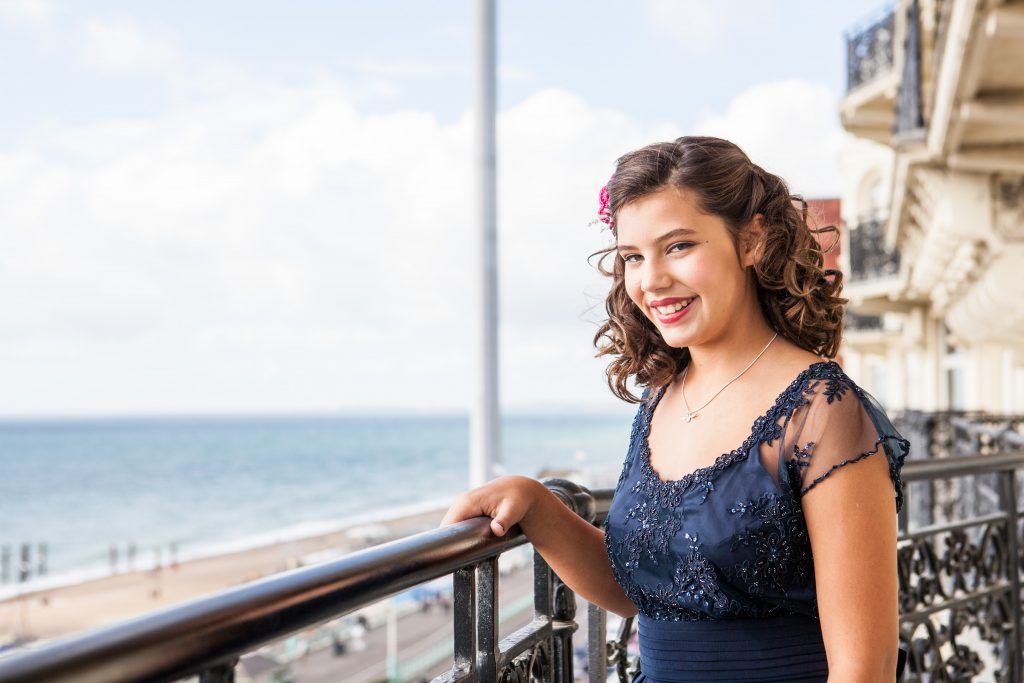
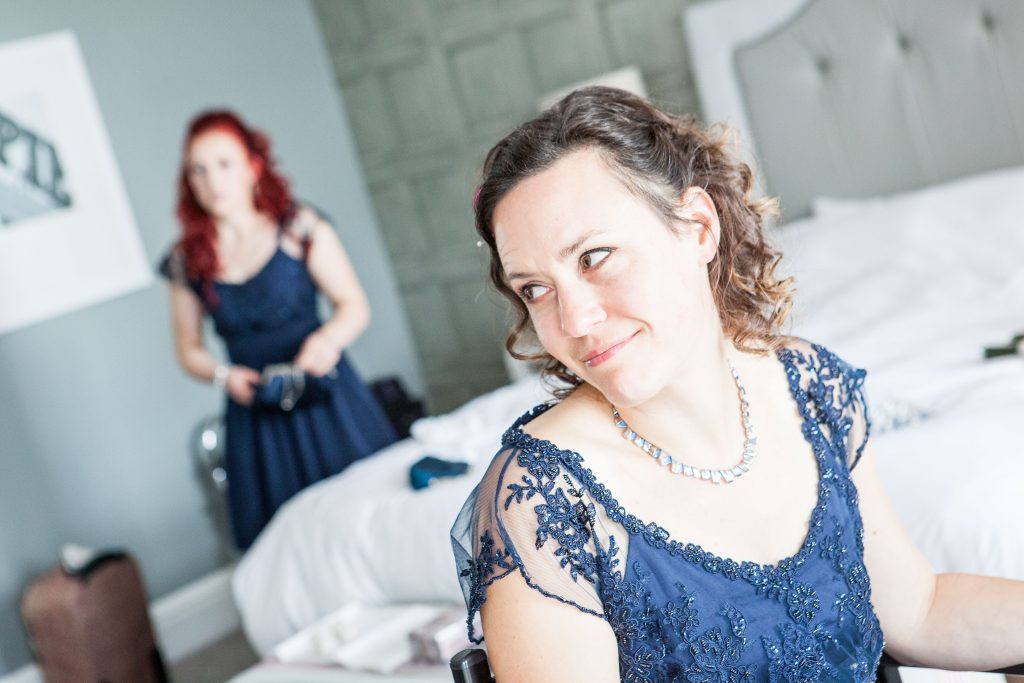
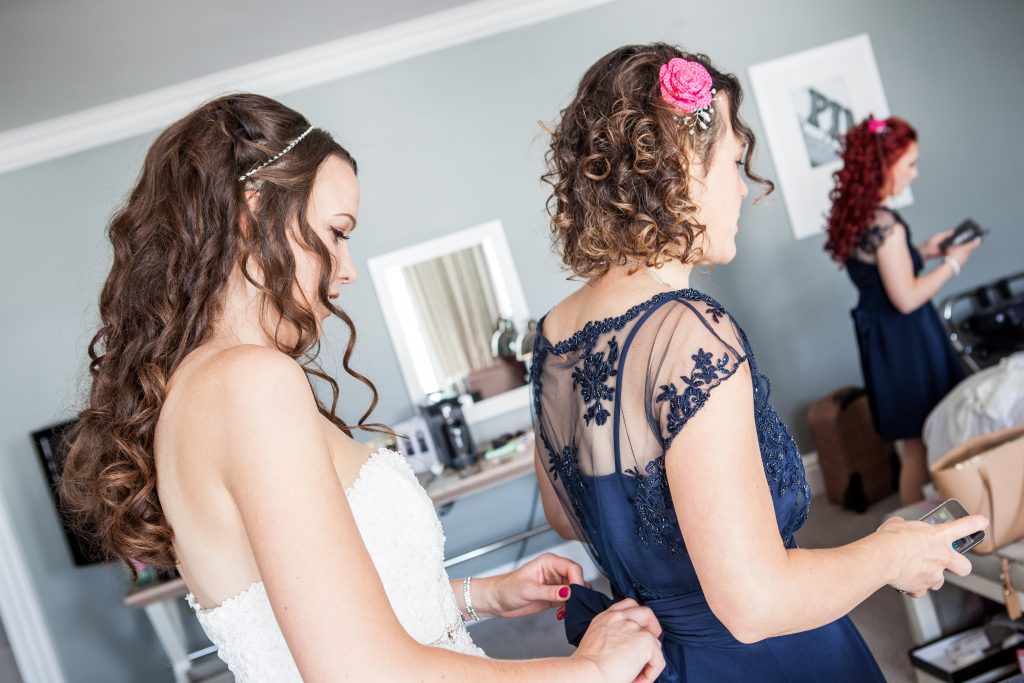
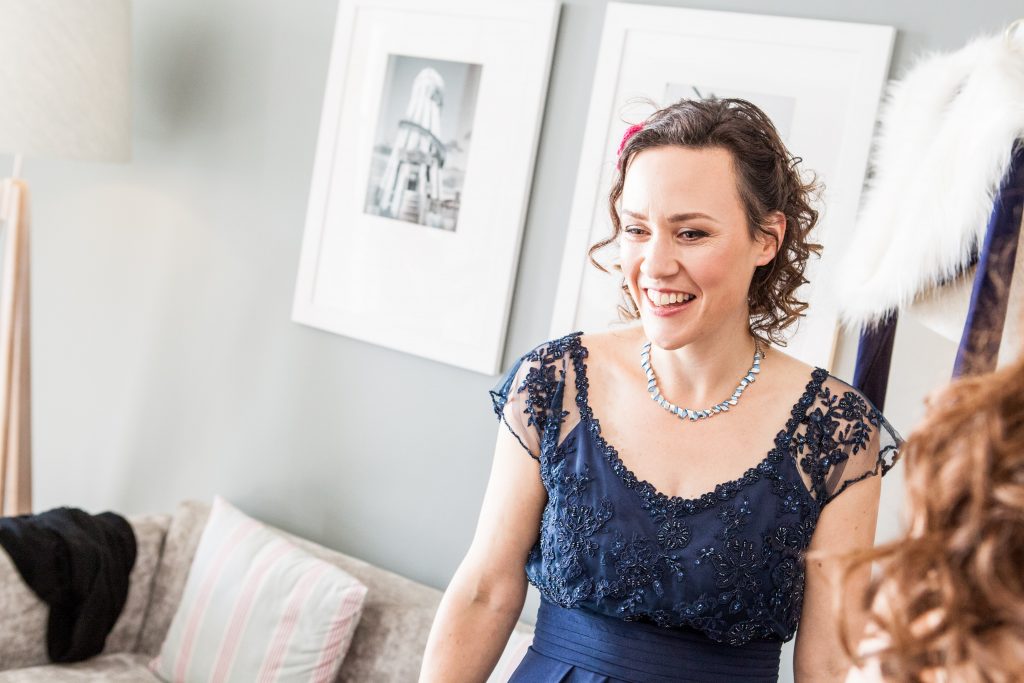
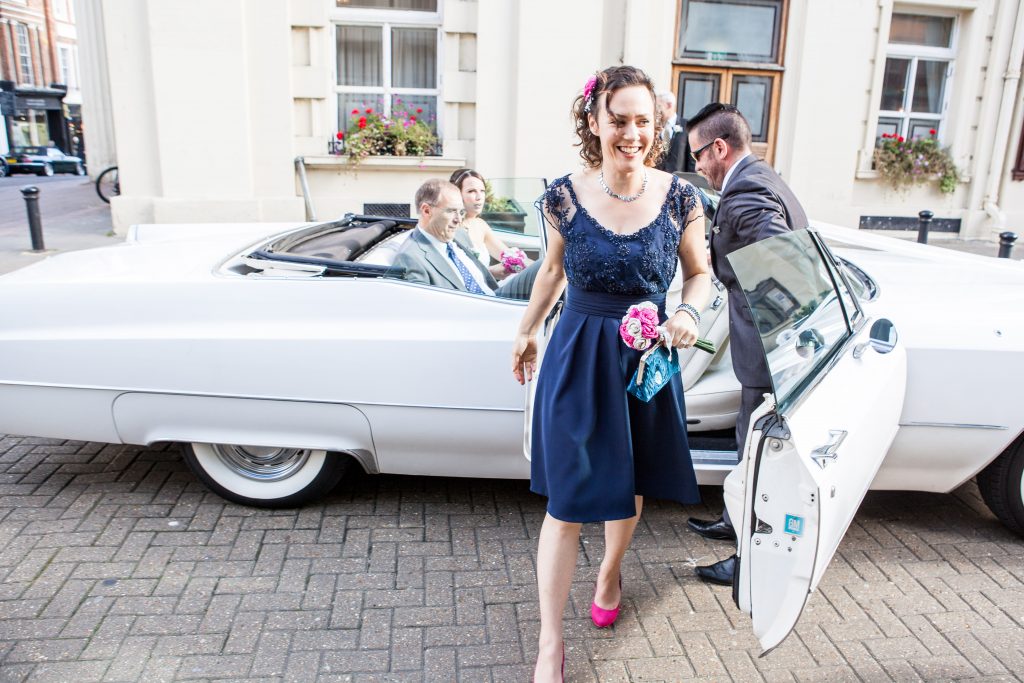
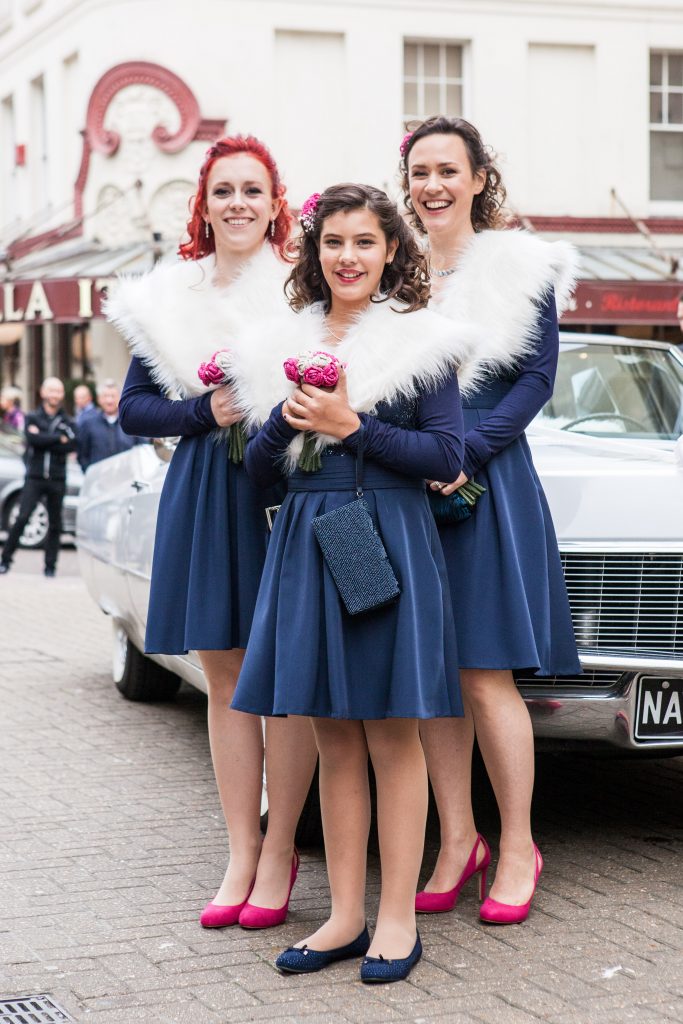
Thanks to Philip Bedford for his fabulous wedding photos!
I’ve got some of the lace fabric left and am planning to make another version of the dress for myself… maybe a long version… we’ll see!
Coming soon:
Wedding dress number 2, the garter, my bridal bouquet and how I made the furry wraps for the bridesmaids!